Our new payment pages are sleeker and more powerful than ever. 🤩 This new checkout experience is especially suited for digital product downloads.

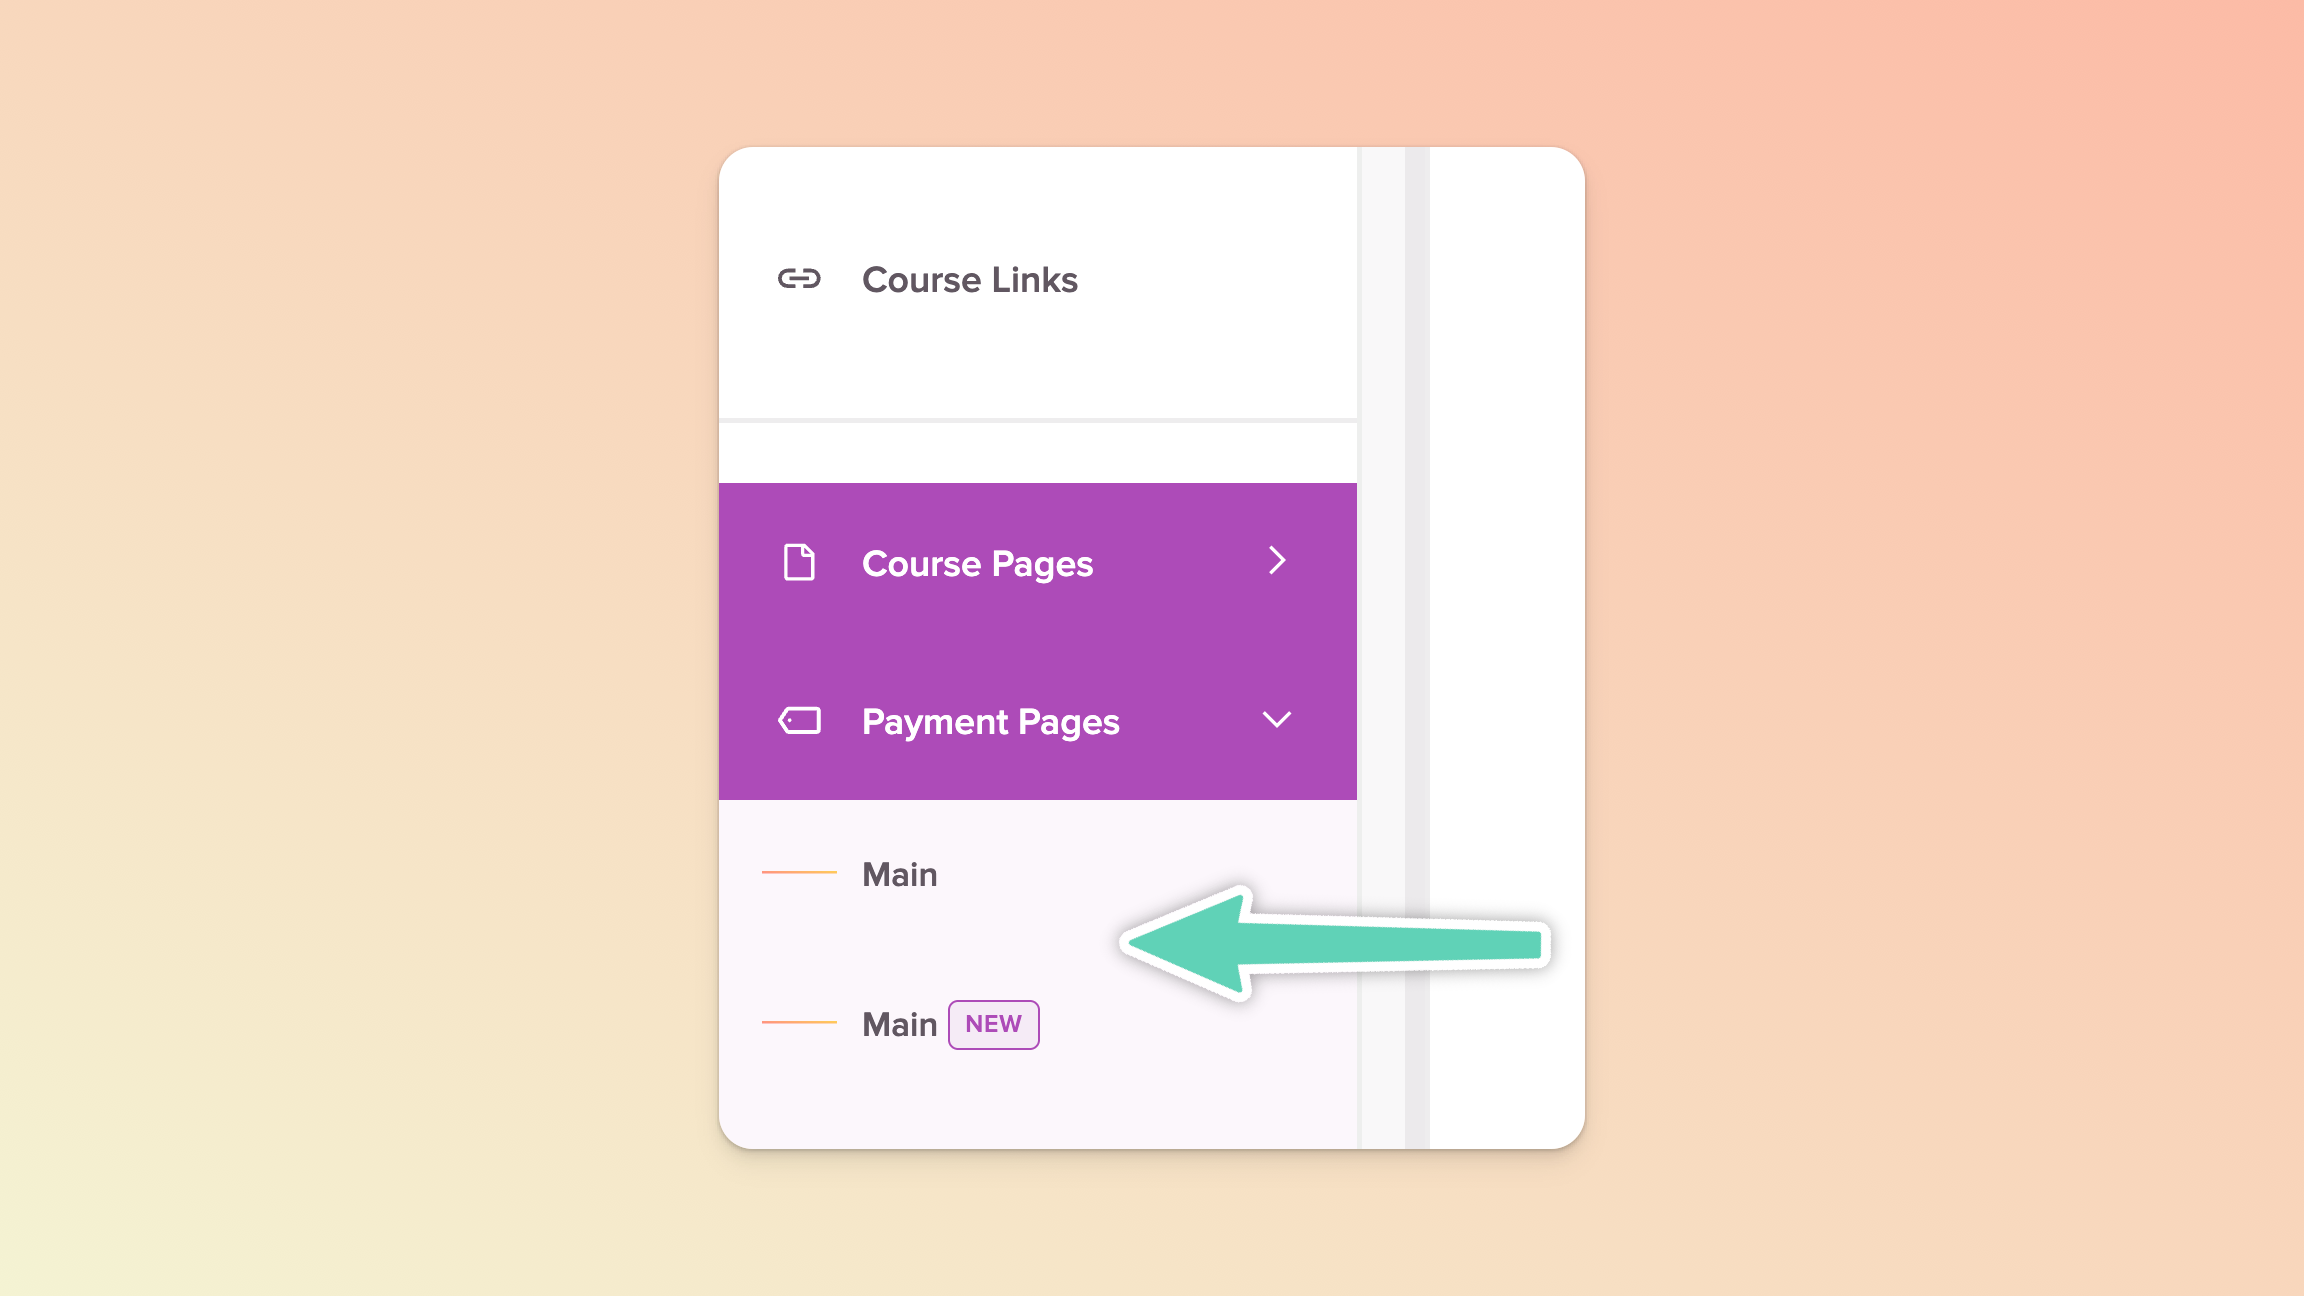
This Payment Page Builder differs to our original template in that it has far more functionality but less design/styling customisation. The image below shows you how we indicate the difference between payment pages in the same course that either use our original template or our new Payment Page Builder (labelled as ”new”). 😉
We have plenty of tips to share so we’ve broken our Payment Page Builder guide into multiple help docs, to make for easier (and less overwhelming) navigating. Below, we cover some important things to be aware of and to give some thought to. Once you’ve reviewed this info, feel free to jump into the other help docs (links at the bottom of this page)!
To make the build of your new payment page easier, you’ll want to be aware of and consider a few things upfront.
That said, some of the below might only make more sense once you’re actively building a payment page but it’s still good to be aware of these things. 😉
If you decide to use our Stripe integration, please note that you cannot fully set up a priced payment page until you connect a Stripe account. We recommend not creating a payment page (or at least the final version of one) until you’ve connected the two tools.
If you’re looking to sell a digital product download (or a coaching session) only and not a course, you’ll want to create a Teachery Product and not a Course.
We strongly recommend you thoroughly test your payment pages by making real purchases. Please read more here.
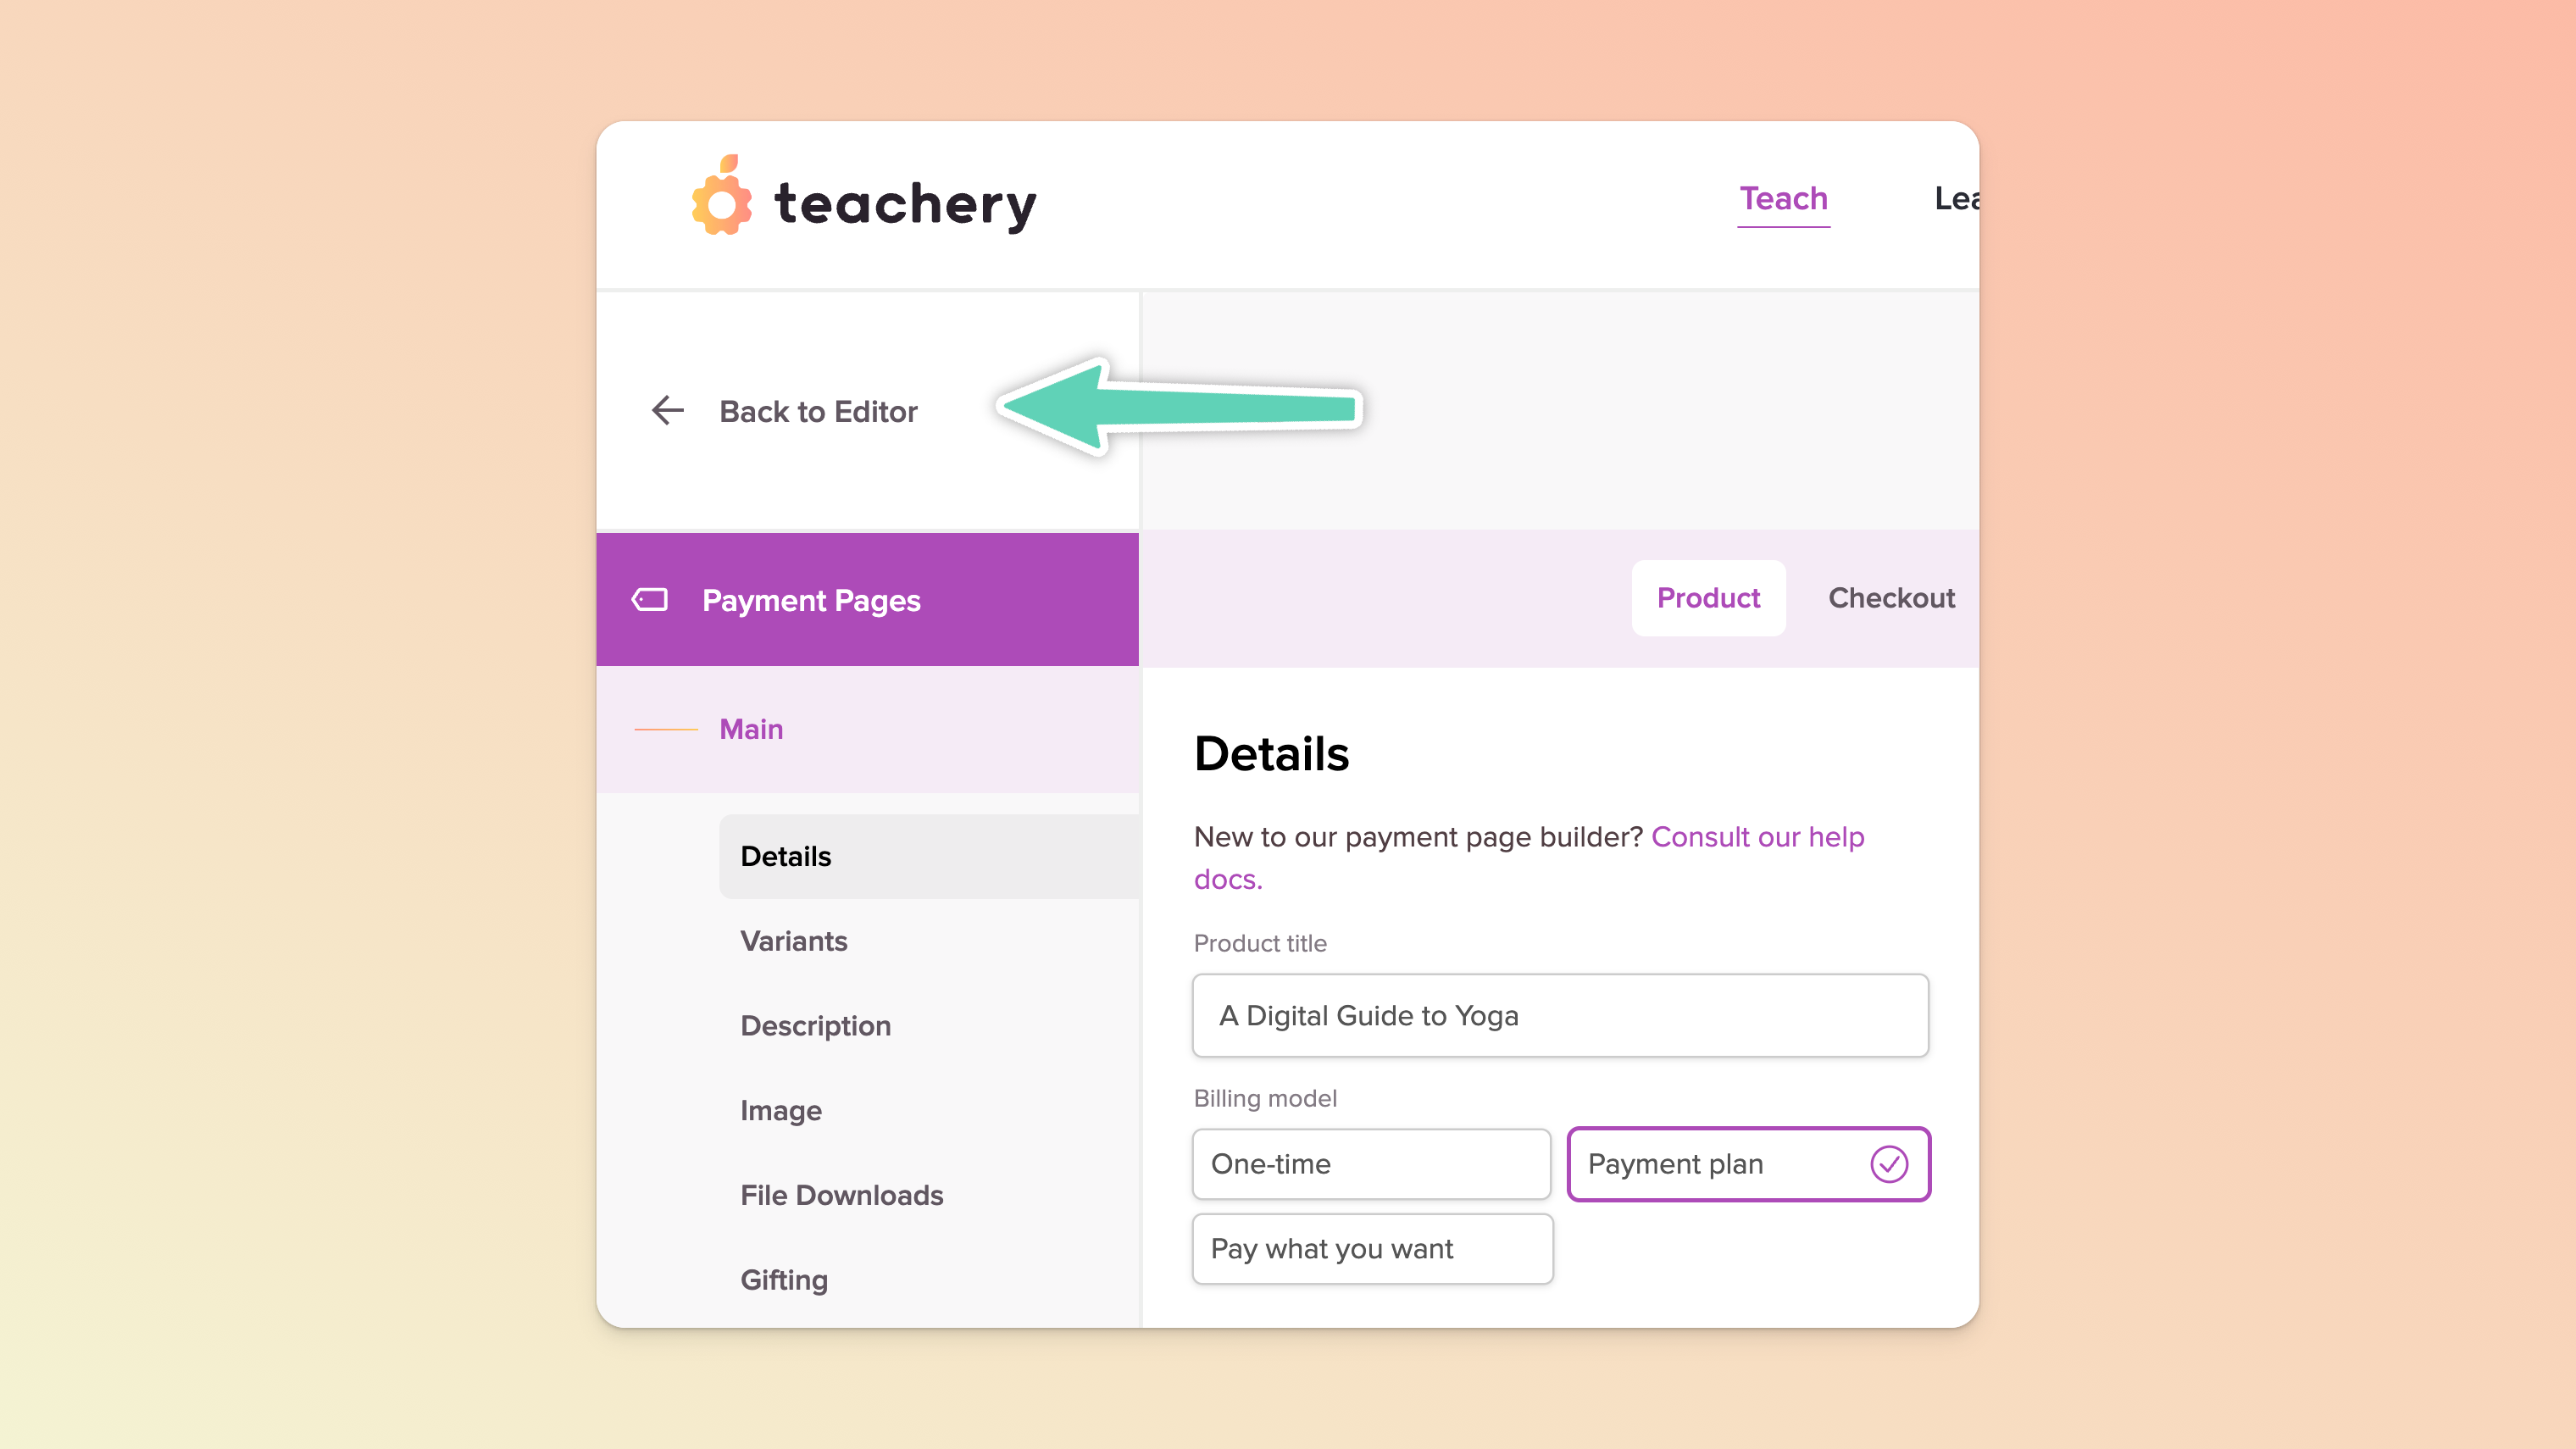
The new Payment Page Builder comes with a lot more settings so make use of the Back to Editor/Return to Payment Page option at the very top of the course’s left sidebar menu to navigate between the deeper settings of a particular payment page and your course’s other pages.
Need to rename a payment page or change its URL? You can do this in the payment page’s Settings tab (and then jump into Page Settings). We recommend naming it as clearly/uniquely as possible - that will make it easier to identify/find as you move through Teachery e.g. Yoga Guide (Early Bird Special) or Yoga Club (Member Plans).
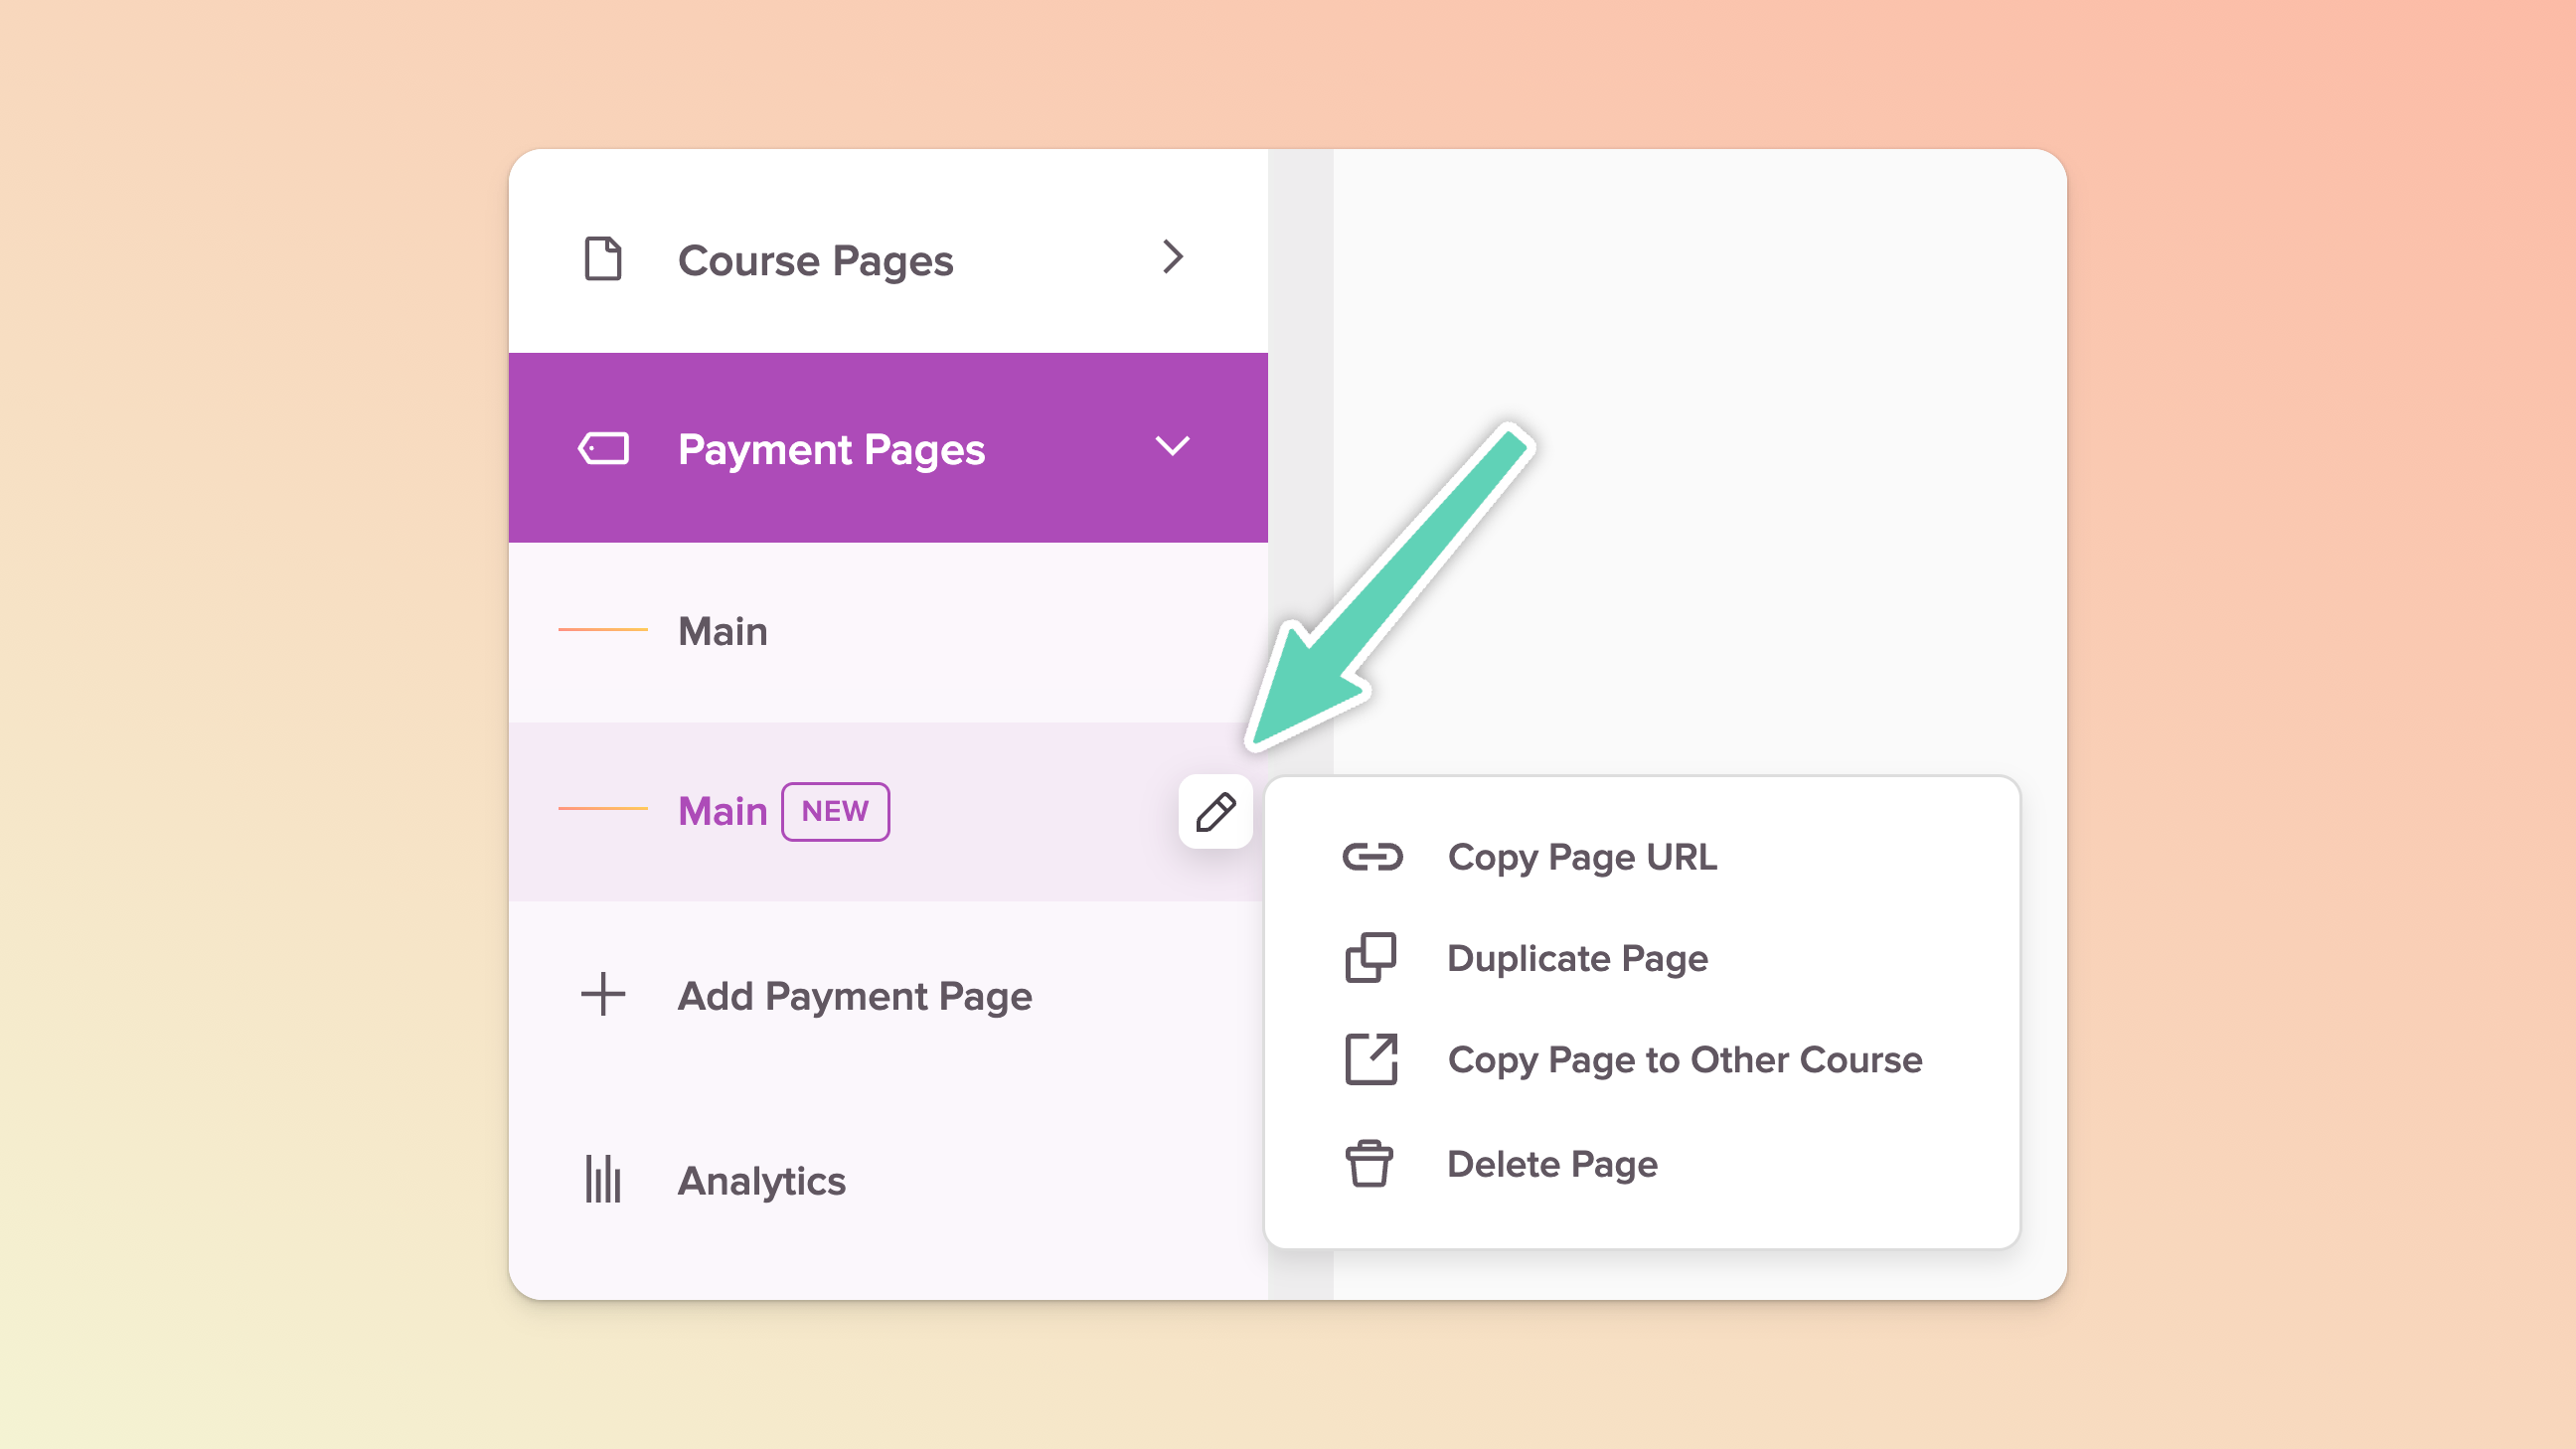
Need to duplicate or delete a payment page? While in the edit view of the payment page, click the Back to Editor option at the top of the left sidebar menu (see point above). Then, hover over the name of your payment page in the left sidebar menu until you see a pencil (edit) icon. Clicking that icon will reveal a list of additional actions.

Be sure to also browse our list of Future Improvements at the very bottom of this help doc to ensure you’re aware of what is or isn’t currently possible with this version of the Payment Page Builder.
Give some thought to what payment options you will be offering your customers. For example:
Will you be charging a fixed, one-time price? If yes, will you offer your customers an instalment/payment plan if they’re unable to pay the one-time price? Alternatively, maybe you want to offer a subscription? Here are the possible combinations for when you get to the Product > Details tab of your payment page:
A one-time price and only allowing for a once-off payment → select Single price as your Pricing type and then One-time as your Billing model.
A one-time price and offering customers one or more instalment plan(s) → select Multiple price as your Pricing type, save and then jump to the Variants tab to set up the one-time and instalment options.
A recurring subscription with only one subscription payment plan → select Single price as your Pricing type and then Payment Plan as your Billing model.
A recurring subscription with multiple subscription payment plans → select Multiple price as your Pricing type, save and then jump to the Variants tab to set up each of your recurring/instalment options.
If you’d prefer, you can also enable your customers to submit what they’re willing to pay and you can define a minimum you’re willing to accept. (During setup, in the Product > Details tab, be sure to select Pay what you want as your Billing Model.)
Important to know about Pay what you want (PWYW):
It’s only intended for once-off payments. If you have a recurring subscription/membership model, we recommend defining a few options you’d be willing to offer your customers and setting those up as different recurring payment plans in the Product > Variants tab of your payment page.
Promo codes apply up to the full amount inserted by the customer (and not the PWYW minimum that you set).
PWYW does not apply to upsells i.e. a customer will need to pay the price of the upsell and any amount they insert as PWYW will be an additional cost to them.
Want to make use of course affiliates? Affiliates essentially work the same way as with our traditional payment pages. See more here.
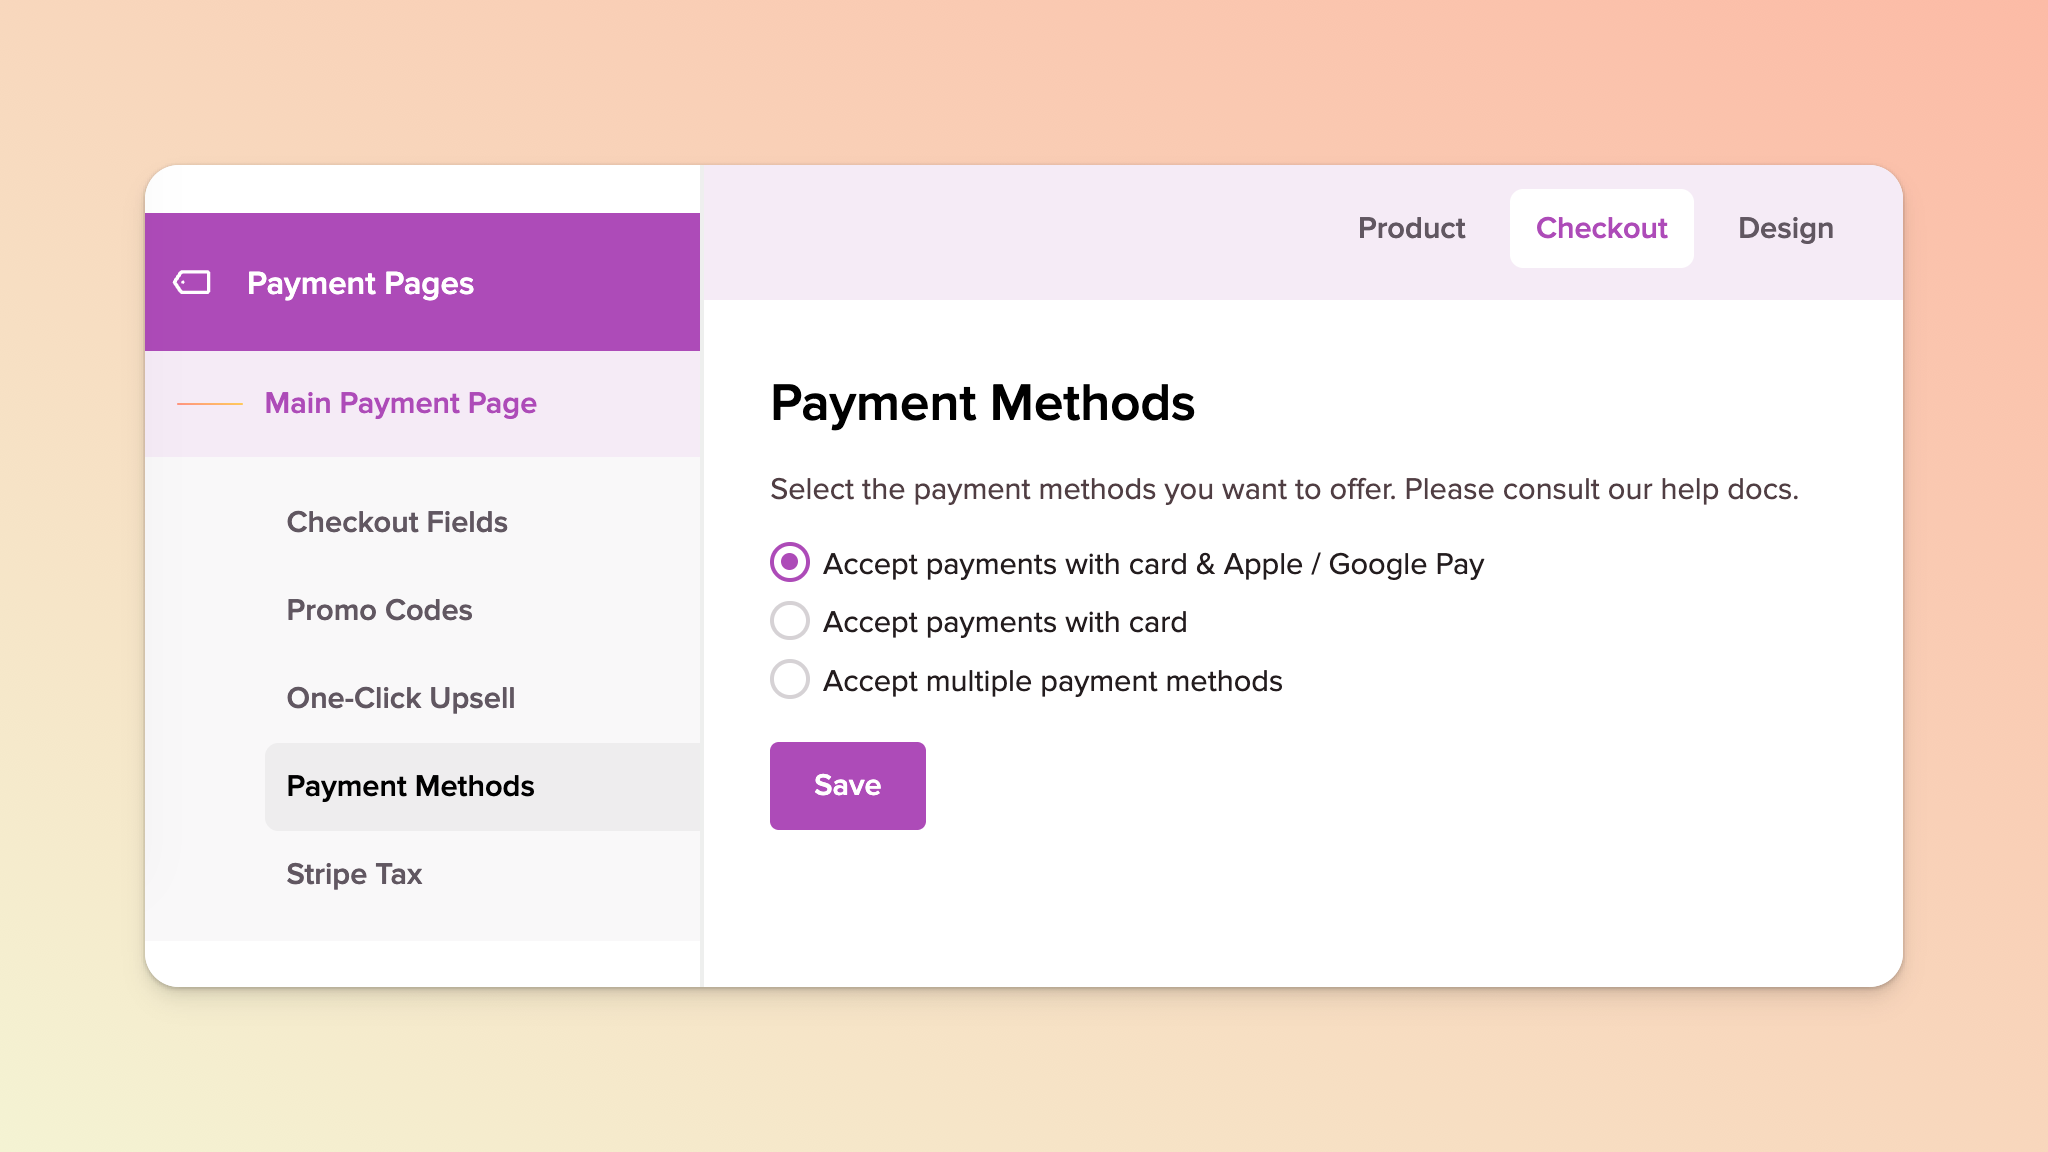
There are several payment options available to you. You can select any of the following:
accept cards only, OR
accept cards and Apple Pay/Google Pay, OR
accept multiple payment methods.
Apple Pay or Google Pay
Note that if you choose the second option above and your customers want to use Apple Pay or Google Pay, they need to be using eligible devices in order to do so. (Your payment page also has to have a price(s) that is greater than zero in order for these options to display.)
Customers who do not have Apple Pay or Google Pay set up on their devices will not be able to use/view these options during checkout, only the card payment option.
PayPal ❌
Please note that although PayPal is a permitted payment method on Stripe for those with accounts located in the European Economic Area (EEA), United Kingdom, or Switzerland, PayPal isn’t available to platforms like Teachery (without us building a full, direct integration - this is on our roadmap).
Multiple Payment Methods
Currently, the only additional payment methods (via Stripe) that we have enabled by default are pictured below. We will be introducing more over time based on demand (let us know in the support chat what you’re wanting to offer to your customers.)
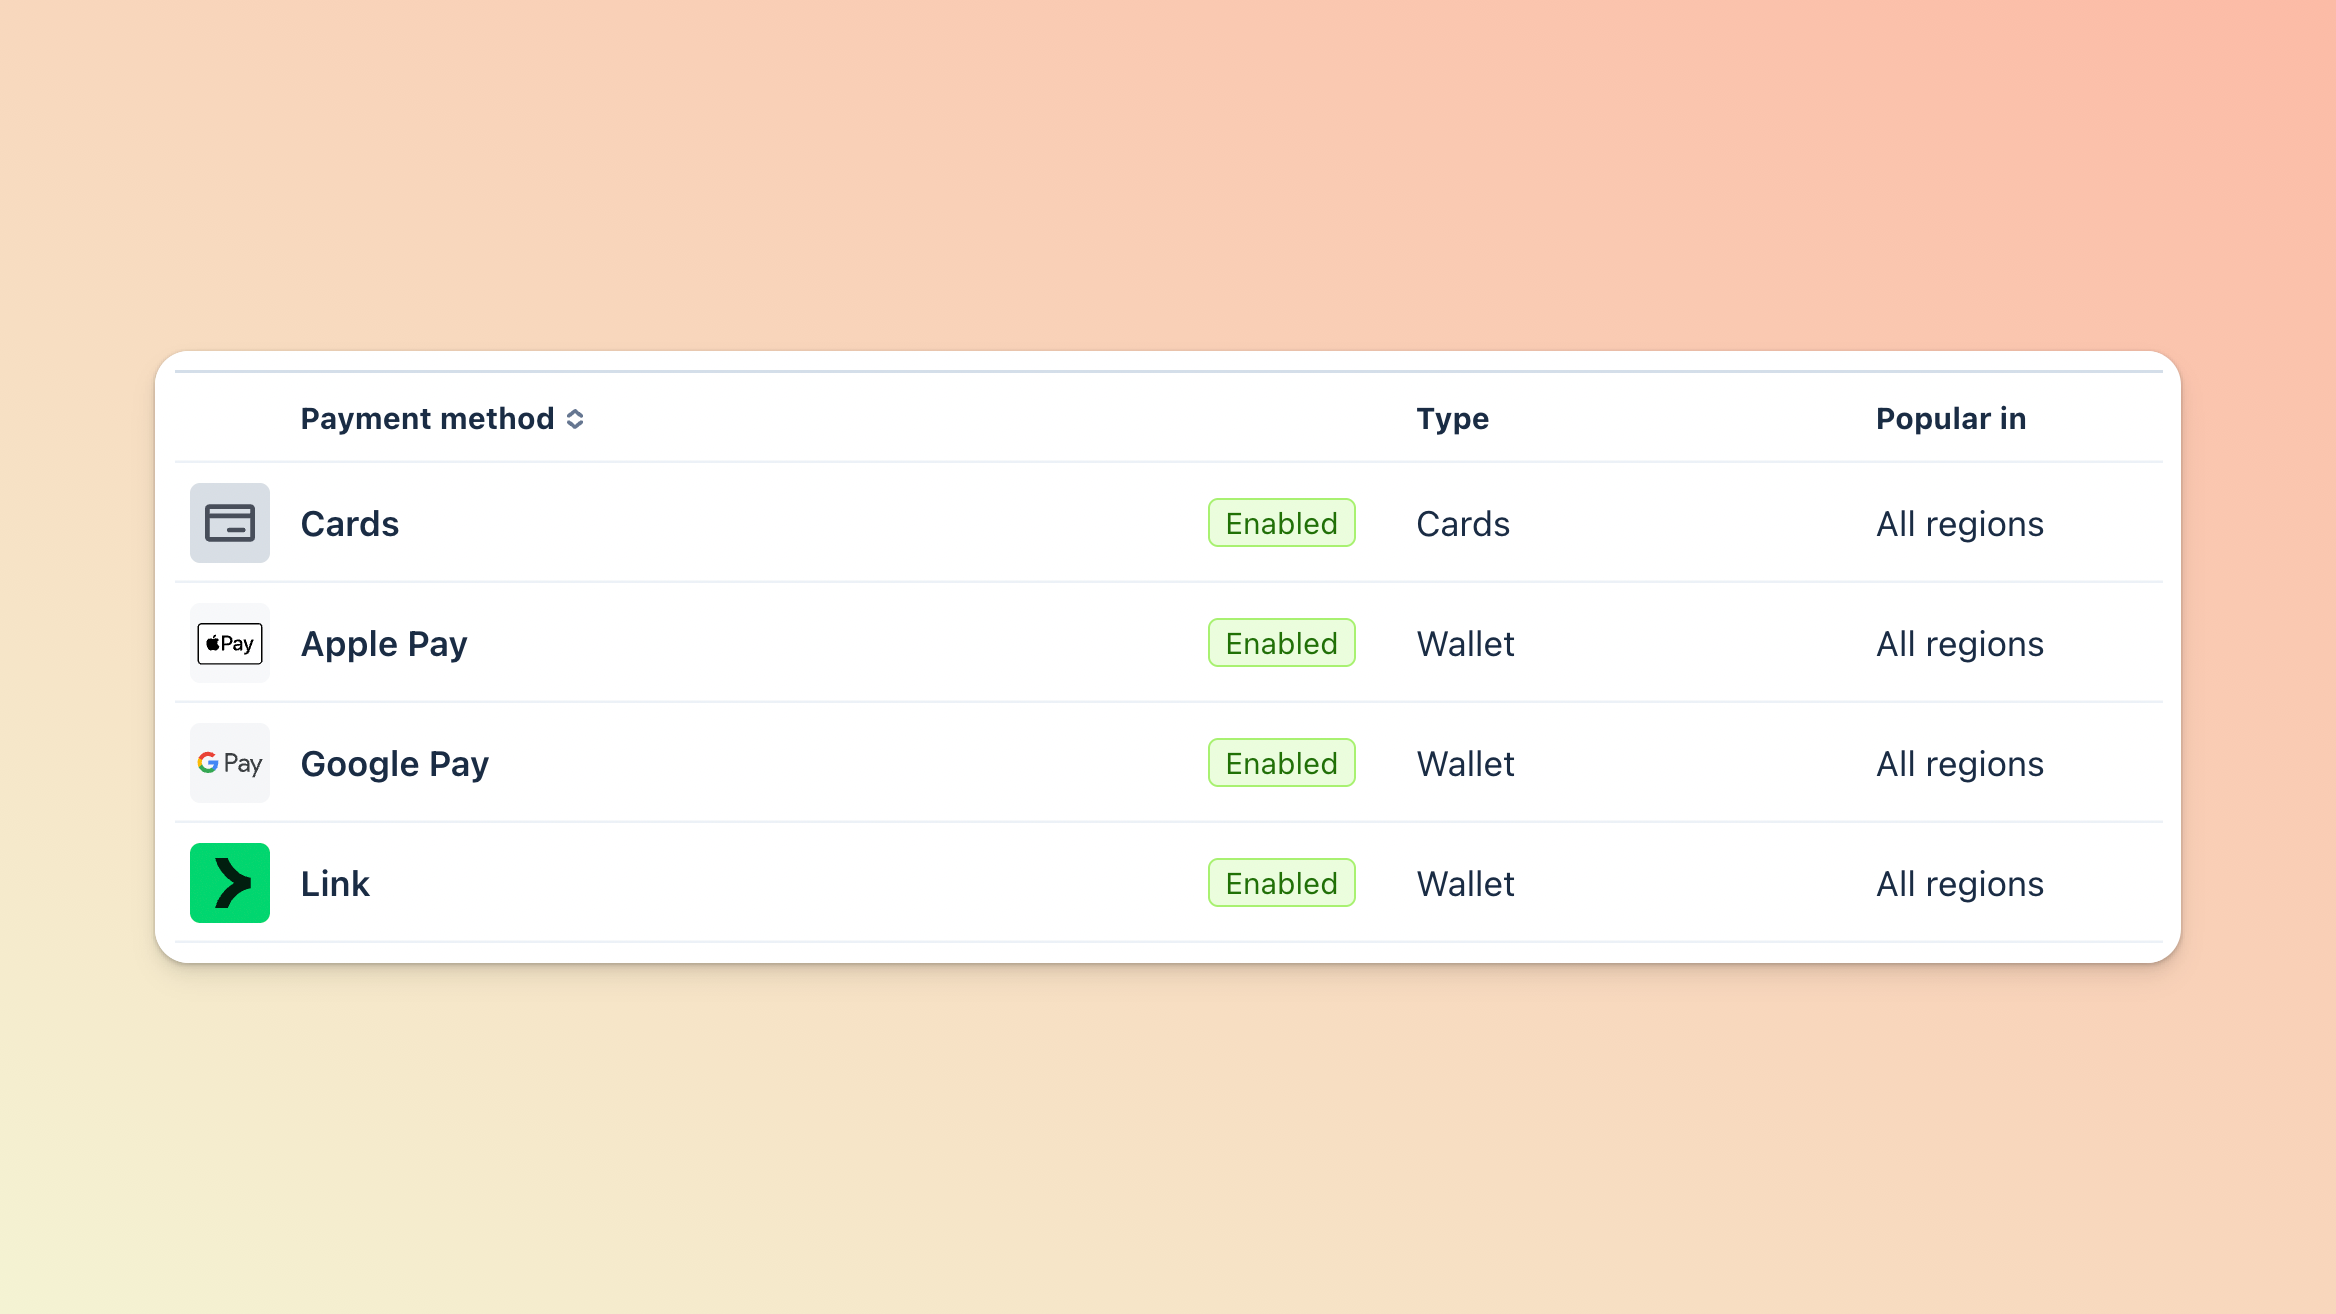
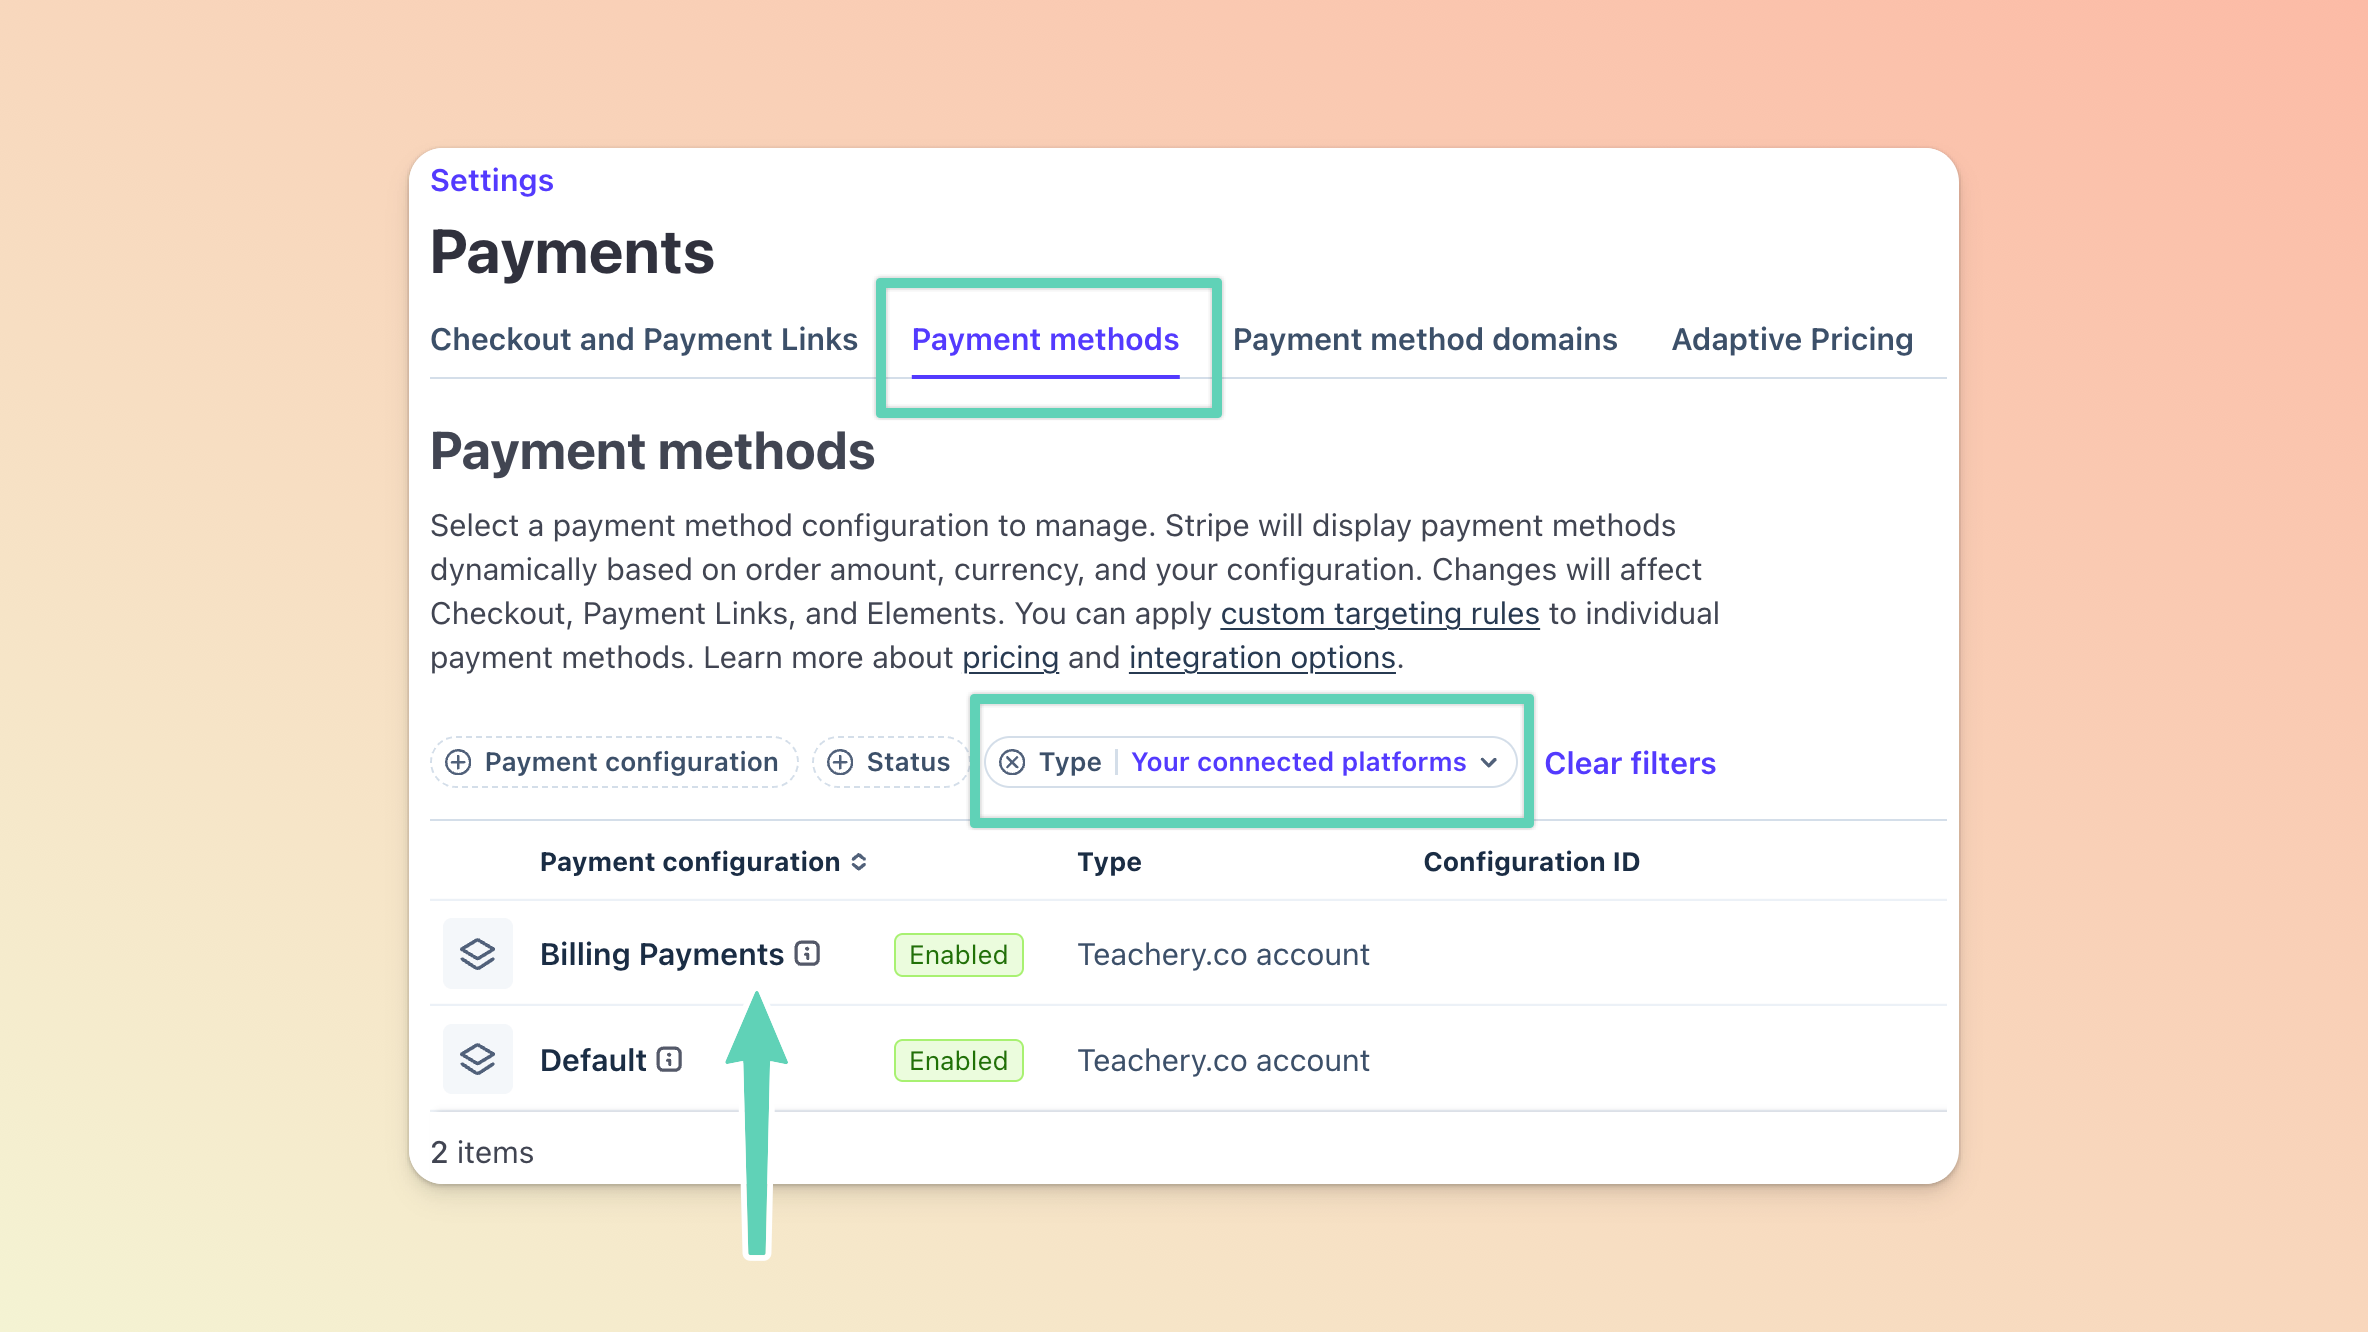
If you enable multiple payment methods in your payment page and would like to offer/accept Link (pictured above) for recurring payments/subscriptions, double-check this method is enabled in the Payment Method settings of your connected Stripe account:
Set the Type filter to Your connected platforms.
Find the Payment configuration called Billing Payments for Teachery and click into it.
Scroll through the list of (eligible) payment methods and Enable as needed.
What information will you want to gather from your customers? The bare-minimum required fields are a First Name, Last Name, and Email Address. If you make use of Stripe Tax, additional required fields will automatically display, as Stripe requires certain fields to calculate/track tax. Please note that, currently, any custom checkout fields you add, will not apply to checkouts for gift purchases (those have their own set of dedicated and fixed fields).
What terms and conditions will you need to communicate to customers and have them accept? (During setup, in the Checkout > Checkout Fields tab, you can add a Terms field and link to your terms and conditions - mark it as Required to ensure customers accept them as part of checkout.) On a related note, here’s a handy help doc about GDPR. Please note that, currently, any Terms field added here will not apply to checkouts for gift purchases (there is a workaround for that).
Will you want to add customers to a mailing list in an external email service provider (e.g. Mailchimp)? (During setup, in the After Payment > Integrations tab, you can connect either Kit, Mailchimp, Mailerlite, or Flodesk as your email provider. Refer to their dedicated help docs for more.) If you choose not to collect email addresses this way, you can always find your customers’ email addresses in your Customers CSV export. At all times, be sure to make your customers aware that by purchasing, they’re being added to a mailing list or allow them to opt out.
If you’re selling a digital download of some kind, you may be wondering how your customers can access these downloads at the time of purchase - but also long after it.
If you choose to display a confirmation message on successful checkout, there will be an option for you to display the download(s) as part of that confirmation message. More specifically:
If you choose to display a LIST of the file(s), customers can immediately download the file(s) directly in the confirmation page.
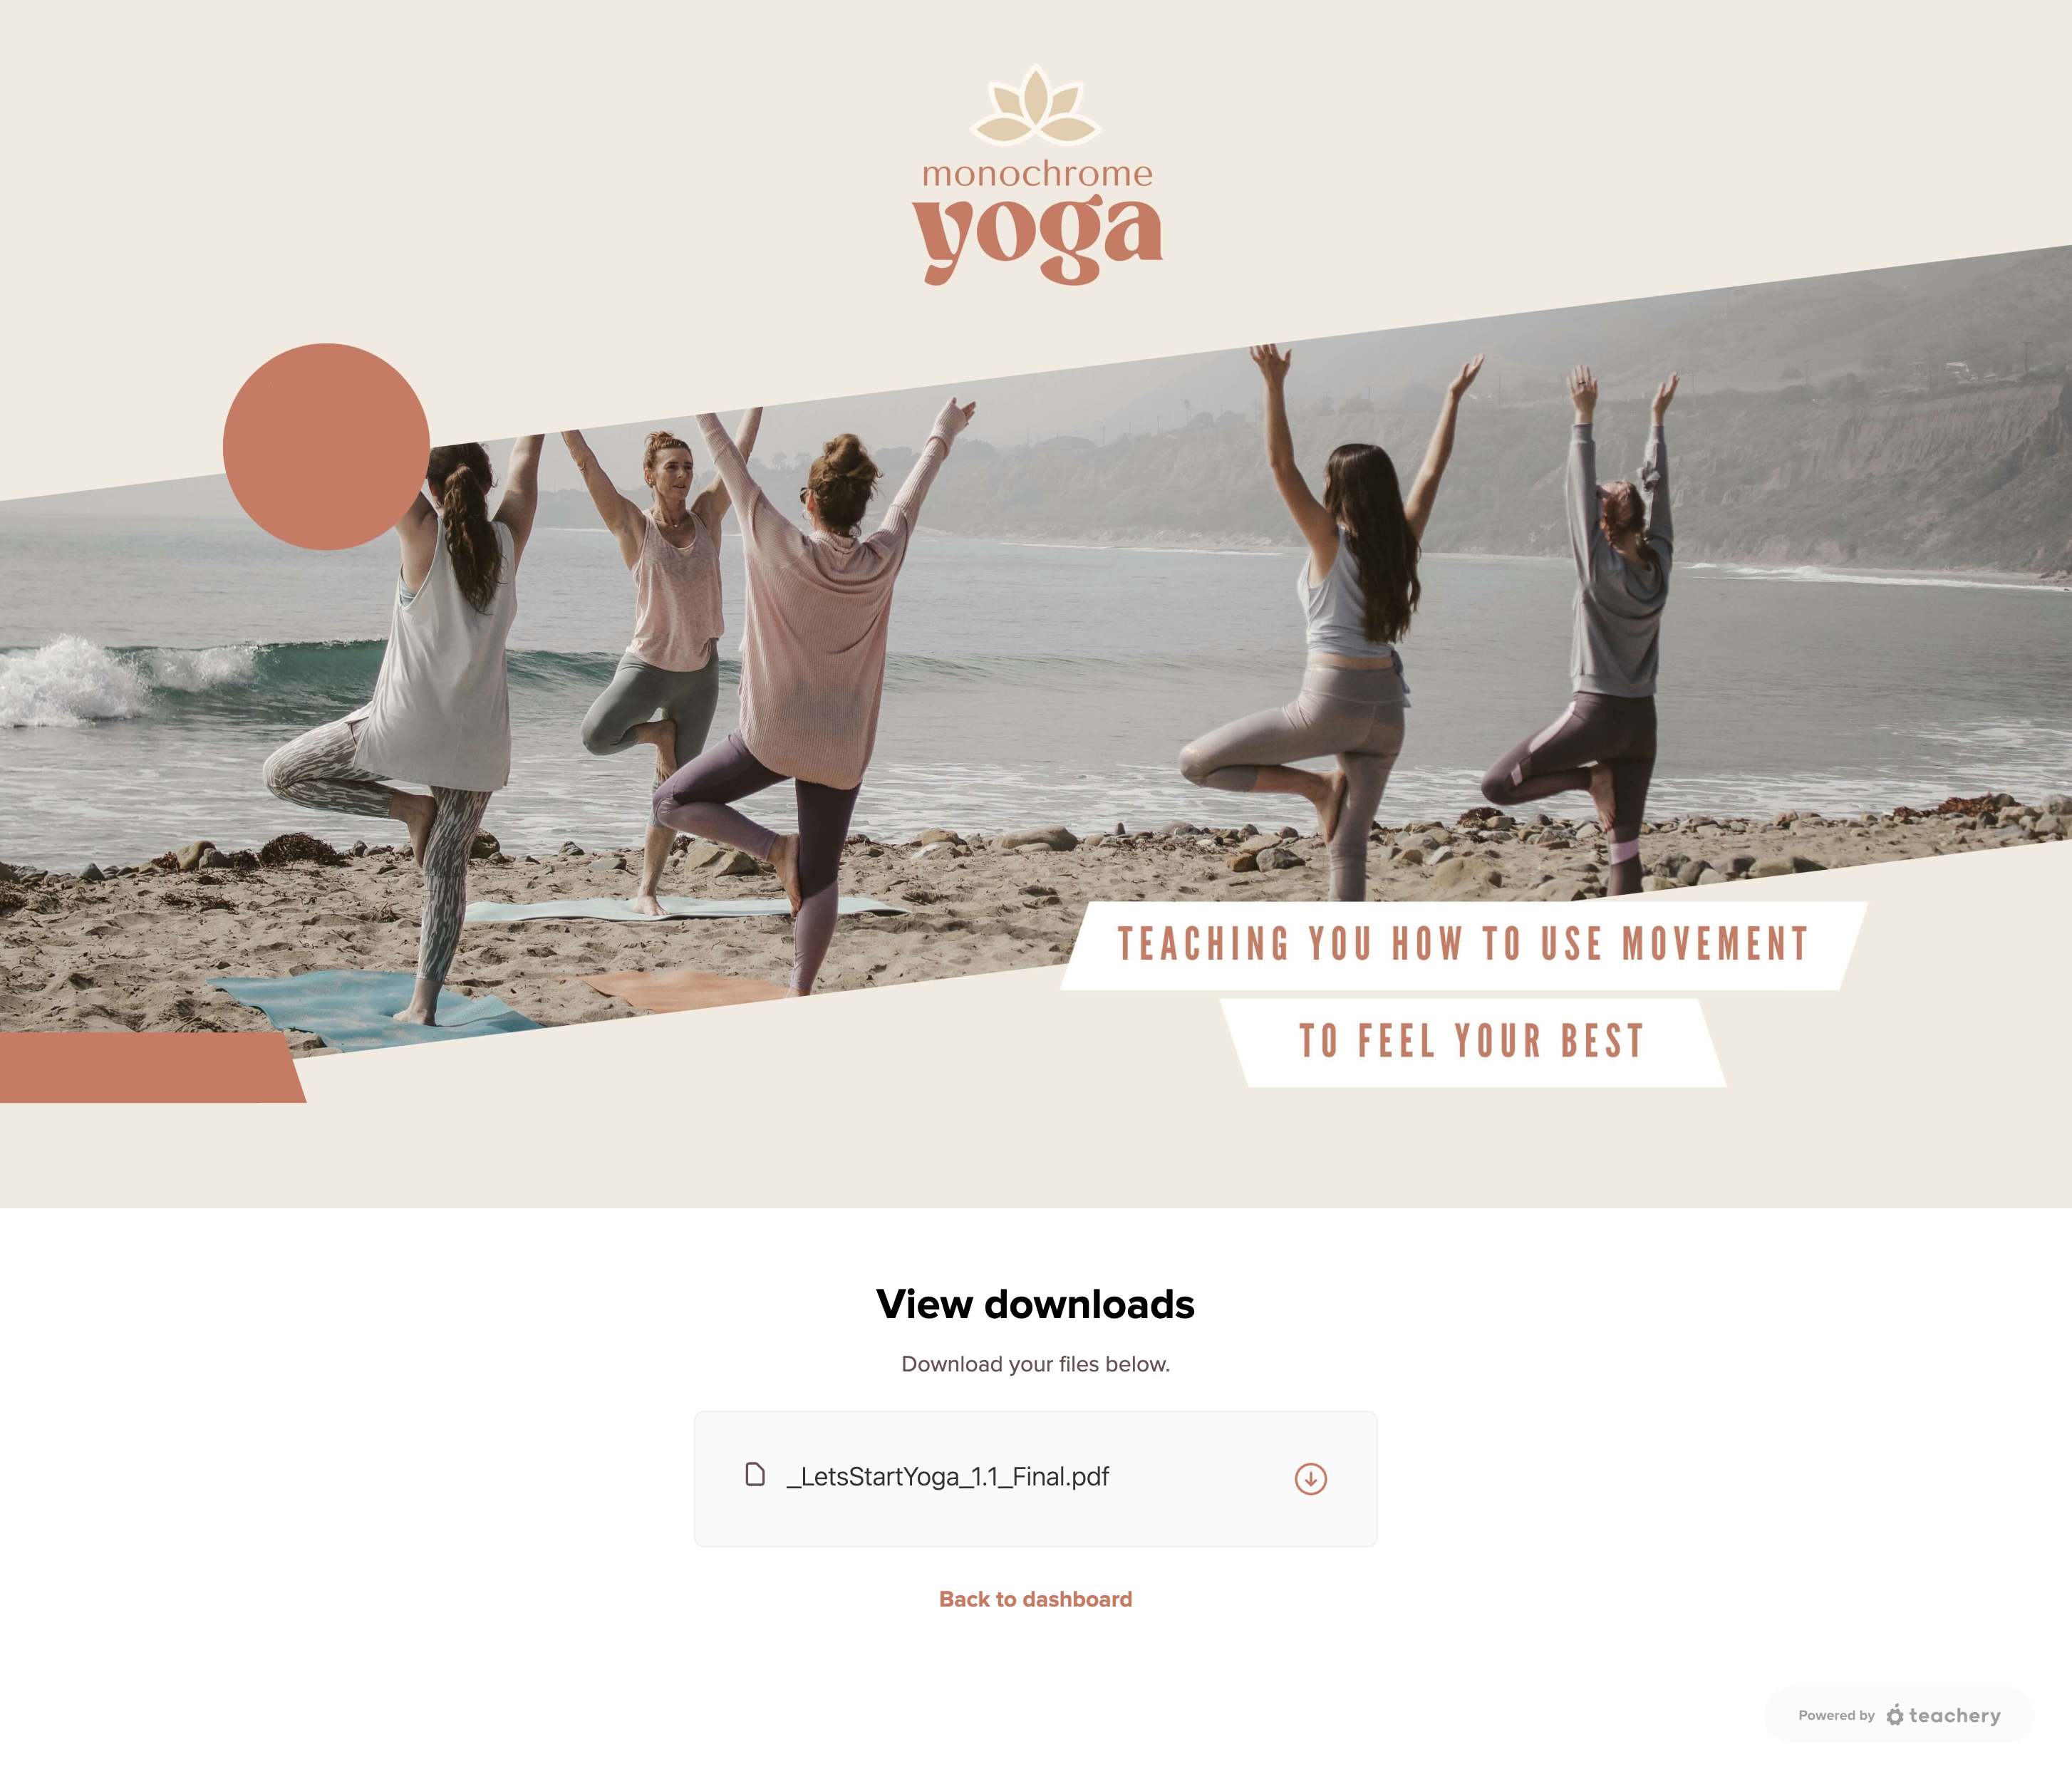
If you choose to display a BUTTON to view the file(s), customers who are brand new to Teachery will be prompted to first set a password (this creates a Teachery account) and only then will they be directed to a dedicated Downloads page (example pictured below) where they can download their files. Existing Teachery customers will go directly to the Downloads page. This option is useful if you’re selling an actual course too, and not just a download(s) or if you want your users to easily return to their downloads some time in the future.
In your welcome email (which we recommend keeping enabled and which will be triggered when a customer makes a purchase), we automatically include download links. Have an upsell with downloads of its own? The welcome email(s) for the course(s)/product(s) within that upsell will be especially important for customers to quickly access their downloads (take note of the last point below too). Ensure you’ve fully set up your upsell to allow for this!
If you’re selling a Teachery Course that includes a downloadable file, you can include as part of your course overview page, a handy link to the download(s) they purchased. The link to use is as follows: your course URL followed by /downloads e.g. https://mycourse.teachery.co/downloads.
If you’ve created and sold a standalone Teachery Product and not a Teachery Course, customers can also find your your Product in their Learn page and this could serve as a great way for them to quickly access their downloads at any time. Alternatively, consider building a hub to house all your Products. Link to this hub in every Product, in your sales/landing pages, and/or email communications.
This is a list of functionality/features not currently available but on our consideration list of future improvements:
PayPal integration (on our roadmap).
Post-checkout upsells or tripwires (but we do enable redirects).
Embedding your payment page.
Digital product payment pages that are independent of courses, allowing for seamless repeat purchases.” Teachery Products are now available!
Seamless switching of customers’ subscriptions or payment plans (for now, you will need to cancel the subscription and have the customer complete checkout again).
More powerful styling, including custom fonts.
Copying the styling of one payment page to another. (Need a workaround? Simply duplicate the payment page within the same or a different course or product.)
Adding more custom fields to the Gifting functionality.
Monitor or contribute to our roadmap for more.
With some high-level understanding of what to expect, we think you’re ready to start building. Here are some additional guides to read and bookmark:
