Think of a Teachery Course just as a container for information. That information can easily be a downloadable product, like a PDF, or a link to a private Notion Template, etc. (as opposed to or in combination with lessons).
Depending on whether you’re using our new Payment Page Builder or our original payment page template, you’ll want to jump to different sections below. 😉
If you’re looking to sell just a digital product, without a course, keep on reading!
That said, Products are not just for downloadable items, they’re for things like coaching sessions (or the like) too. That is, you don’t need to have a file attached to your Product. 😃
Navigate to the Products tab of your Teach page.
Click the + Create new Product button.
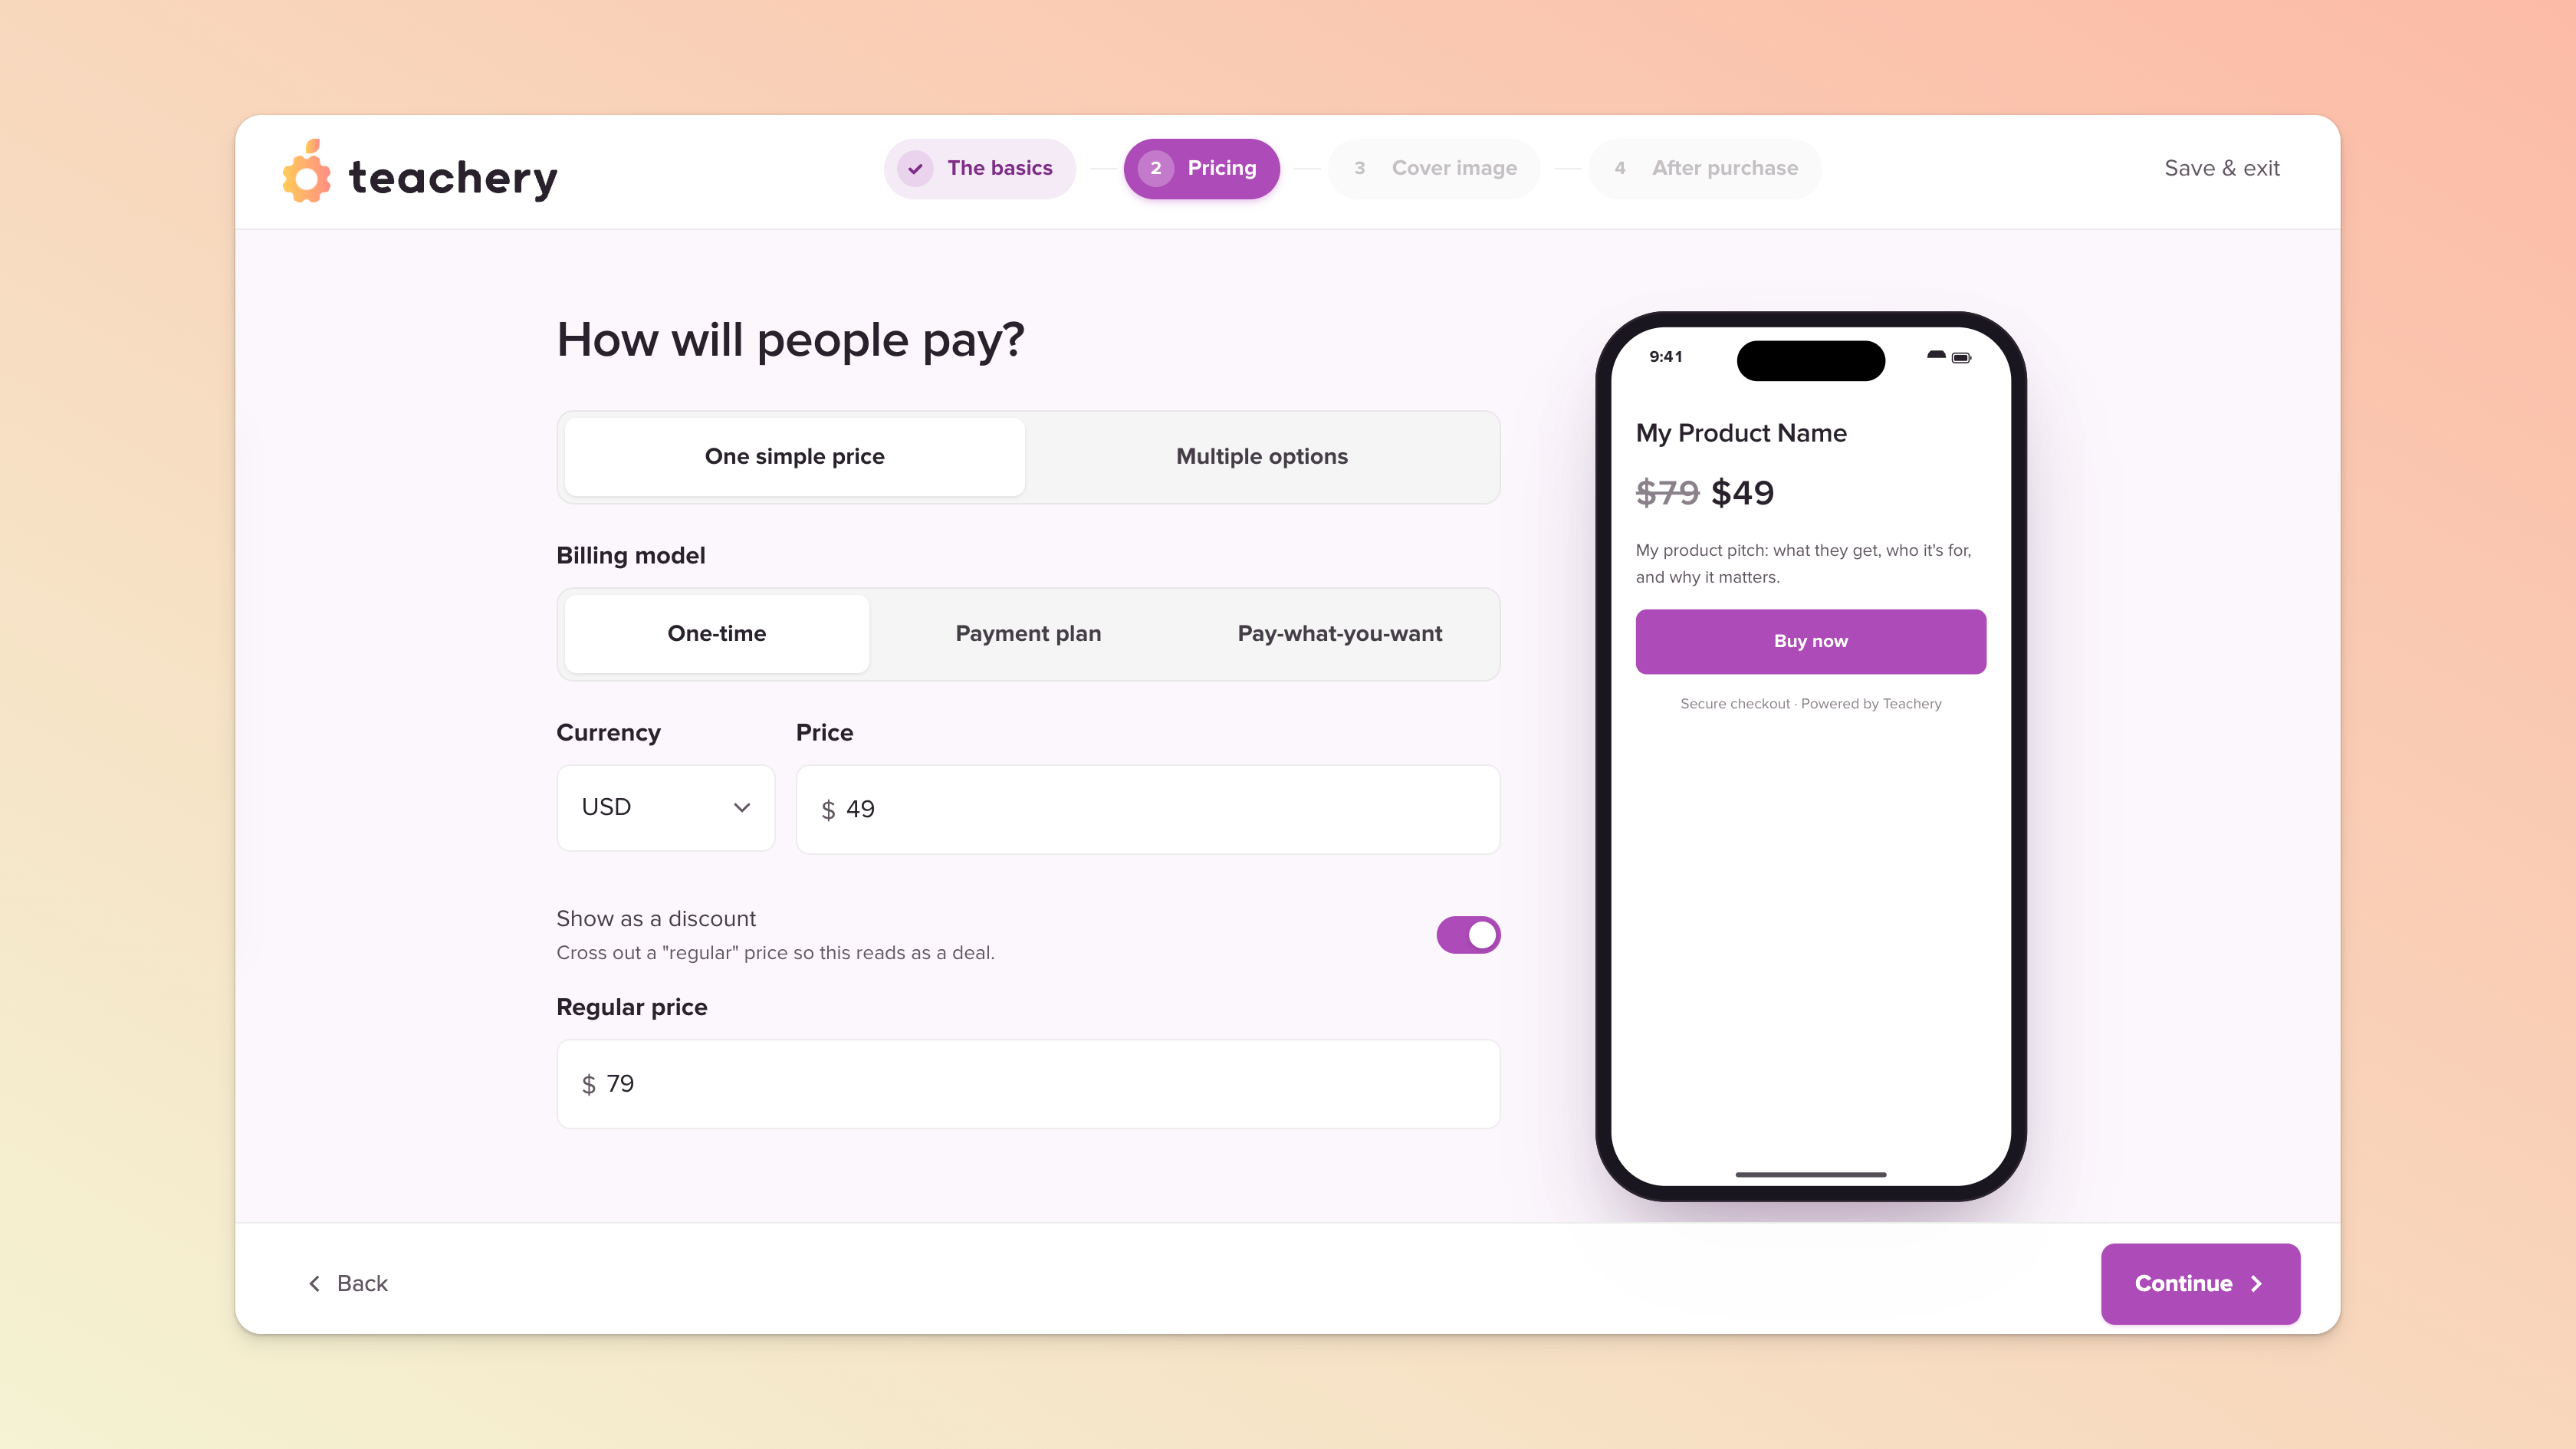
Walk through each step of our guided product-building process by populating some basic info: product name, description, pricing model, cover image, file download, and confirmation screen.
We provide a provisional preview at this point but be sure to click the “Open full editor” button to arrive directly in your payment page (where you can edit or add to the details of your product offering) and get a more accurate idea of what your final product will look like.
Think of the payment page as a two-in-one: a simple sales page with a checkout.

On your Product Overview page, you’ll find the payment page that you created. Click the Edit button to jump back into it at any time or access if via the left sidebar menu.

For more detailed guidance on how to make use of our more powerful Payment Page Builder, keep these help docs handy:
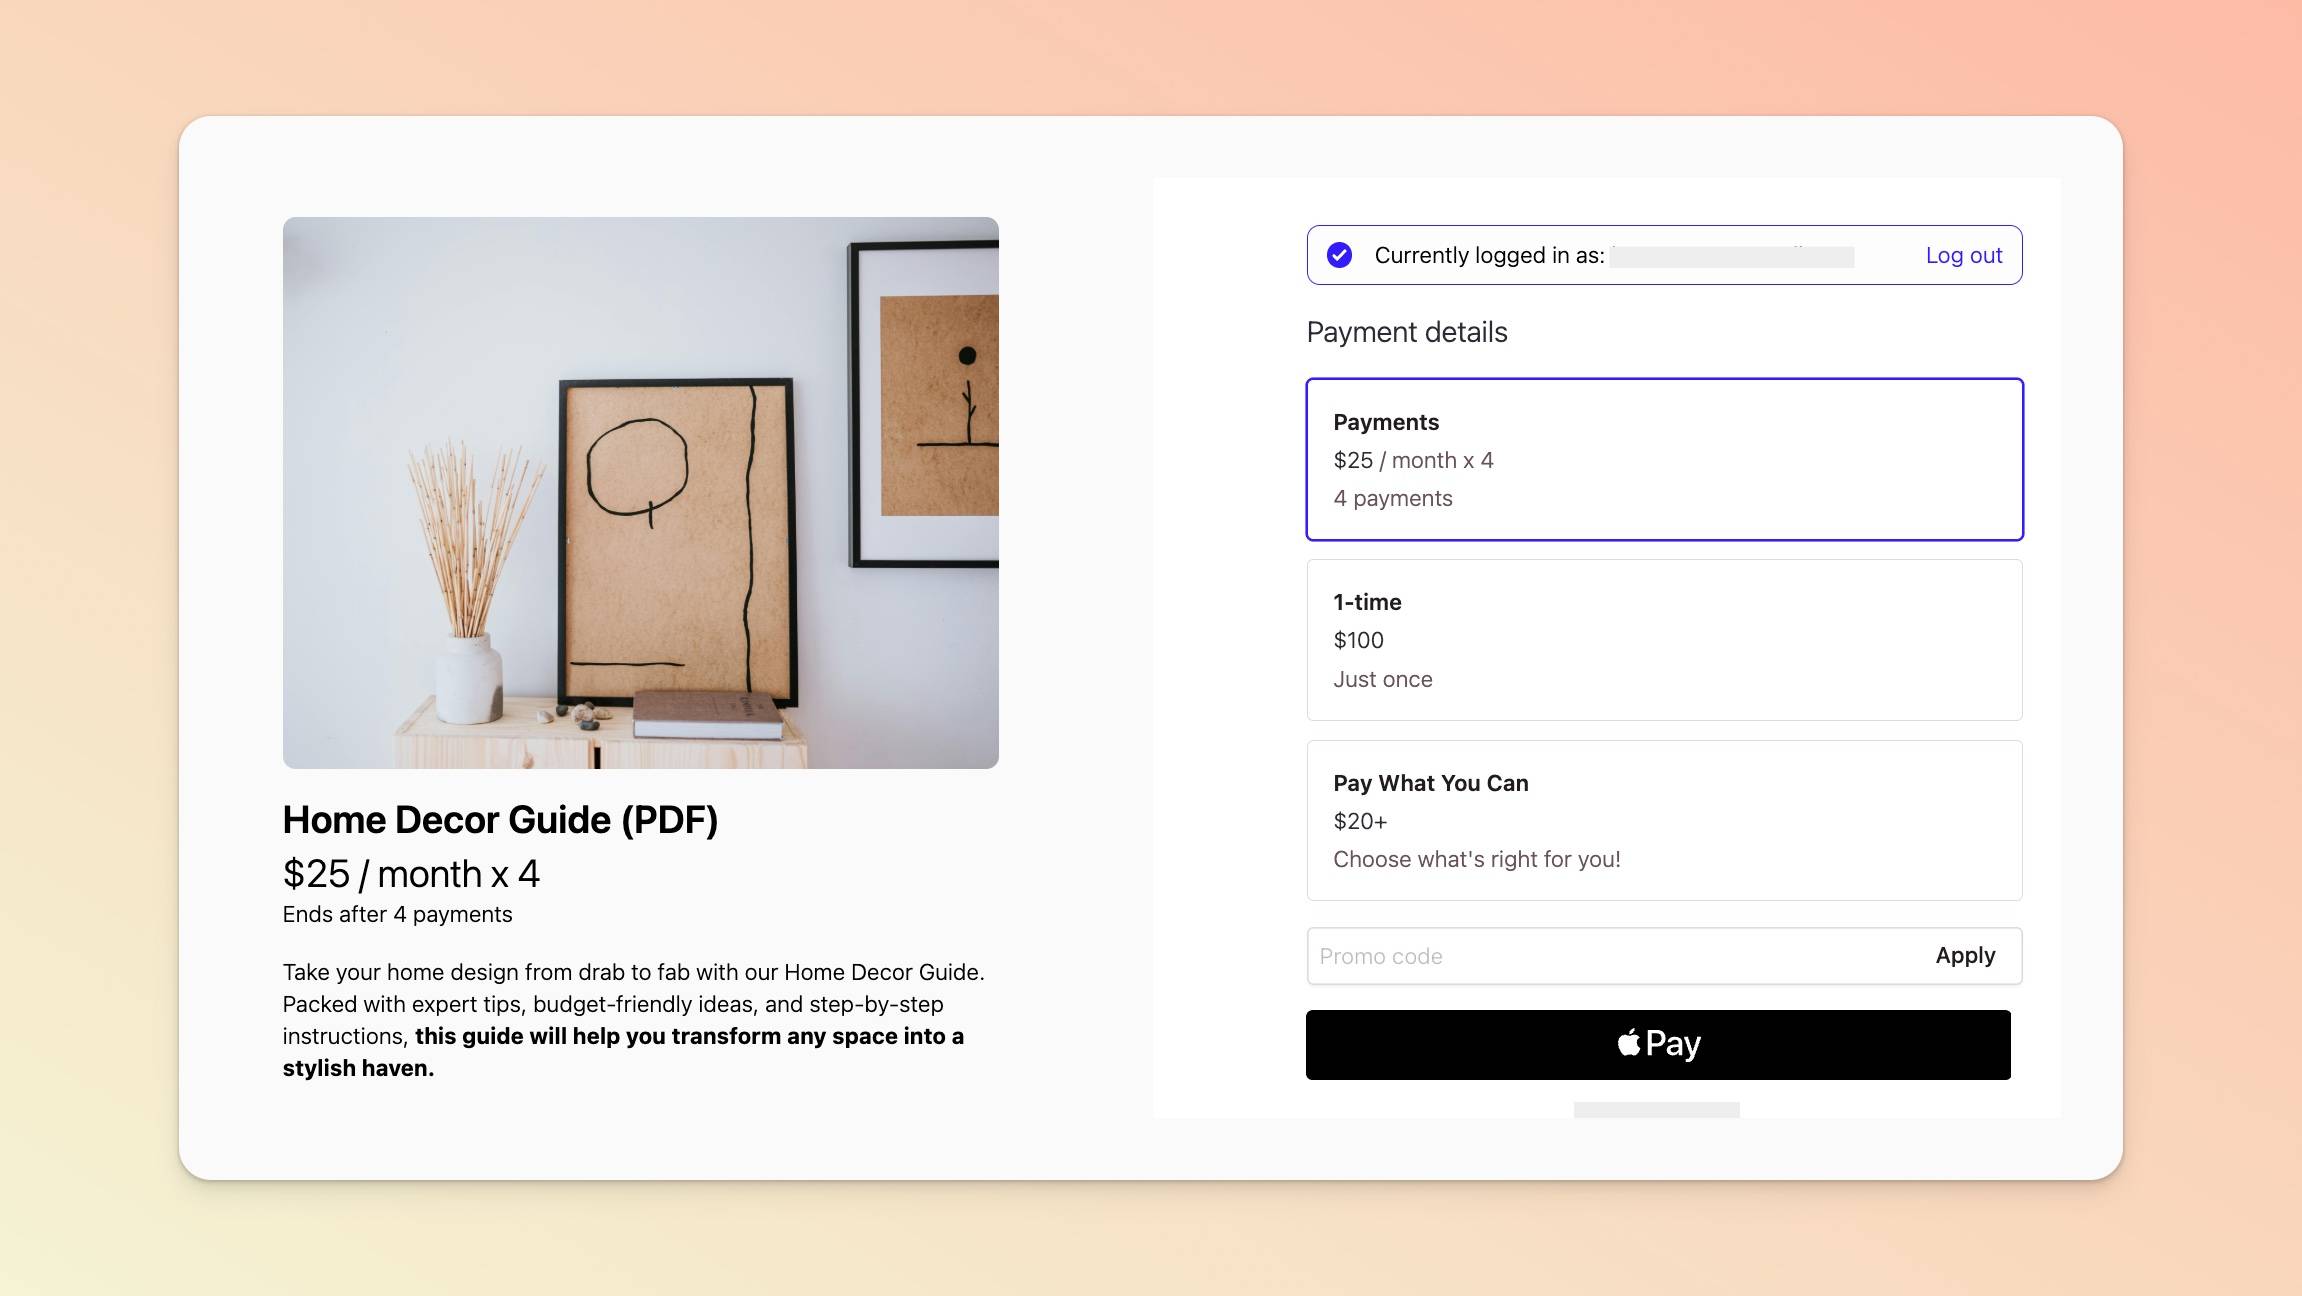
You can create a clean, brief, elegant payment page (like the one pictured below) or one with more bells and whistles (including your own custom CSS).
Ensure your welcome email is enabled and ready. You’ll find it in your Product Emails.
We include, by default, some basic purchase information and, if your offering includes a downloadable, our system will automatically include a link to it in the final version of the welcome email that the customer receives.
If you chose to display a confirmation message after a customer successfully completes an order, our system will automatically include in the welcome email either a hyperlinked list of your downloads or one single link to your Downloads page, depending on whether you chose to display a list of your downloads or a button to your downloads on that confirmation page.
If your offering doesn’t include a downloadable (e.g. in the case of selling a coaching session), your welcome email will only include some basic purchase info so feel free to use the welcome email to also include as much additional info you believe might be useful to your customers e.g. how best to contact you for support, any links to other platforms or next steps, etc.
If your offering includes a downloadable of any kind:
You can configure a confirmation message to display on the page your customers will see after successful checkout. With this message, you can include a list of your downloads or a button to your downloads.
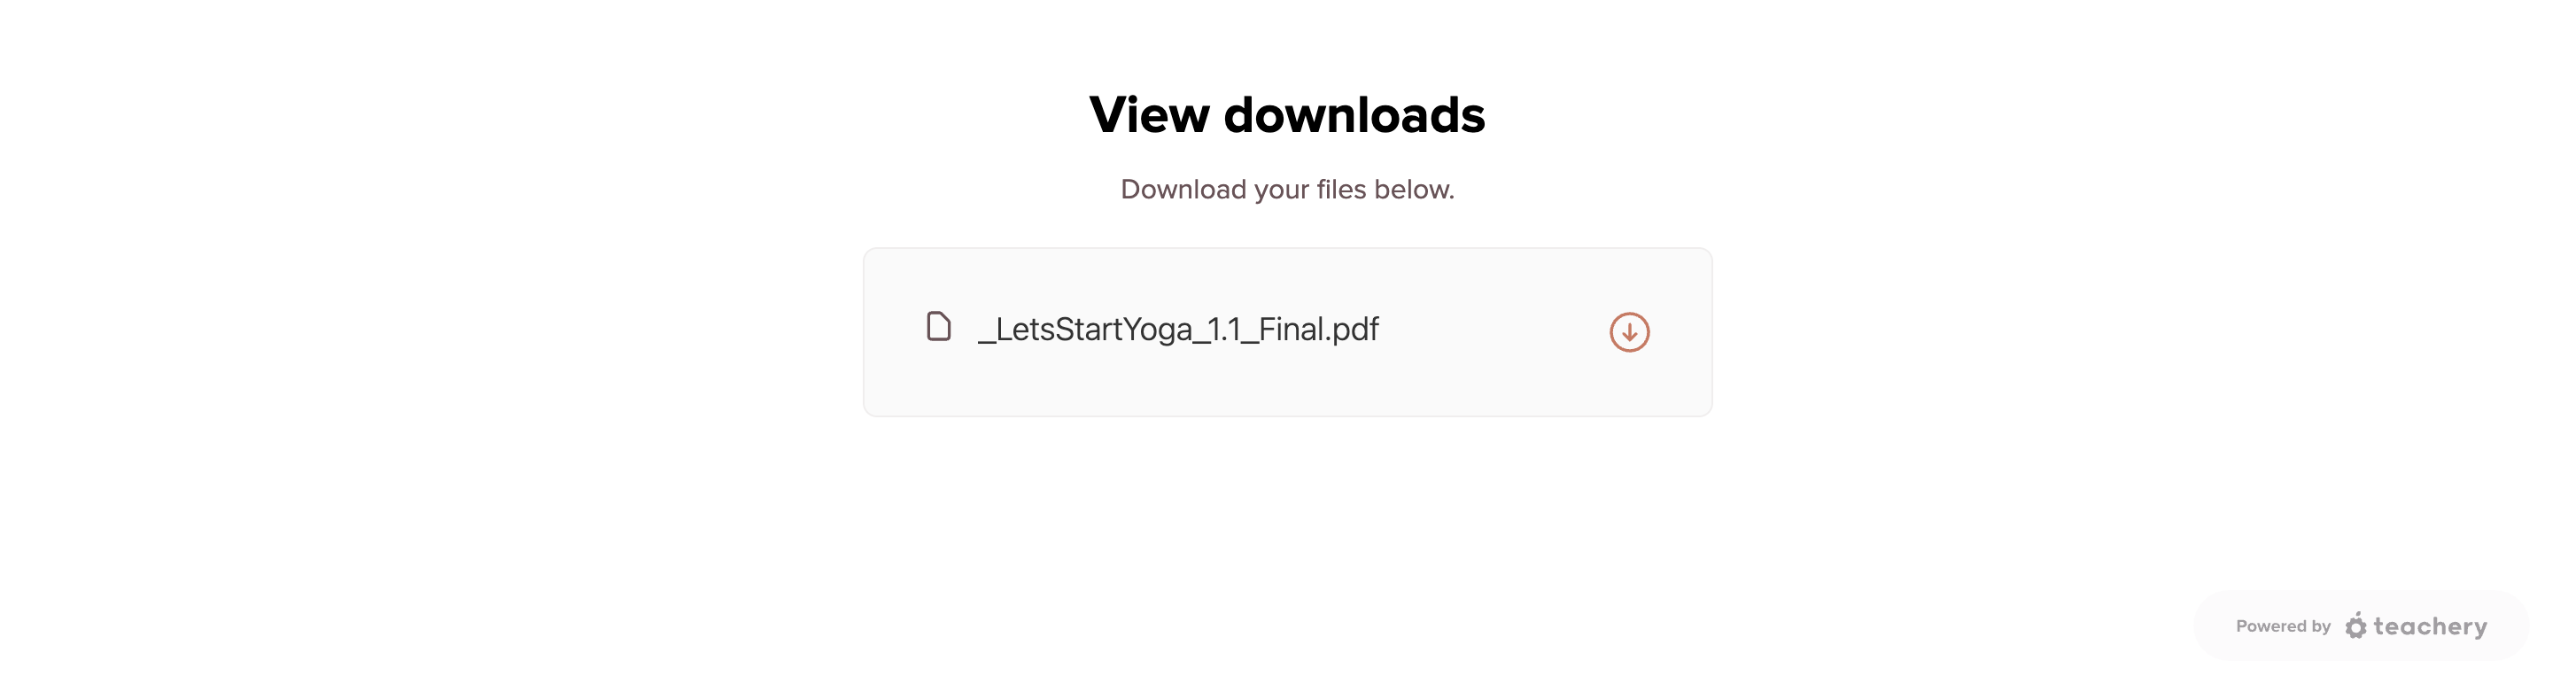
The welcome email a customer receives will automatically include a link to their download(s) - see section above. (Your Product comes with its own dedicated Downloads page, which is essentially where customers will find their files. An example is pictured below. The Downloads page is also accessible via a customer’s Teachery Learn page - clicking on your Product there will take them to this page.) The link in their welcome email is unique and tied to their purchase.
A “generic” link to your Downloads page is available in your Product URLs page (in case you need to share it with a customer). It follows this format: your course URL followed by /downloads e.g. https://mycourse.teachery.co/downloads.
If a customer needs to retrieve their downloads long after their initial purchase, they may be prompted to log into Teachery first (especially if they use the “generic” link above). Customers who are brand new to Teachery just need to reset their password before they log in. Existing Teachery users can simply use the same login credentials they use throughout Teachery.
We recommend encouraging customers to keep their welcome emails so they always have their download links accessible (or you can resend it to them) so that they can use their own custom downloads link, which, again, is tied specifically to their purchase.
If your offering does not include a downloadable (e.g. you’re selling coaching sessions):
On successful checkout, a customer will either see a simple confirmation message or be redirected elsewhere (depending on what you configured in your payment page).
The welcome email a customer receives will simply serve to confirm their purchase. If you did set a redirect on successful checkout, you can include that same redirect URL in your welcome email by popping in the placeholder %redirect_url%.
Despite offering Test Mode (see above), we still cannot stress this recommendation enough:
If you want to see the exact experience (you and) your customers will have (and to ensure that taxes are being captured correctly or email provider integrations are working), making a real purchase of your own course will be useful. You will get to see both sides of the transaction and ensure everything is working as it should.

Click the Share URL button in the top right of your payment page
Click the Copy to Clipboard in the popup that appears
Open that link in an Incognito or Private Window
Put the payment page to the test (e.g. if you have multiple payment plans available, confirm the page reflects your selection) and complete the checkout
If you want to refund your purchase at any point, you can do so via your test customer’s Customer Profile via the Customers page.

Instead of making a real payment, you can create yourself a 100%-off promo code just for testing purposes (be sure to make it a tricky promo code and/or consider limiting it to one use). But we still strongly recommend placing an order with a real payment to ensure welcome emails, Stripe receipts, refunds, taxes, etc. are all rendering/working as they should.
If you very quickly want to disable access to the payment pages of your Product, navigate to Product Settings > Manage Options and scroll down to the Turn Product On/Off setting. Turn your Product “Off” and click Save Options.
Alternatively, you can expire your payment page.
If you’re using our original payment page template, follow these steps:
Create a new Course.
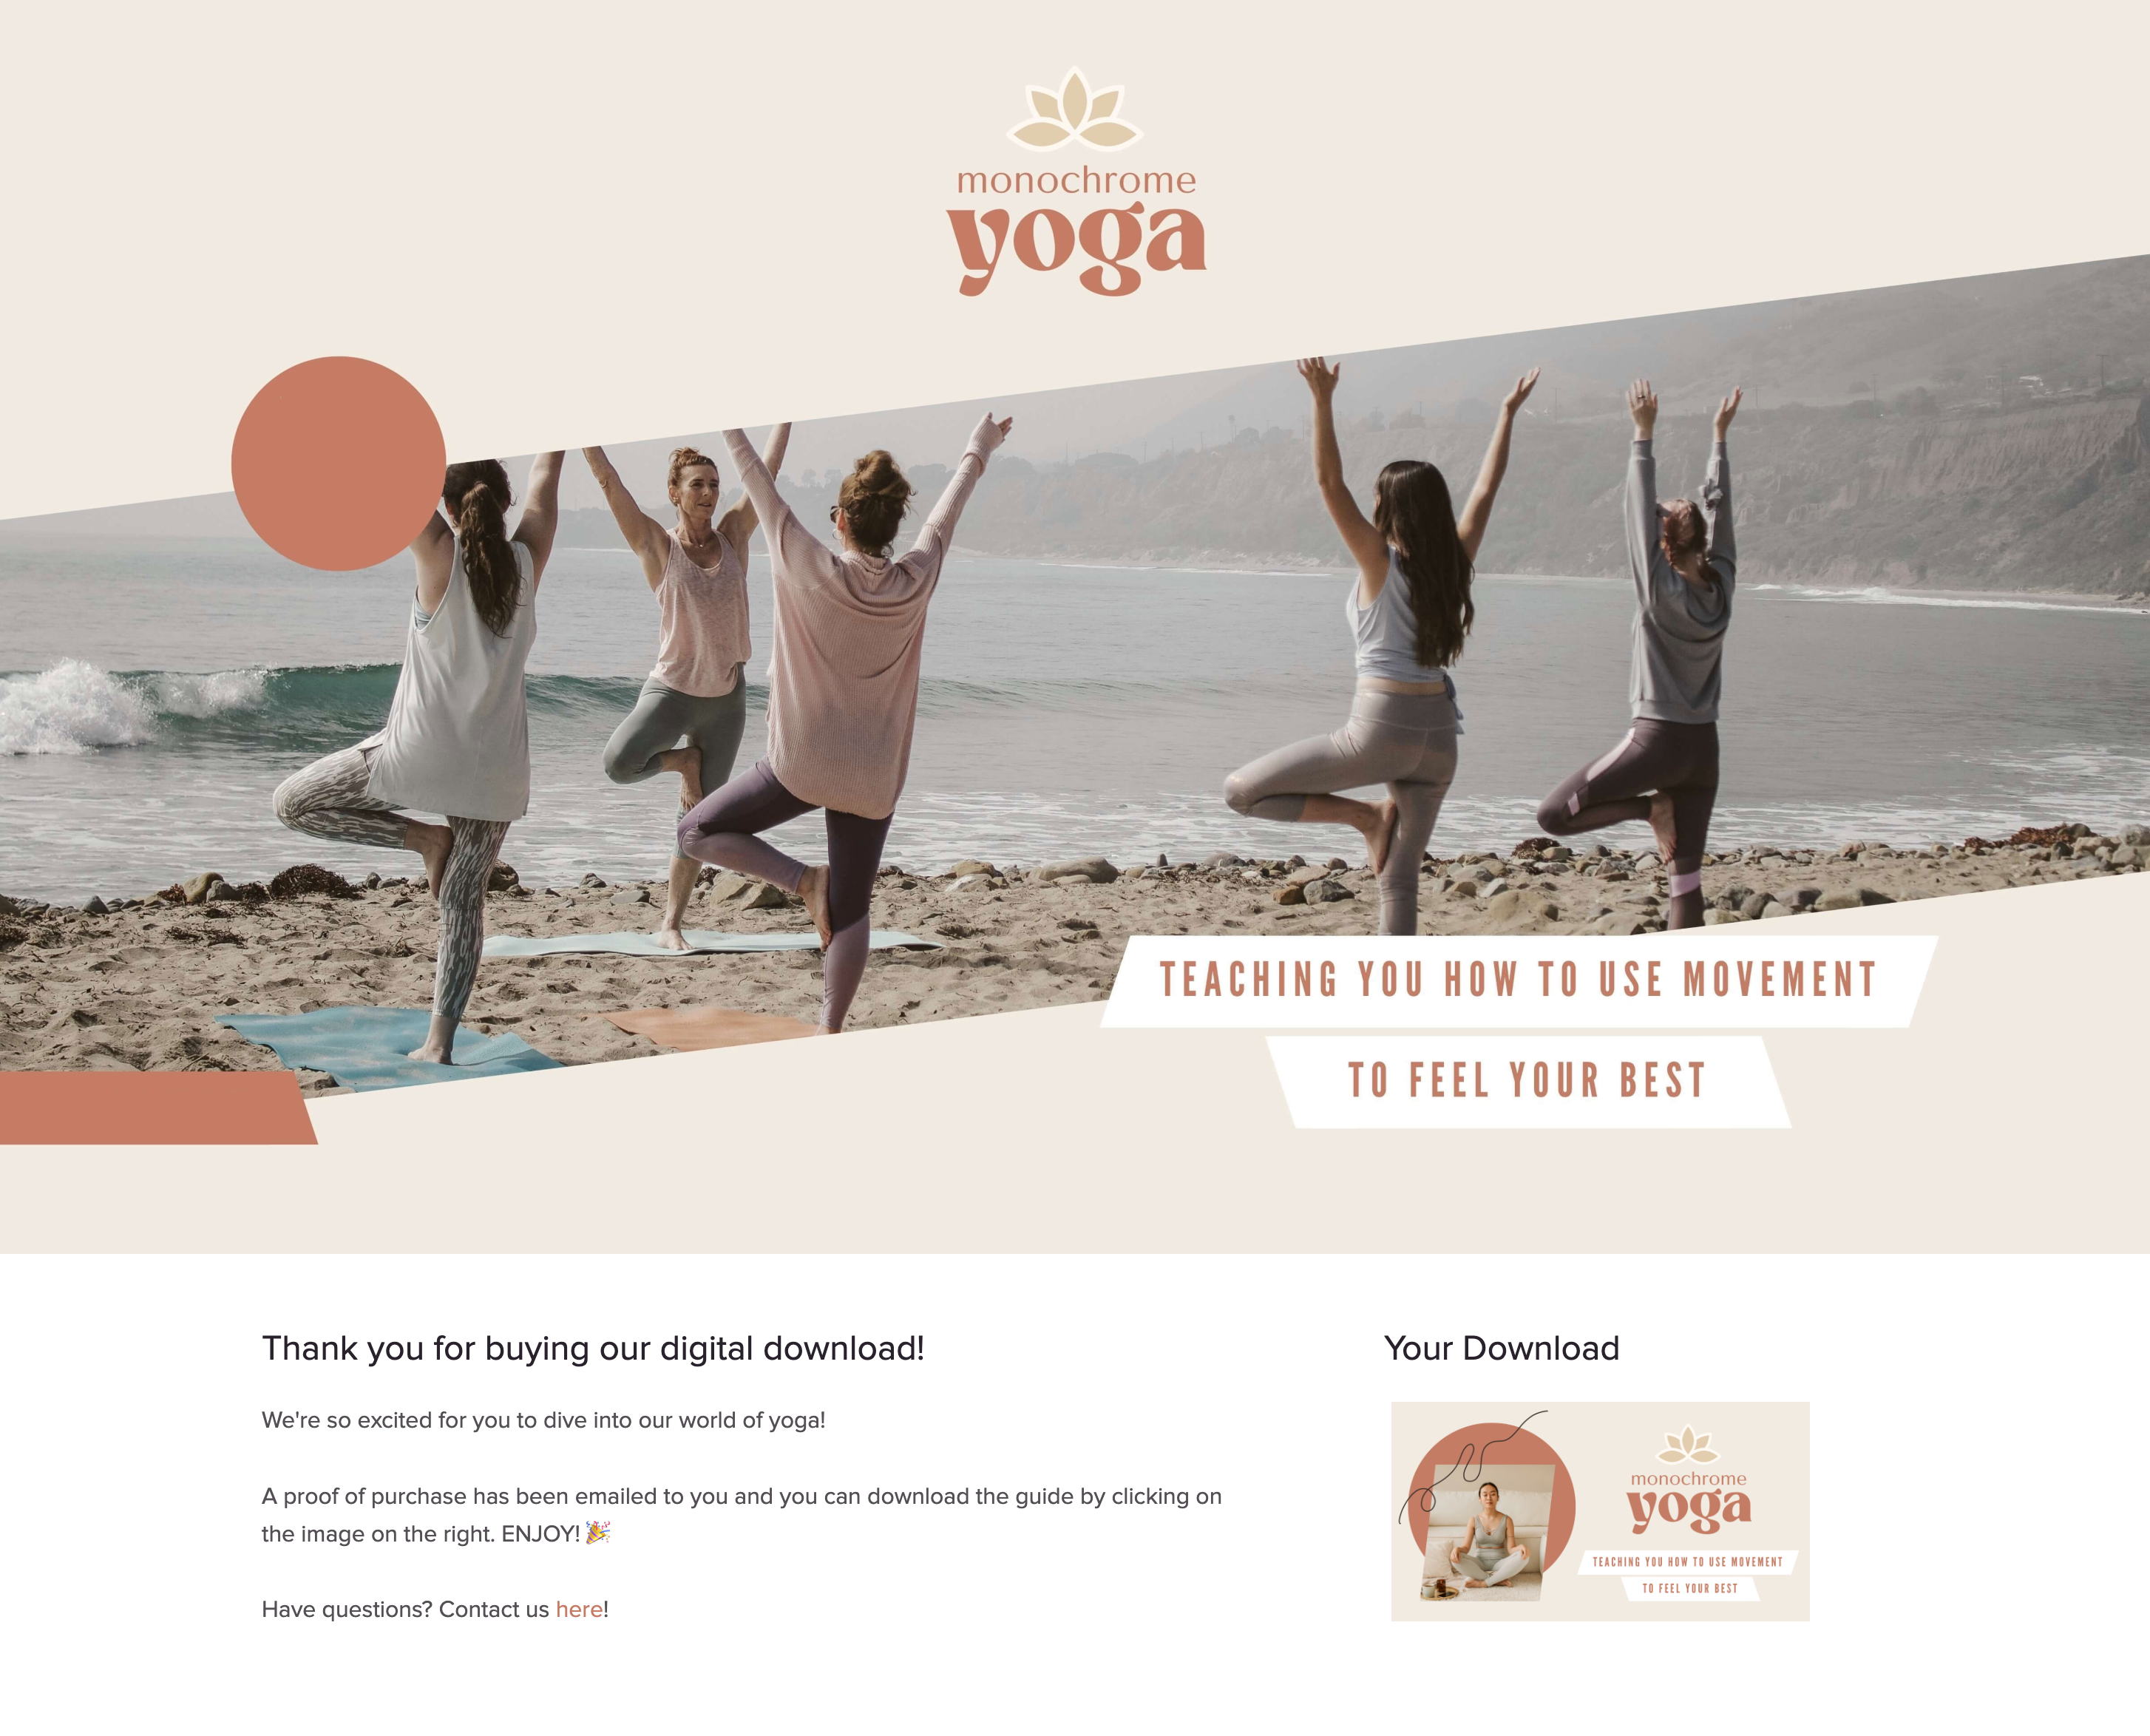
Link some text or an image that you add to one of the text areas at the top of your course Overview page (in the example below, an image in the right text block has been hyperlinked) to your downloadable item:
IF your downloadable product is under 50MB, you can host it with Teachery.
IF your downloadable product is larger than 50MB, upload your file to your own Google Drive, Dropbox, etc. cloud storage provider. Then, grab a share link for the file and hyperlink text (or an image) in Teachery to it!
🎙 Important: selling an audio file? These files work differently (e.g. they won’t automatically download if you’re hosting them in Teachery, unless you compress them into a .zip folder), please read this guide carefully.
Customize the course Overview page with additional text and add a header image, if you like (in the example below, there is a header image). As mentioned in step (2) above, this is where you’ll include a link to your digital product/downloadable item, as the course Overview page essentially serves as a confirmation or thank you page.
Optional: You don’t need to have any course lessons set up (unless you’d like to add any other useful content/resources for your customers or promote other offerings, etc.).
Optional: In the Landing Pages section of the left sidebar editor, create a landing/sales page using either our old template or our new page builder. If you build a landing/sales page, you’ll still need to complete the next step in order to capture payment. You don’t necessarily need a landing/sales page, you can build a simple one by just using our payment pages (next step).
In the Payment Pages section of the left sidebar editor, add a new Payment Page using our original payment page template, customize it, and set your price.
Finally, go into Course Emails section of the left sidebar editor and customize the welcome email as needed.
💡 Pro-tip: Link to your digital download in the welcome email as well, so it’s easy for your customer to get access in the future. Note again that this is only necessary if you’re using our original payment page template.
Optional: Style the course with colors/fonts if you want. ✨
We strongly recommend testing the purchase workflow like any of your users would to ensure everything is working.
Then all you need to do is share the landing/sales page URL or the direct payment page URL (depending on your chosen setup) with your community and you're off!
(URLs can be found in the Actions menu at the top of the landing/sales page or payment page OR in the Course Links section of your course’s left sidebar editor.)
