Teachery allows you to upload images quickly and easily within different areas of your course pages. Our built-in file manager will enable you to upload/import, organise, and delete your images - all in one place.
💡 We recommend ensuring your images are web-optimised to improve page-loading time. More information below!

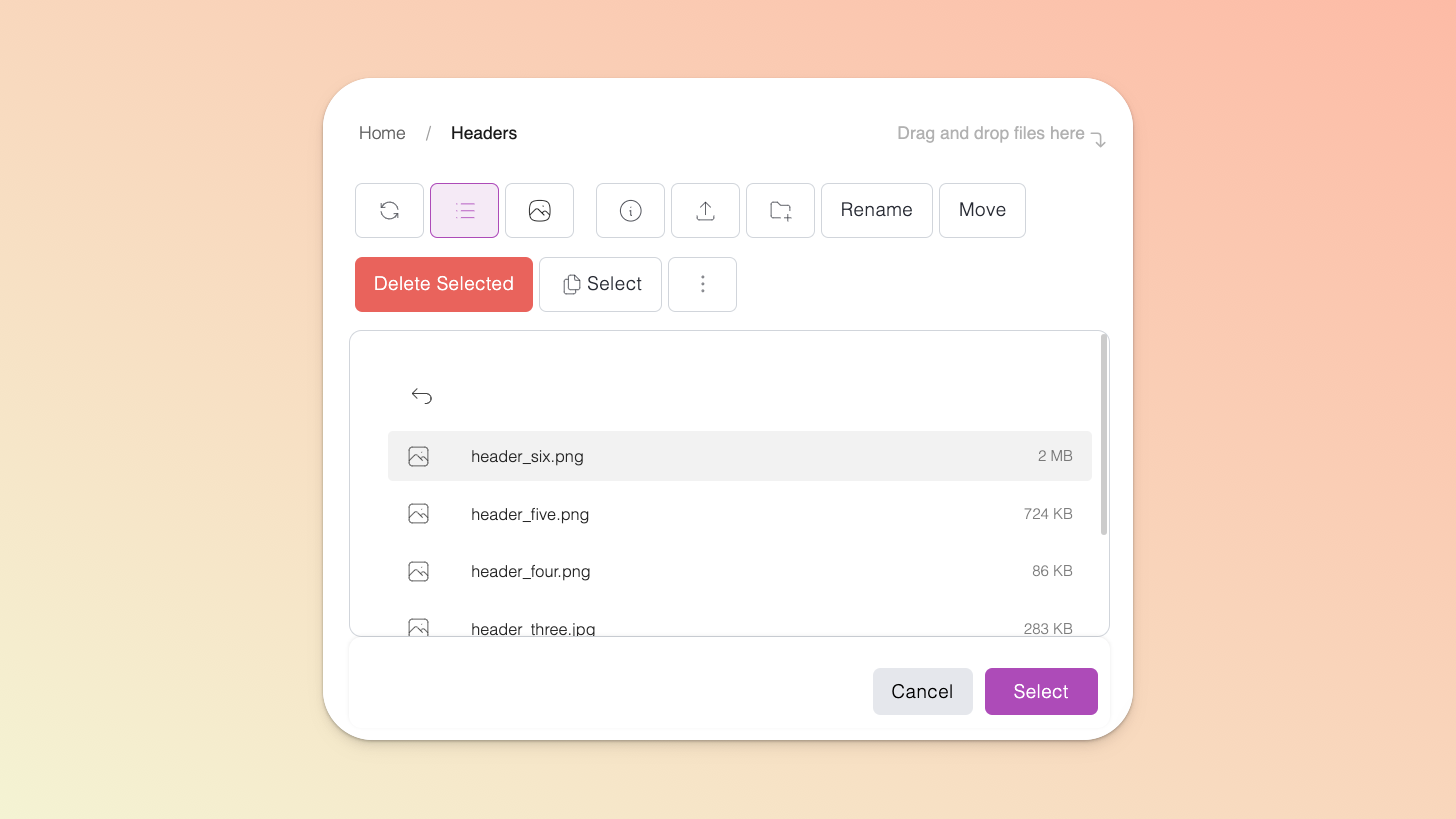
The file manager is pretty intuitive but it’s worth familiarizing yourself with all its options so that you can stay organised from the get-go. 🤓 Simply drag-and-drop or click the upload icon to import your files.
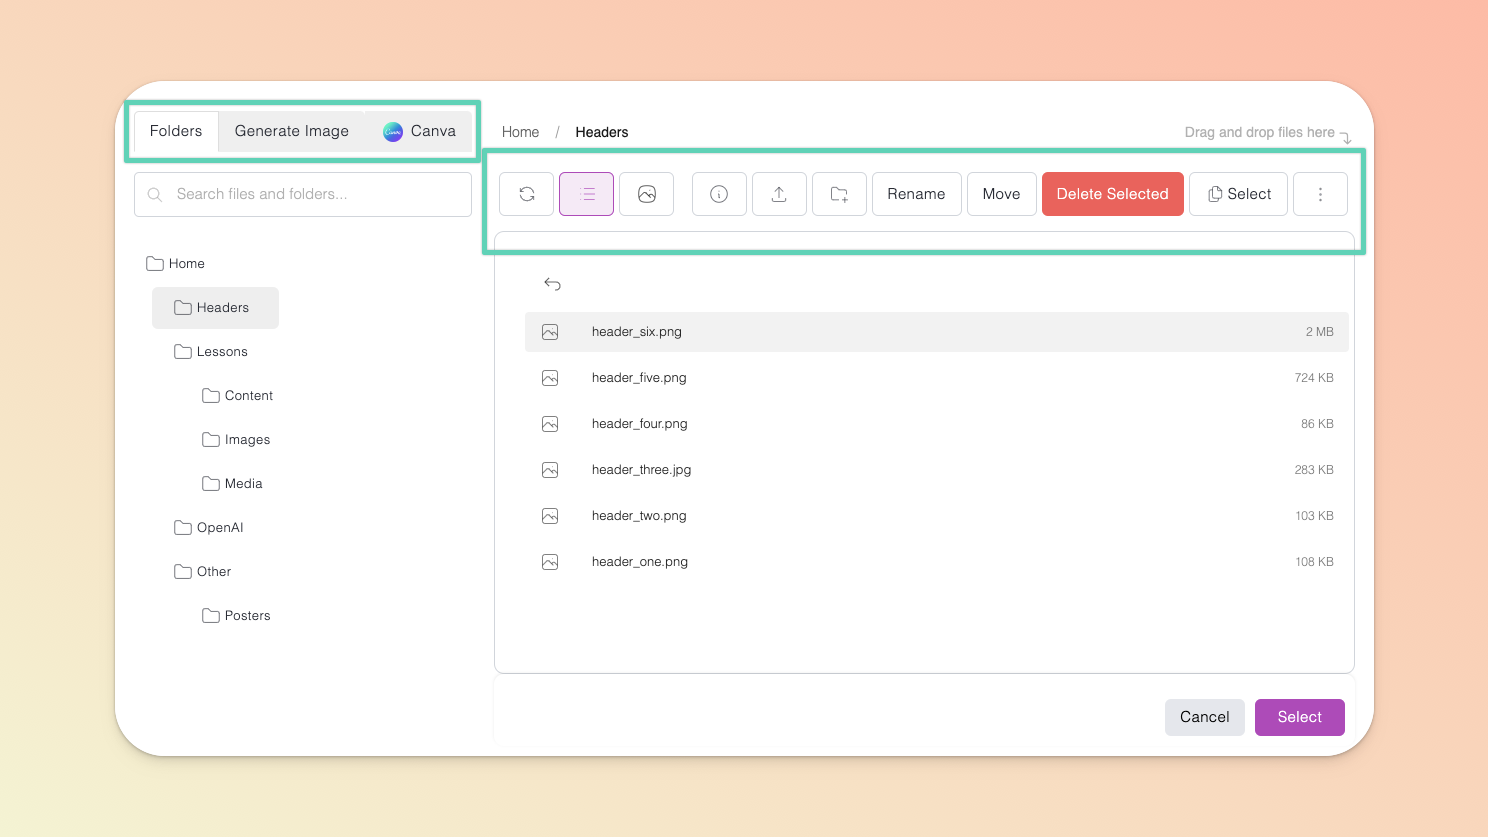
On the LEFT side of the file manager window, going from left to right:
Folders tab: This is essentially your Teachery file explorer (think of it as your Mac Finder or Windows File Explorer, but for Teachery). It comes with a search bar and displays your folder tree/directories.
Generate Image tab: It’s here you can connect to OpenAI (using your API Key) and create images by inputing prompts, image dimensions, and preferred image quality. When created, the images are automatically saved to your Teachery file manager.
Canva tab: This is a space dedicated to your Canva assets. It has its own search bar, folders selector menu, and refresh button. Read more about our Canva integration here (coming soon).
The Icons/Buttons on the top right side of the file manager window, going from left to right, you’re able to:
refresh your folders/files;
switch to List view*;
switch to Gallery view*;
upload or import a file;
create a new folder;
select one or more files or folders at once (and then move or delete them as needed); and
*additional layout options for your list or gallery view.
Where ever you can add an image or downloadable content (e.g. PDFs) or audio files is where you will find your file manager. 🤩 This can look different depending on which page you’re on.
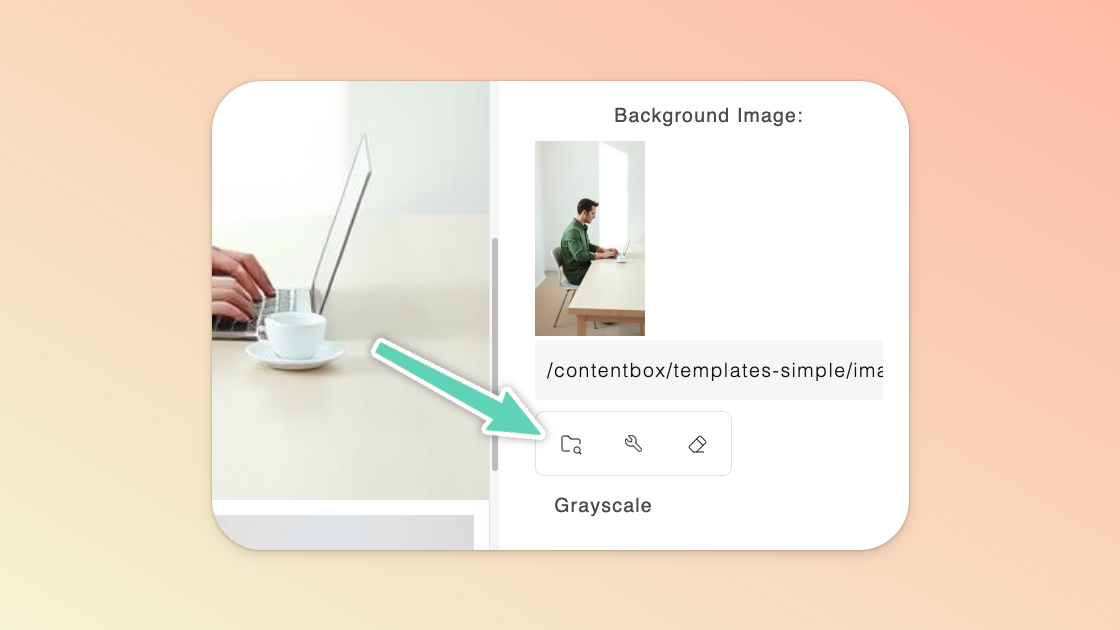
Simply hover over the preview or header image you’re looking to set or replace and click the image icon that appears. Clicking the icon will pop open the file manager. Import a new image from your computer or select one already in your file manager and click Select.
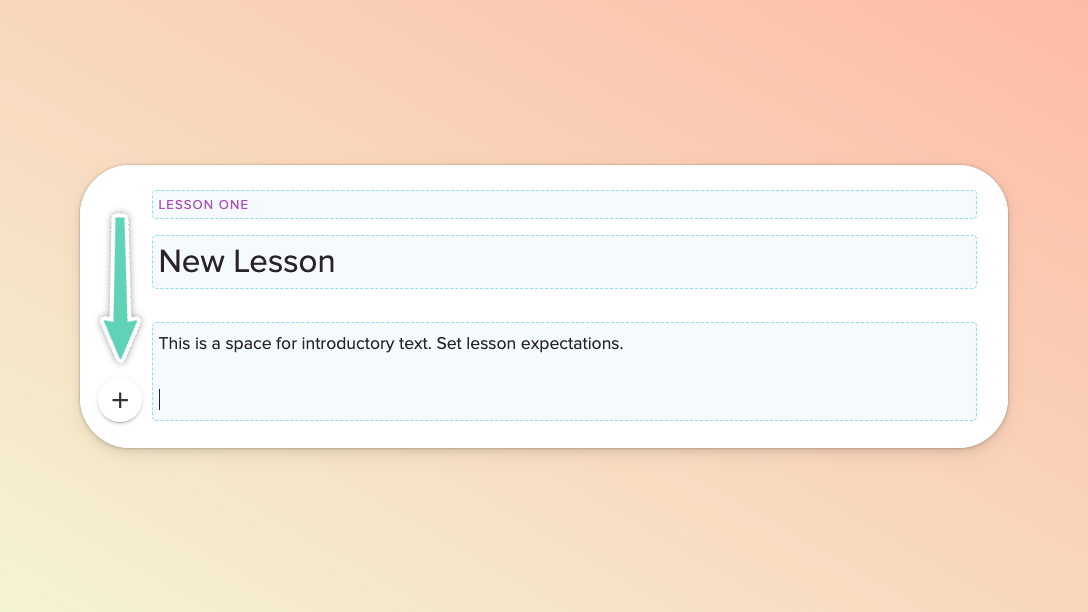
Click into any text area, hit enter on your keyboard to make a new line, click the ( + ) icon that pops up to the left of the text area, then click the insert image icon to open the file manager. Import a new image from your computer or select one already in your file manager and click Select.
If you’re using our old landing page template, you will find the file manager just as you would on any lesson or payment page (see above).
If you’re using our new landing page builder tool: click into any image element/content block, open its edit/settings panel and click the file manager (folder) icon. Once in the file manager, import a new image from your computer or select one already in your file manager and click Select.
You just need to connect to OpenAI and you can quickly begin using AI to help you create new images.

If you don’t already have an API key, visit the OpenAI website, and create an account or log in.
OpenAI now requires that you verify your identity in order to generate images. Visit the Verification section of this page to complete the process. Note that it can take up to 15 minutes for your verification to take affect.
While you wait, fund your OpenAI account with at least $5. This too is critical for generating images.
On the API Keys page, click the + Create new secret key button. Name your key and grant All permissions and click the Create secret key button. Once your API Key is generated, copy it and save it in a safe place.
Open your Teachery file manager (wherever you intend to insert an image), open the Generate Image tab, click the Connect OpenAI button, paste your key in and save.
Your status will change from Not Connected to OpenAI Key Connected and, if you hadn’t yet completed steps (2) or (3), you will be prompted to do so. Sorry, you will not be able to generate images until OpenAI has verified you and you’ve funded your OpenAI account.
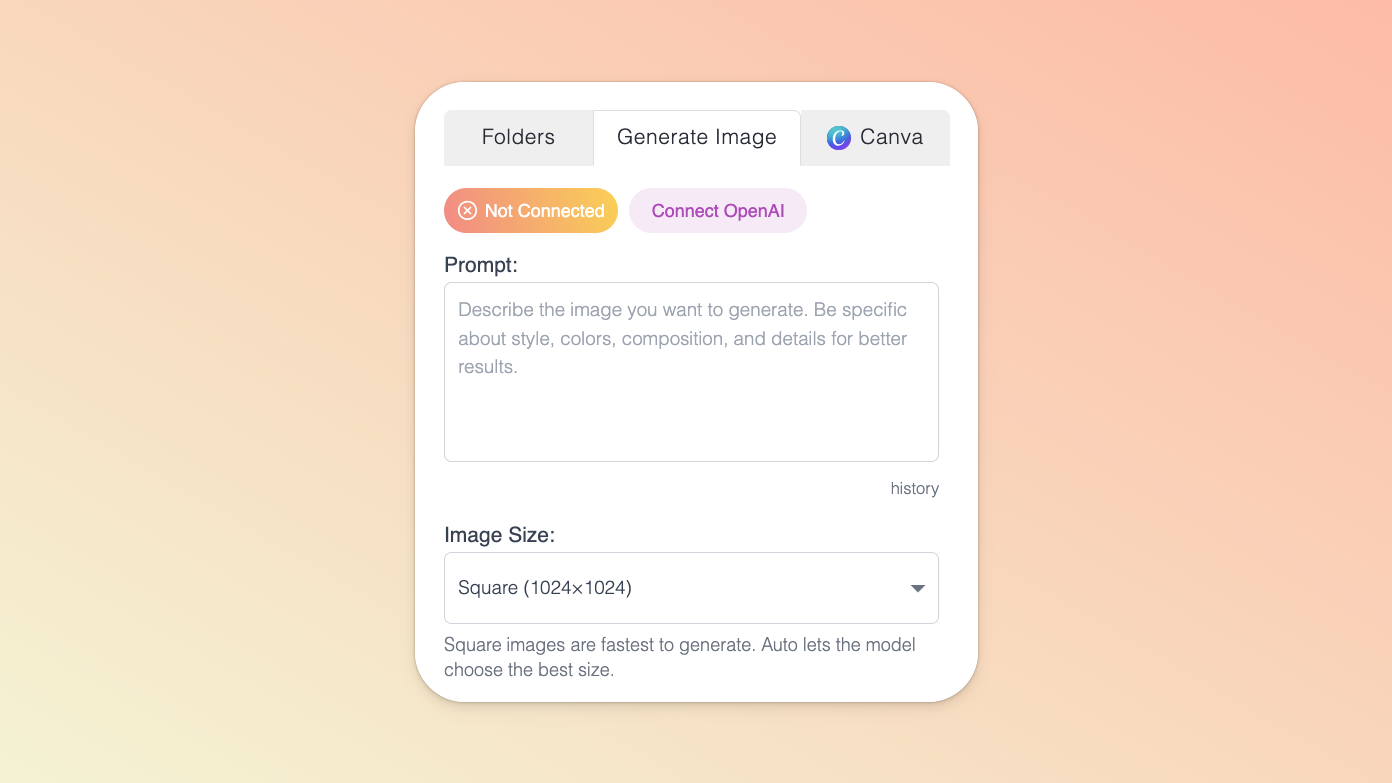
To the right of the Generate Image tab of your file manager, find or create the (sub)folder to which you’d like OpenAI to save your generated image. Then, insert a descriptive prompt in the field provided and select:
the image size (size options are limited to 1024x1024 [square], 1536x1024 [landscape], and 1024x1536 [portrait];
the image background (auto, transparent, or opaque); and
the file format (.png or .jpeg).
Click the Generate button and OpenAI will create and save an image to your file manager.
Click into any text area, hit enter on your keyboard to make a new line
Type any text and the HIGHLIGHT that text
A widget will appear and you'll click the third icon +:
In the +: menu, click the image icon
In the image menu, click the link icon and paste your image URL*
Hit "Insert" and you're all set! 👌
The text you typed will drop below the image, simply highlight it and delete it if you don't need it.
*Note: Make sure the URL has .png, .jpg, or .gif at the end of it or it will not work properly. 🙂
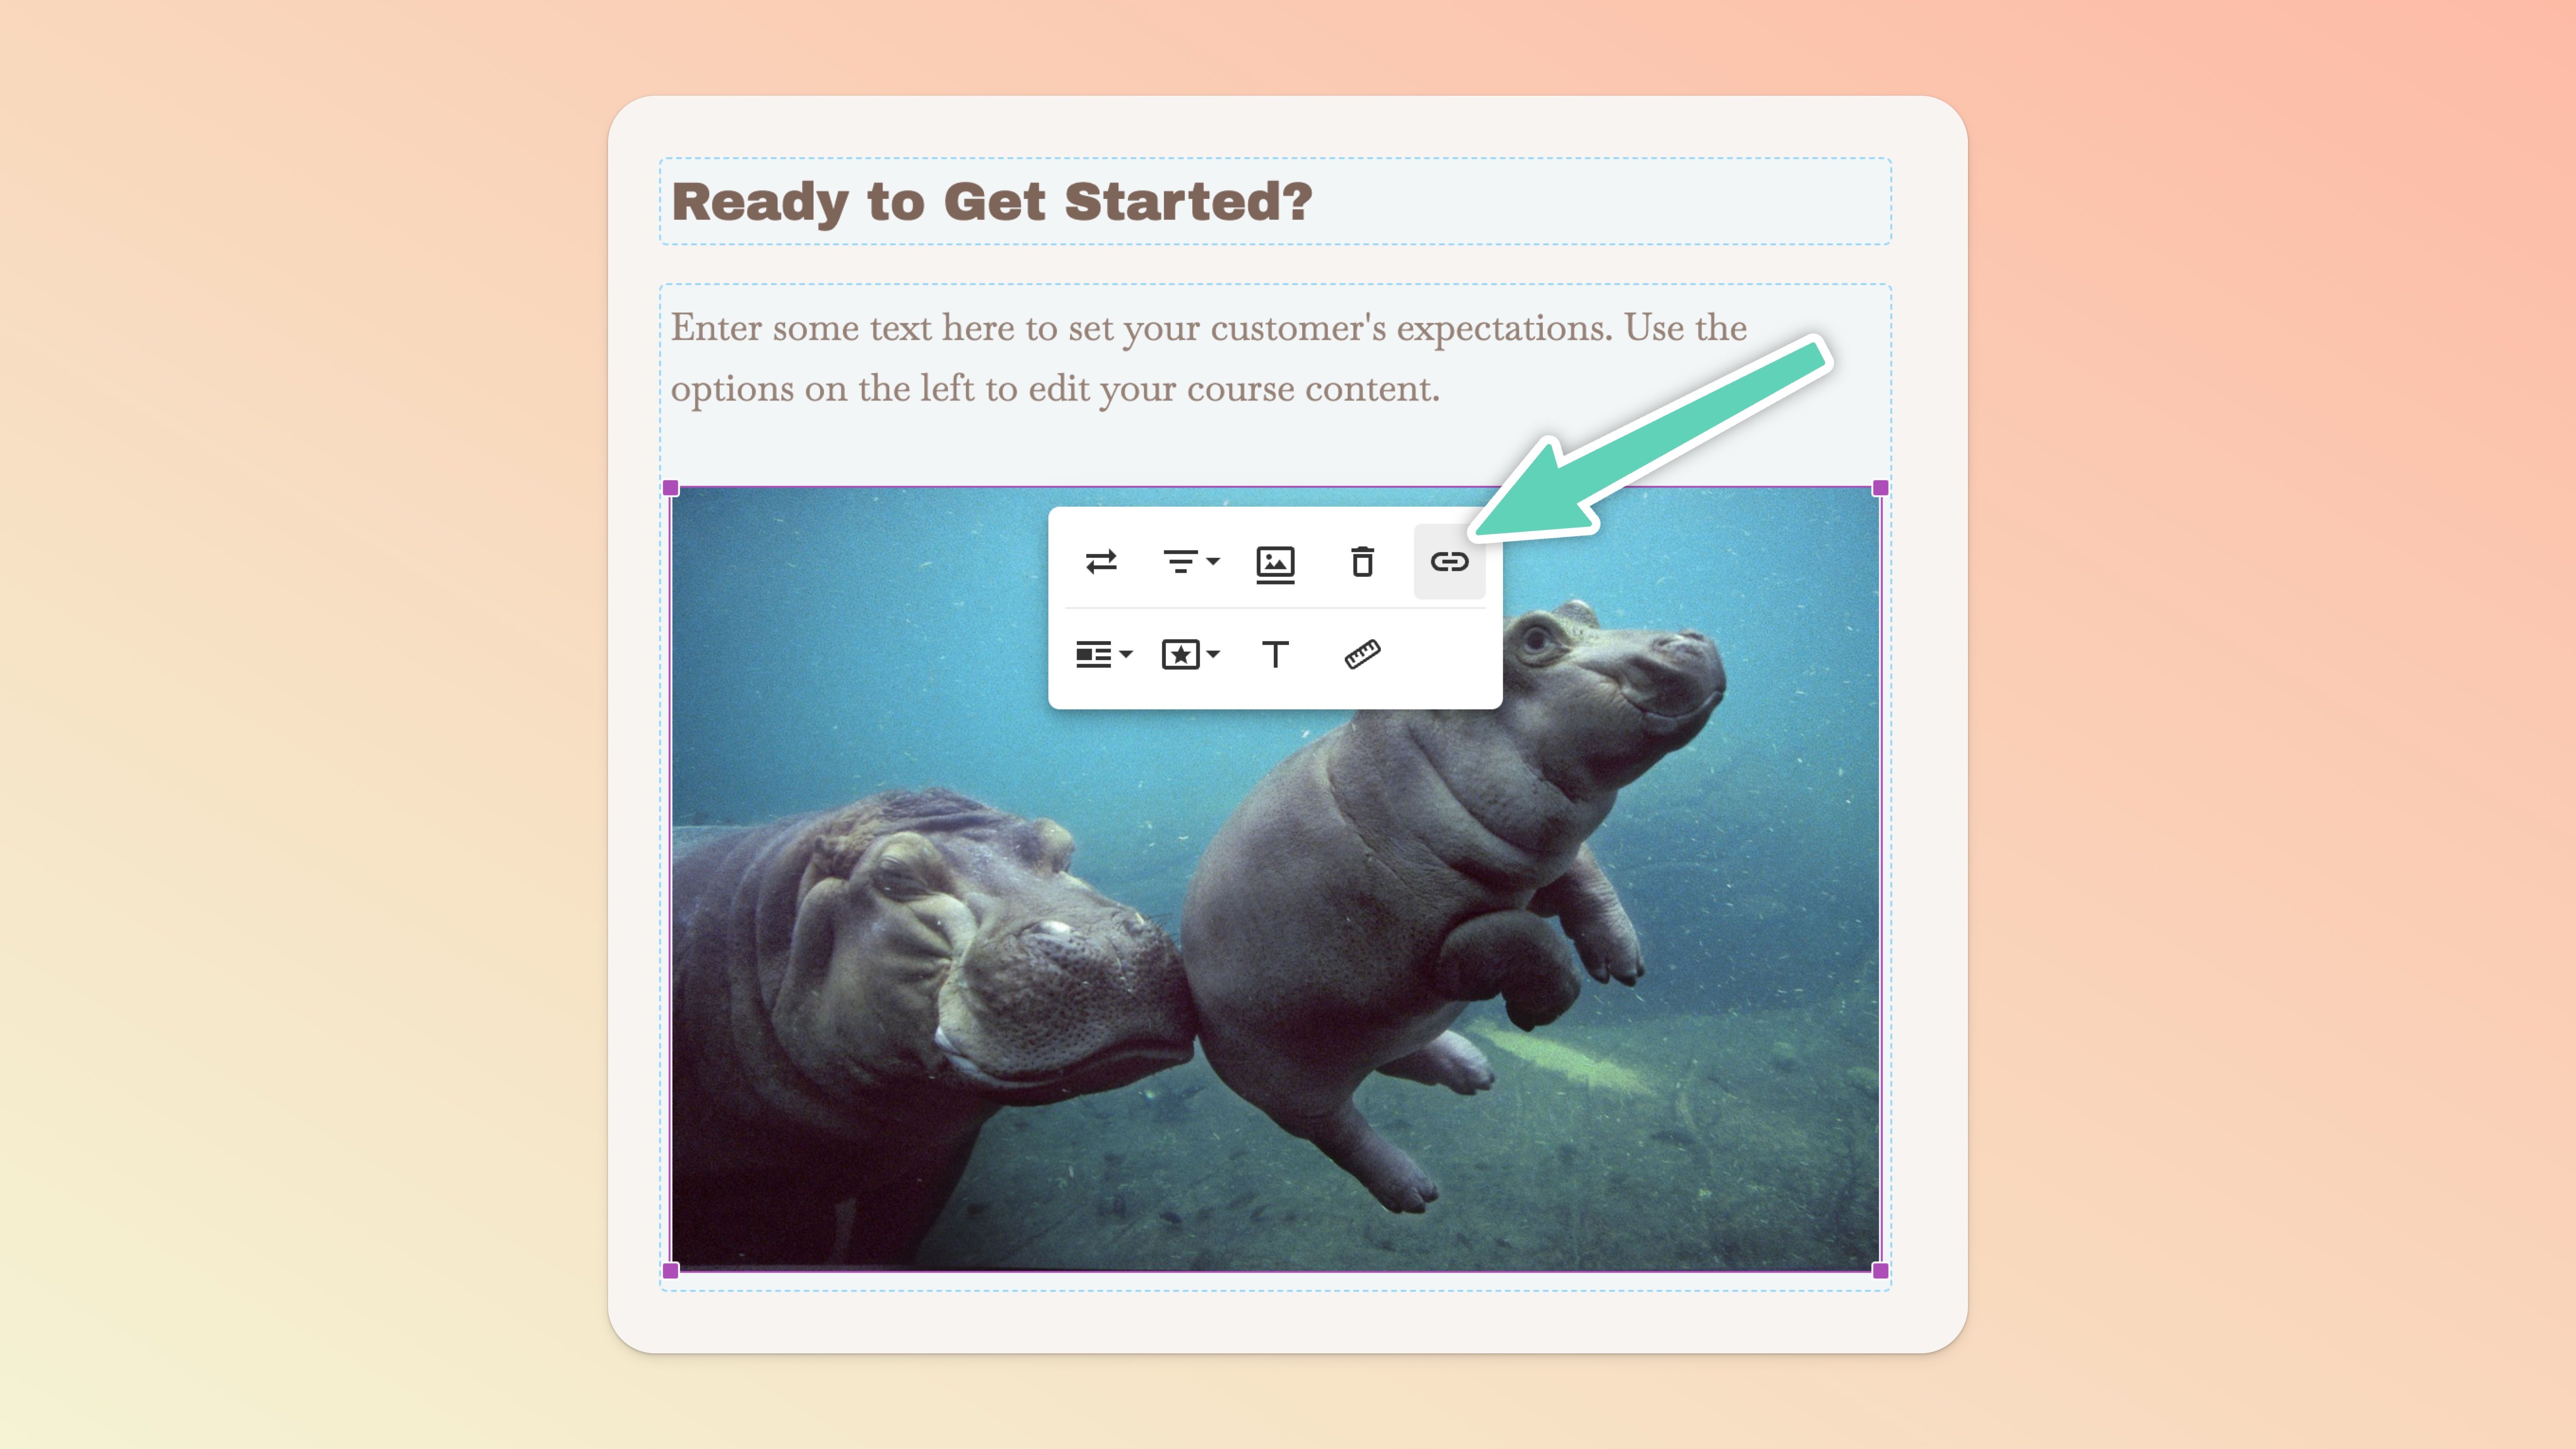
Easy peasy! Just click an image you've added and a toolbar of options will appear below it. Click the link 🔗 icon and add your link.
All links added will automatically open in new windows by default. To edit your link, just click your image again, bring up the toolbar, click the link icon and edit. 👍
Note: If you want to add a mailto link, simply type "mailto:[email protected]" (without the quote marks).
You can only upload images with a maximum size of 50MB and in JPG, JPEG, PNG, GIF, or WebP format.
Optimize your images with a tool like TinyPNG.com, TinyJPG.com, or Squoosh.app. The slower your course loads due to large images, the less awesome the experience for your students. If you need to optimize GIFs, use ezgif's optimize tool.
Don't know where to look for images? Use sites like unsplash.com or deathtostock.com to find great stock photography.
Looking for a fun GIF to add to your course? You can find greats ones on giphy.com and easily embed them.
