If you aren't familiar, an "Upsell" (a.k.a order bump) is a way to create an add-on purchase opportunity during the checkout process. In this help doc, we'll introduce you to our Upsells feature.
We also have three other Upsell help docs:
1⃣ Bundle Upsell - Offer multiple courses at a one-time offer price
2⃣ Anything Else Upsell - Offer anything else as an Upsell (ex: 1-hour Zoom coaching, a physical product, or something else outside of Teachery)
3⃣ Upsells + Affiliates - Have your Course Affiliates get commission for Upsells too.
🎥 There's also a video walkthrough at the bottom of this help doc if you learn best through video and audio.
Let's jump right into a common scenario for using Upsells: you have a course (let’s call it your "main course") and then you create a second Teachery course to promote in your main course’s payment page.
For our working example, let’s assume the following course names and prices:
Main Course - Sourdough Your Life 🍞 Course ($100 course)
Second (Upsell) Course - 🍲 Souper Duper Course ($50 Upsell offer)
This is where you set the name of the Upsell, choose the Upsell Course, set your price, and set your optional discount.
The Upsells feature can be found inside any course editor under the Payment Pages section of the left sidebar menu. Once you click into the Upsells section, simply click the New Upsell button to get going.

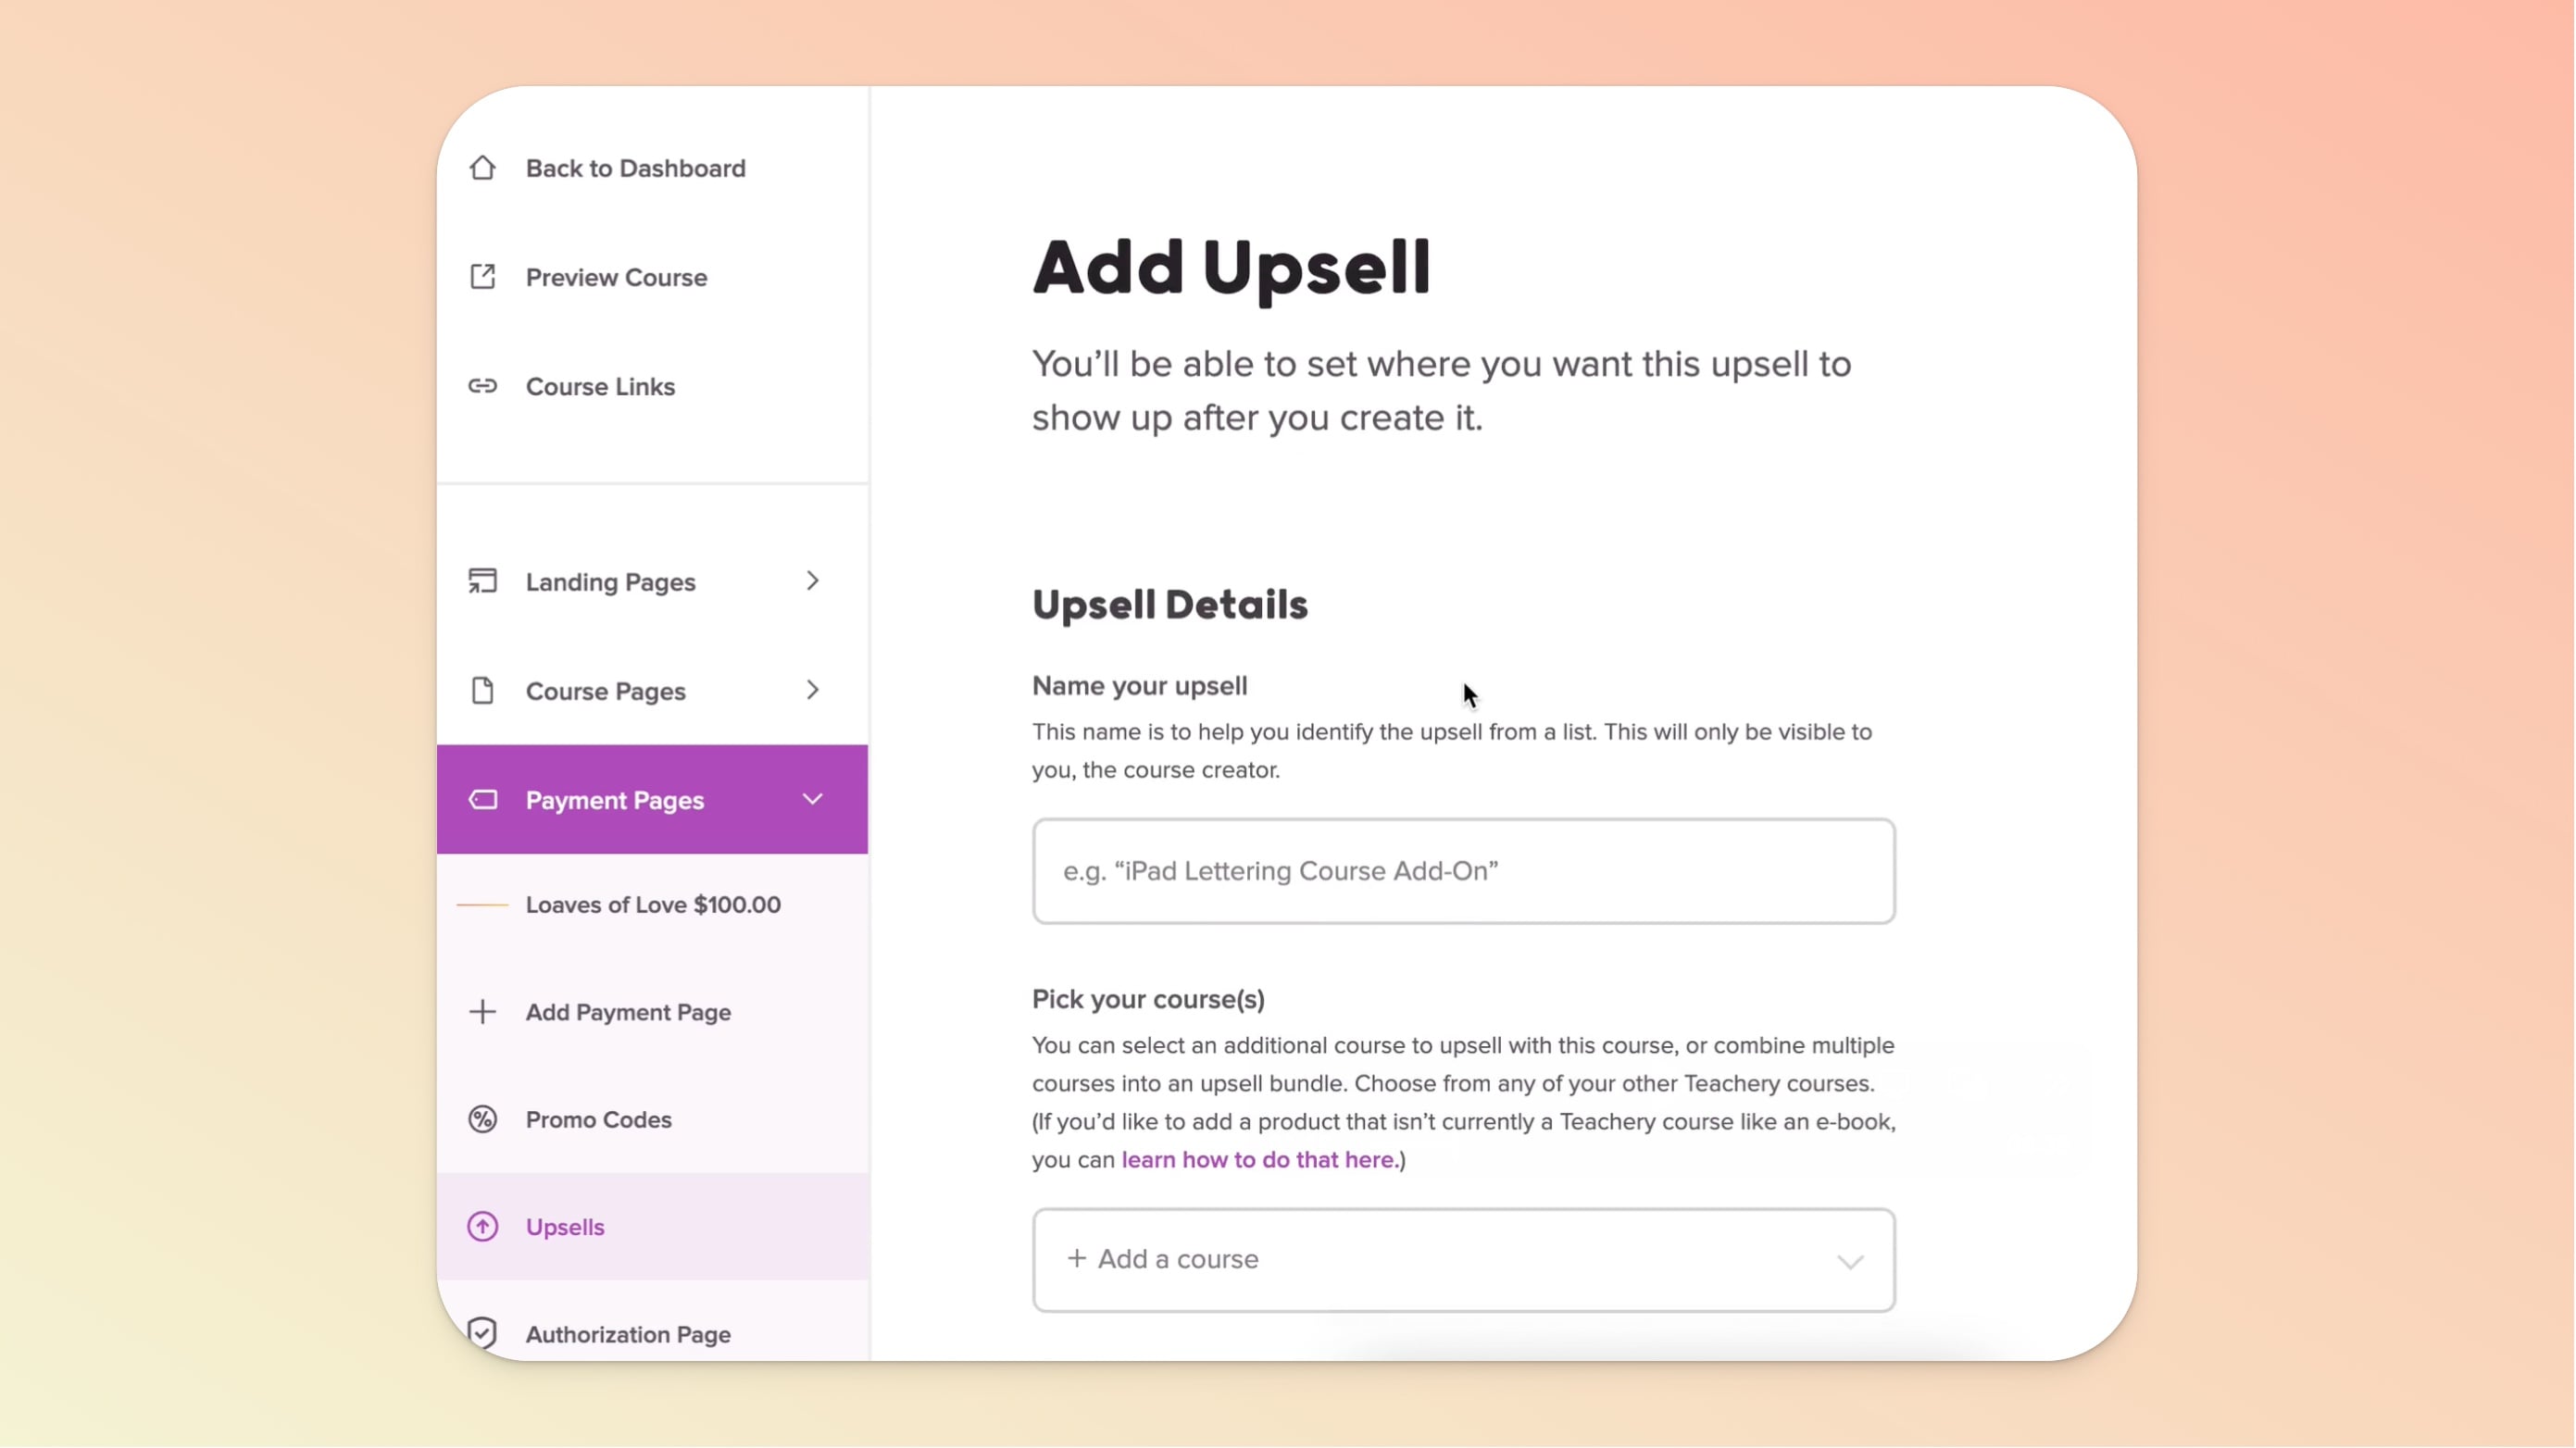
Name Your Upsell - Make this clear and obvious as you’ll need to search for it elsewhere and may be visible to your customers. You can update the name later if you like.
Pick Your Course(s) - This is where you select which course(s)/products(s) will be added to your customer's account when they purchase this specific Upsell.
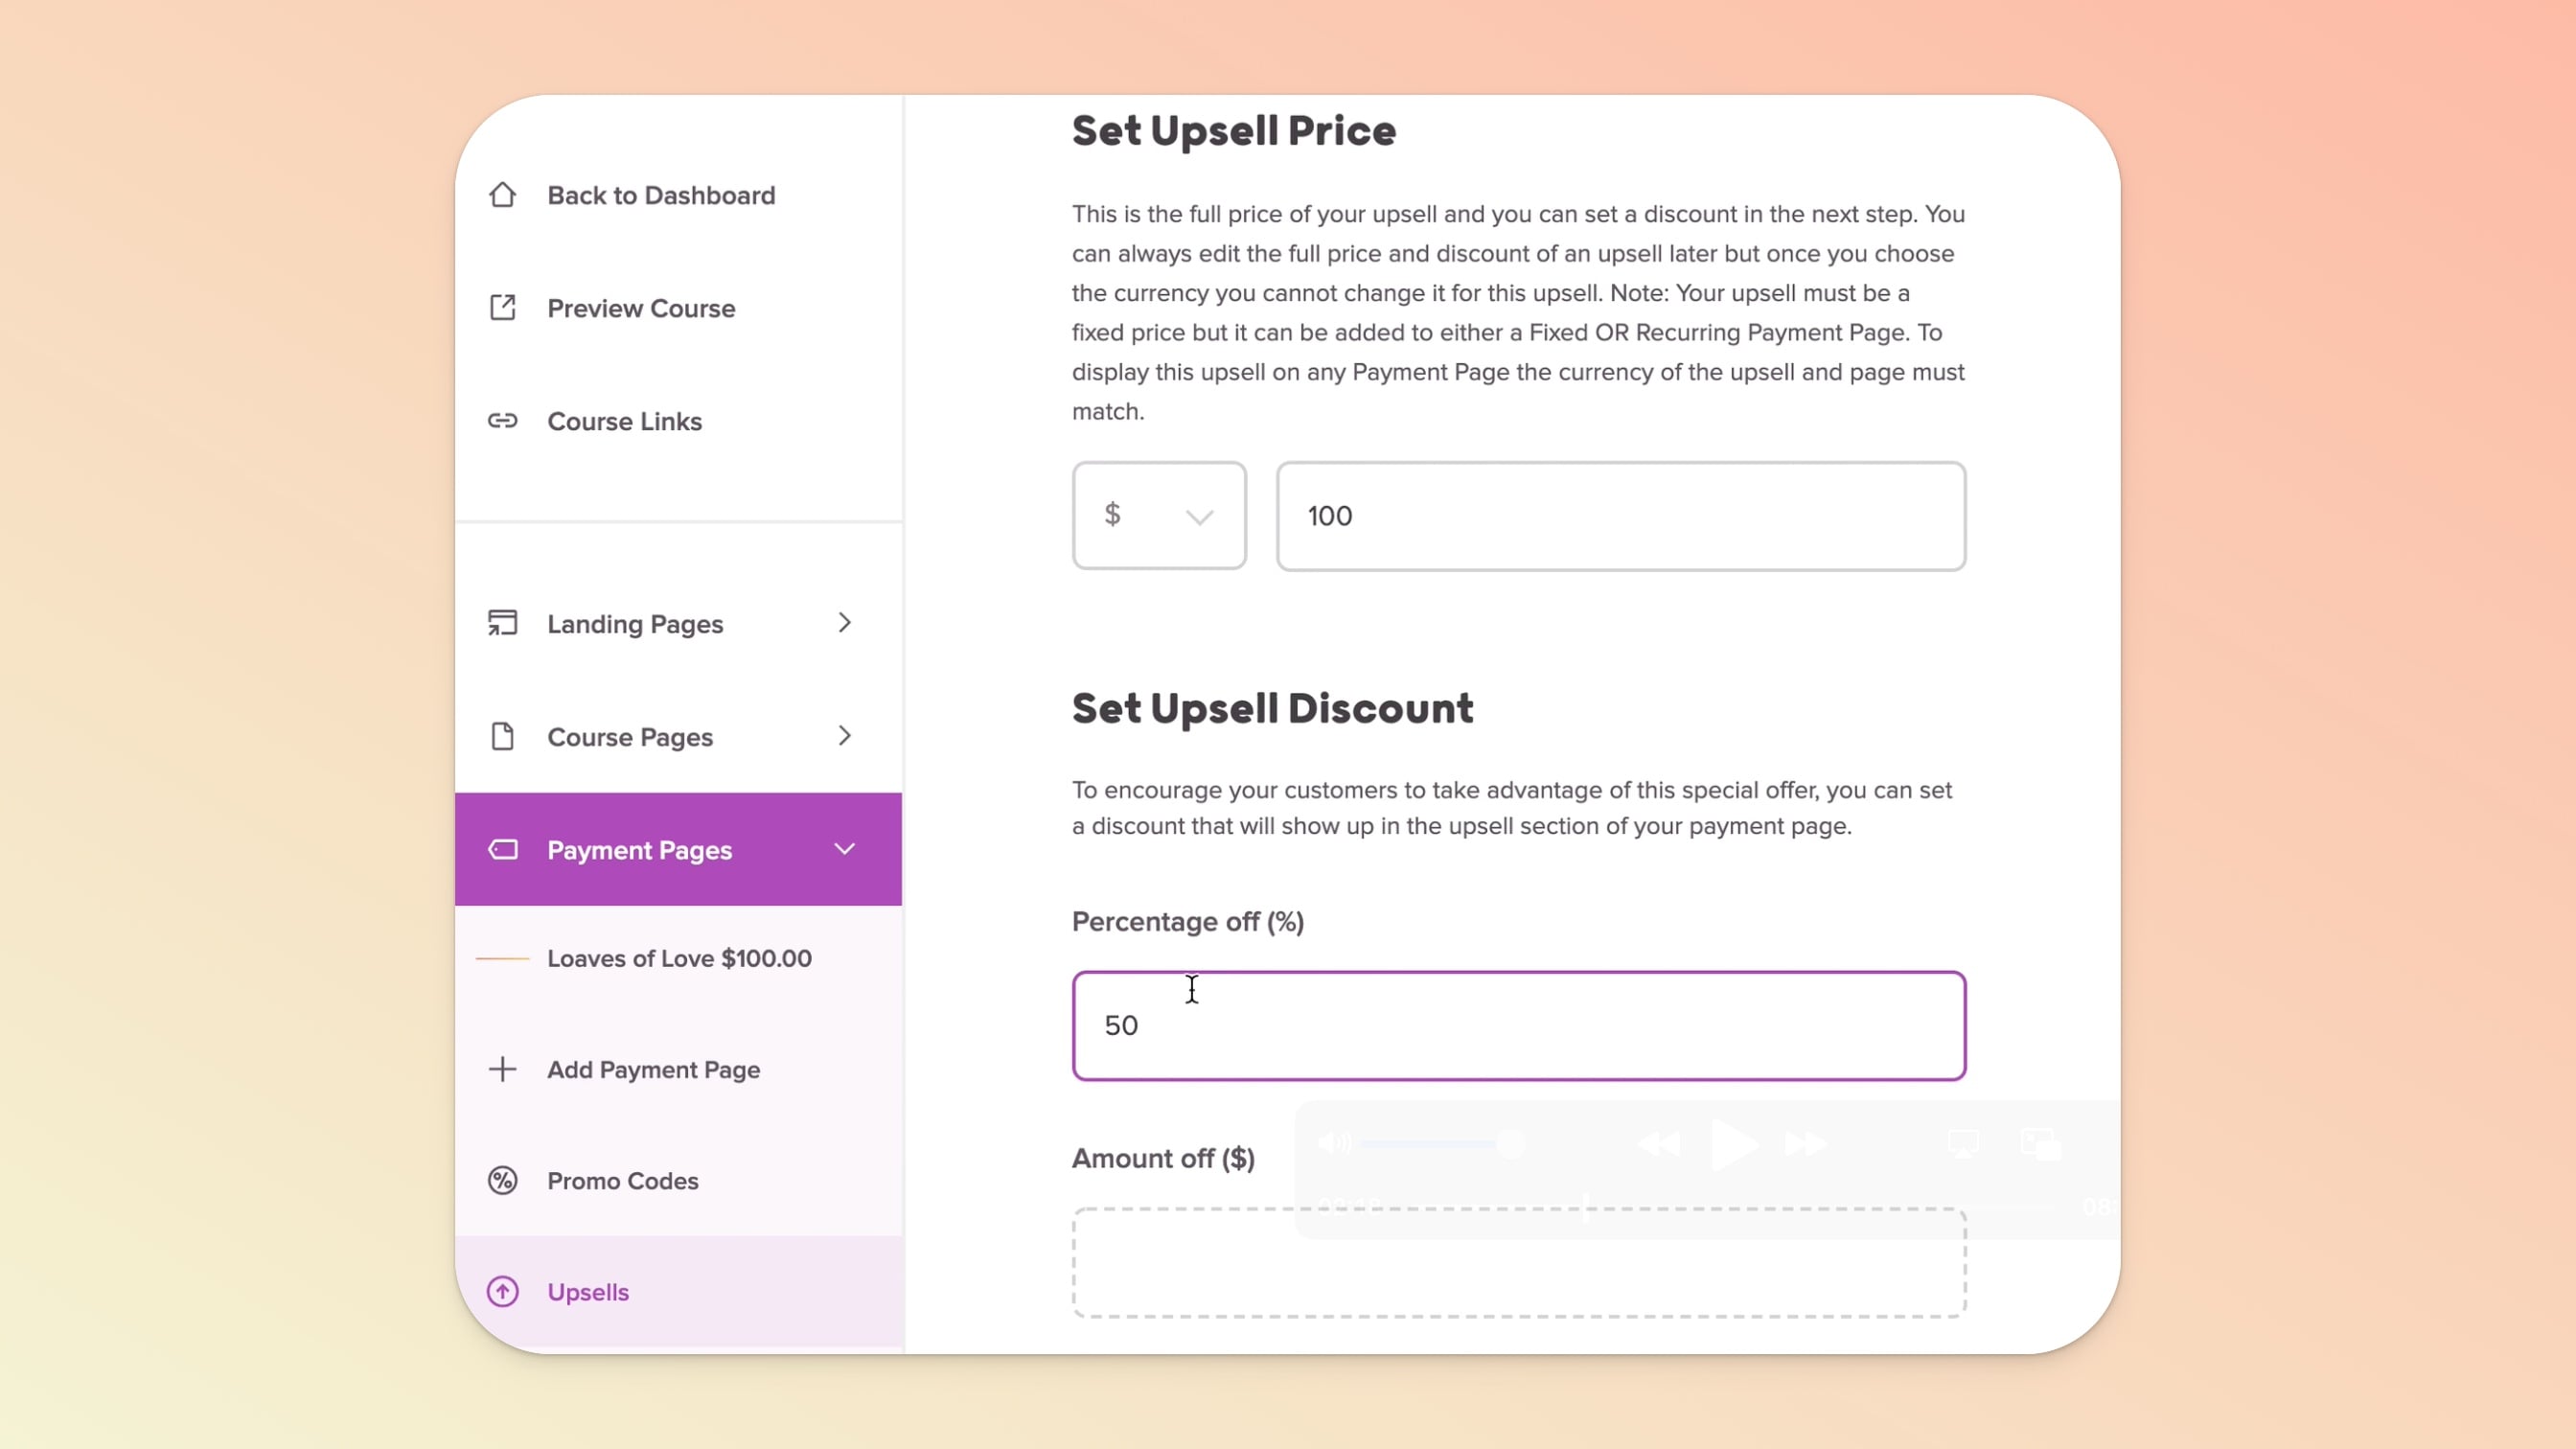
Set Upsell Price - This is where you choose the full price for your Upsell as well as the currency. Most often, this will be the full price you sell your second course for.
For example, the 🍲 Souper Duper Course will have a full price of $100 and then we can set and display a discount offer (see below).

Set Upsell Discount - This is where you'll set the discount for your Upsell (if applicable).
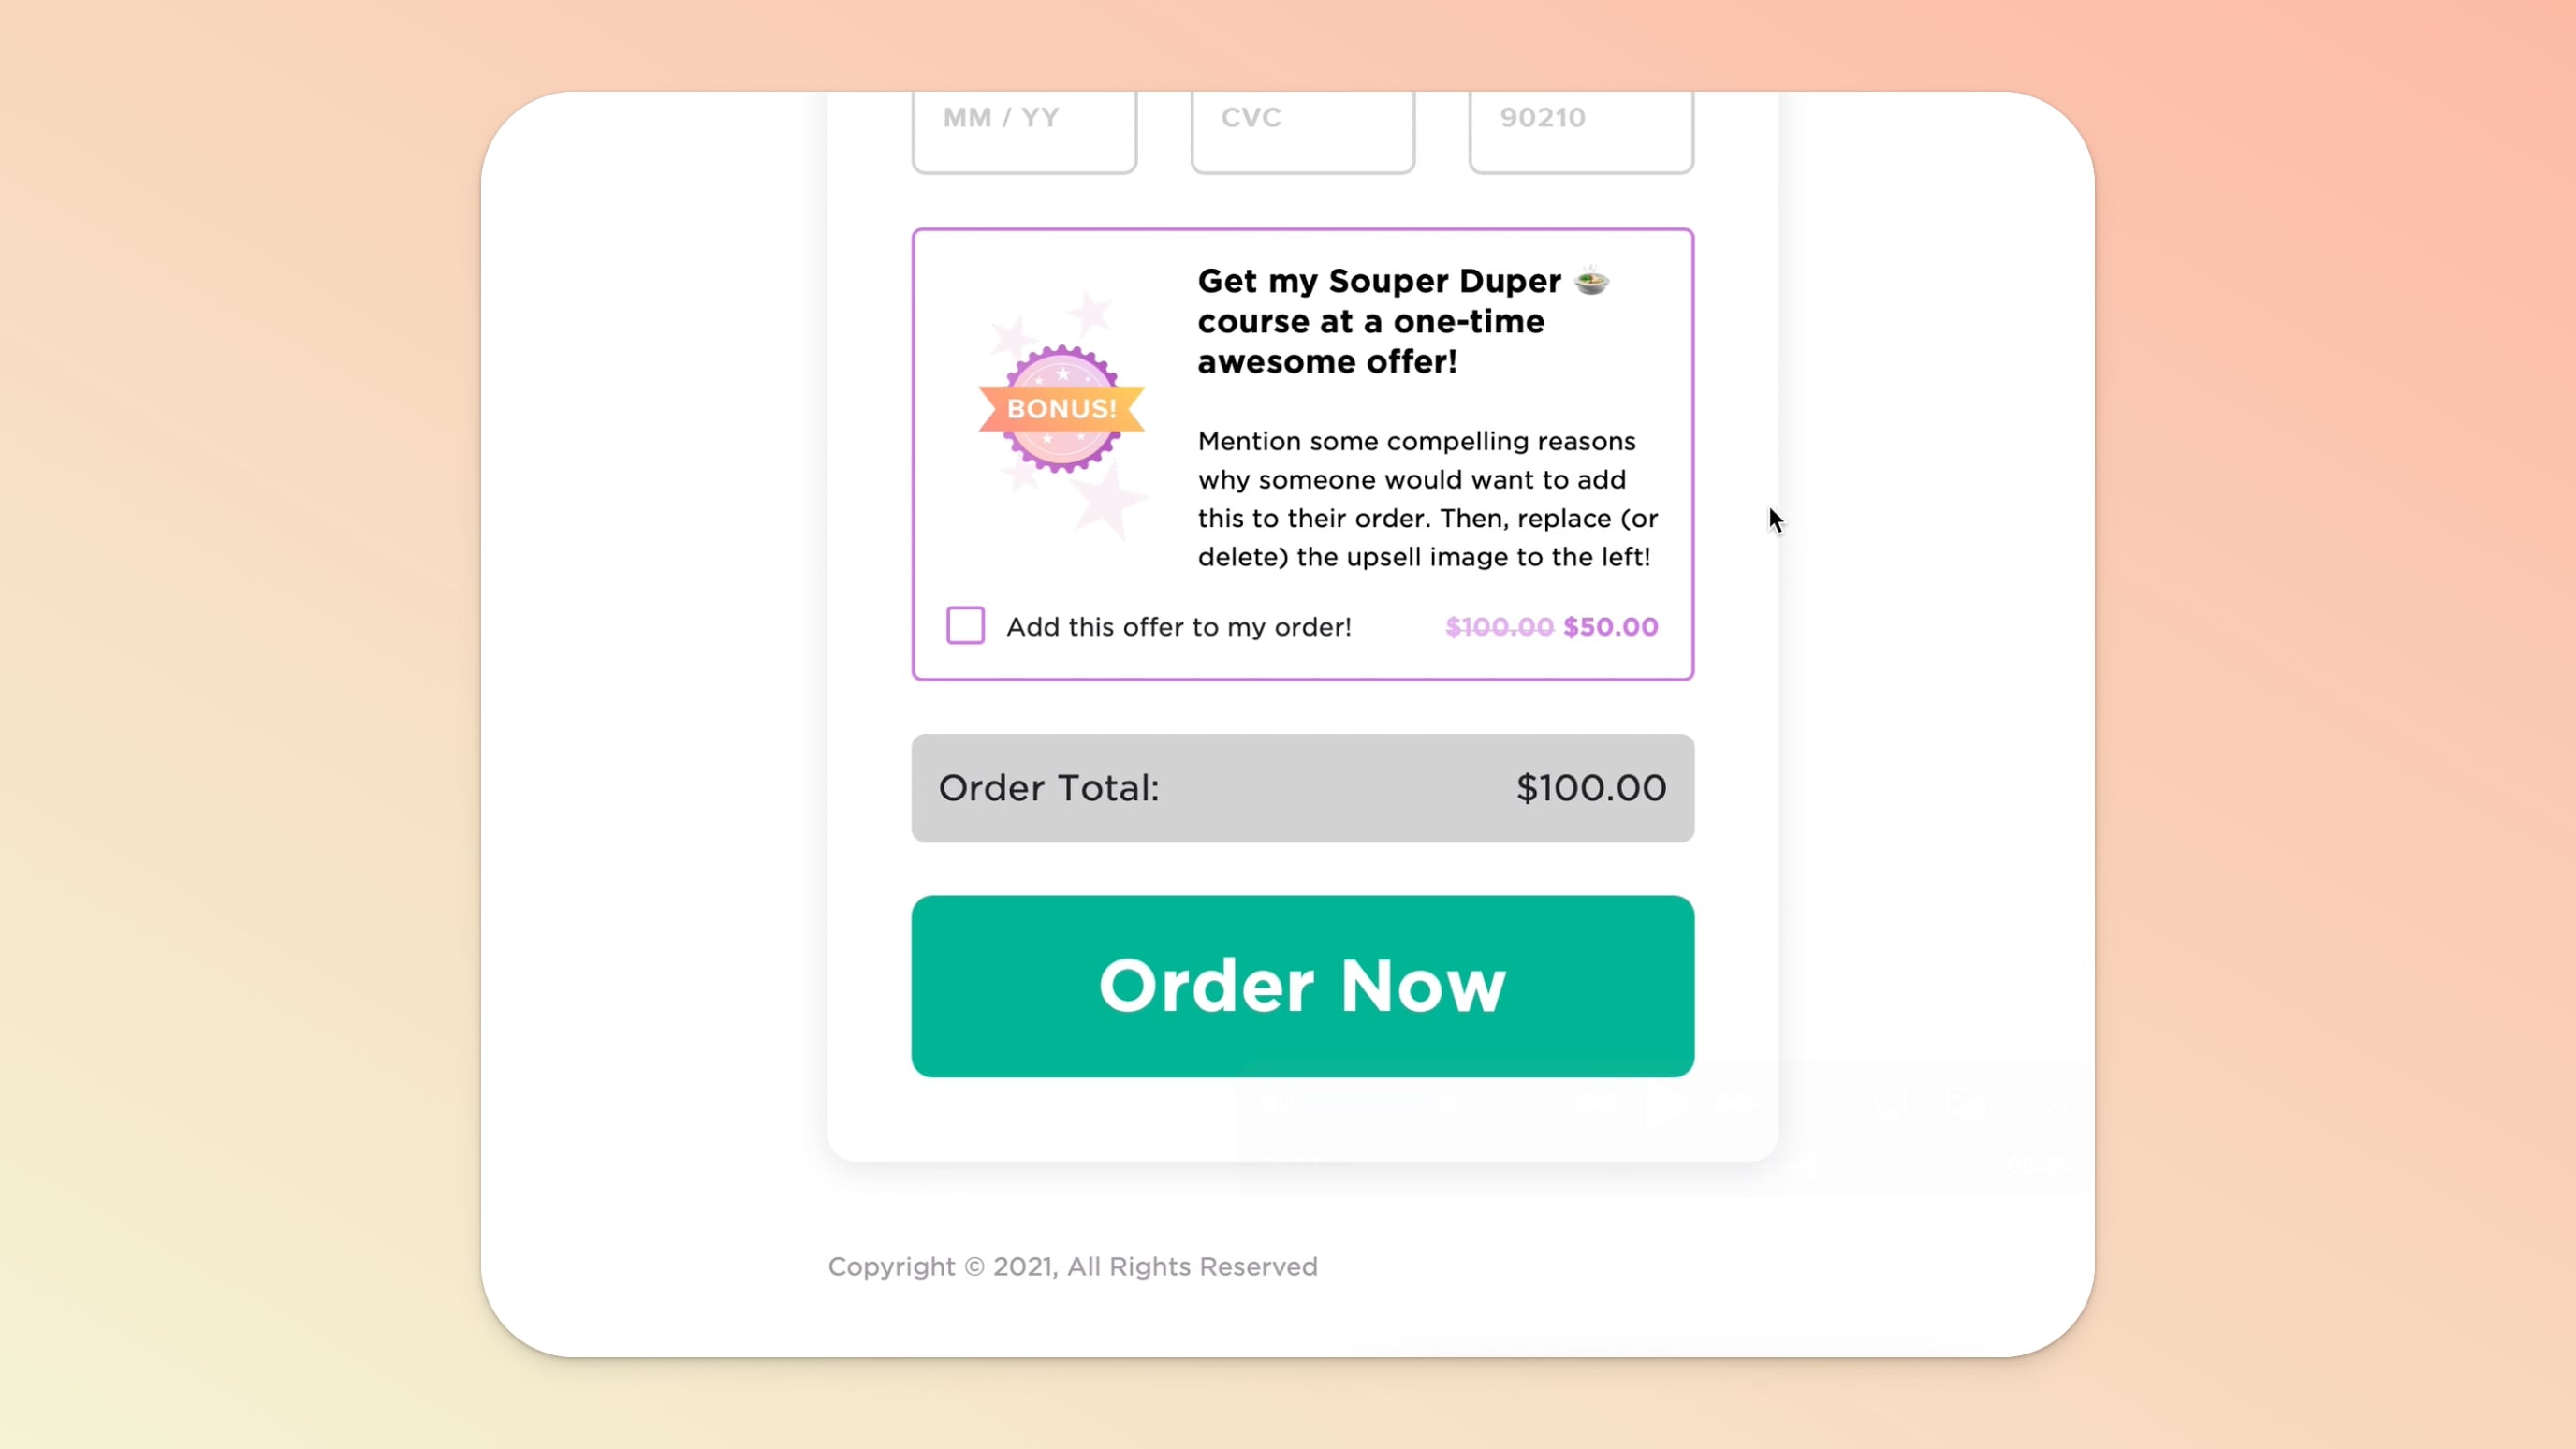
For example, the full price of the Upsell course 🍲 Souper Duper Course is $100. You want to offer a discount to entice customers to grab the Upsell offer, so you set a 50% OFF discount (you can do % OFF or $ OFF). The customer will later see the full price crossed out and the Upsell price of $50 (as depicted further down below).
Once you finish adding all your Upsell Details and hit the Create Upsell button, you'll see your Upsell is ready for placement (Step #2 below)!
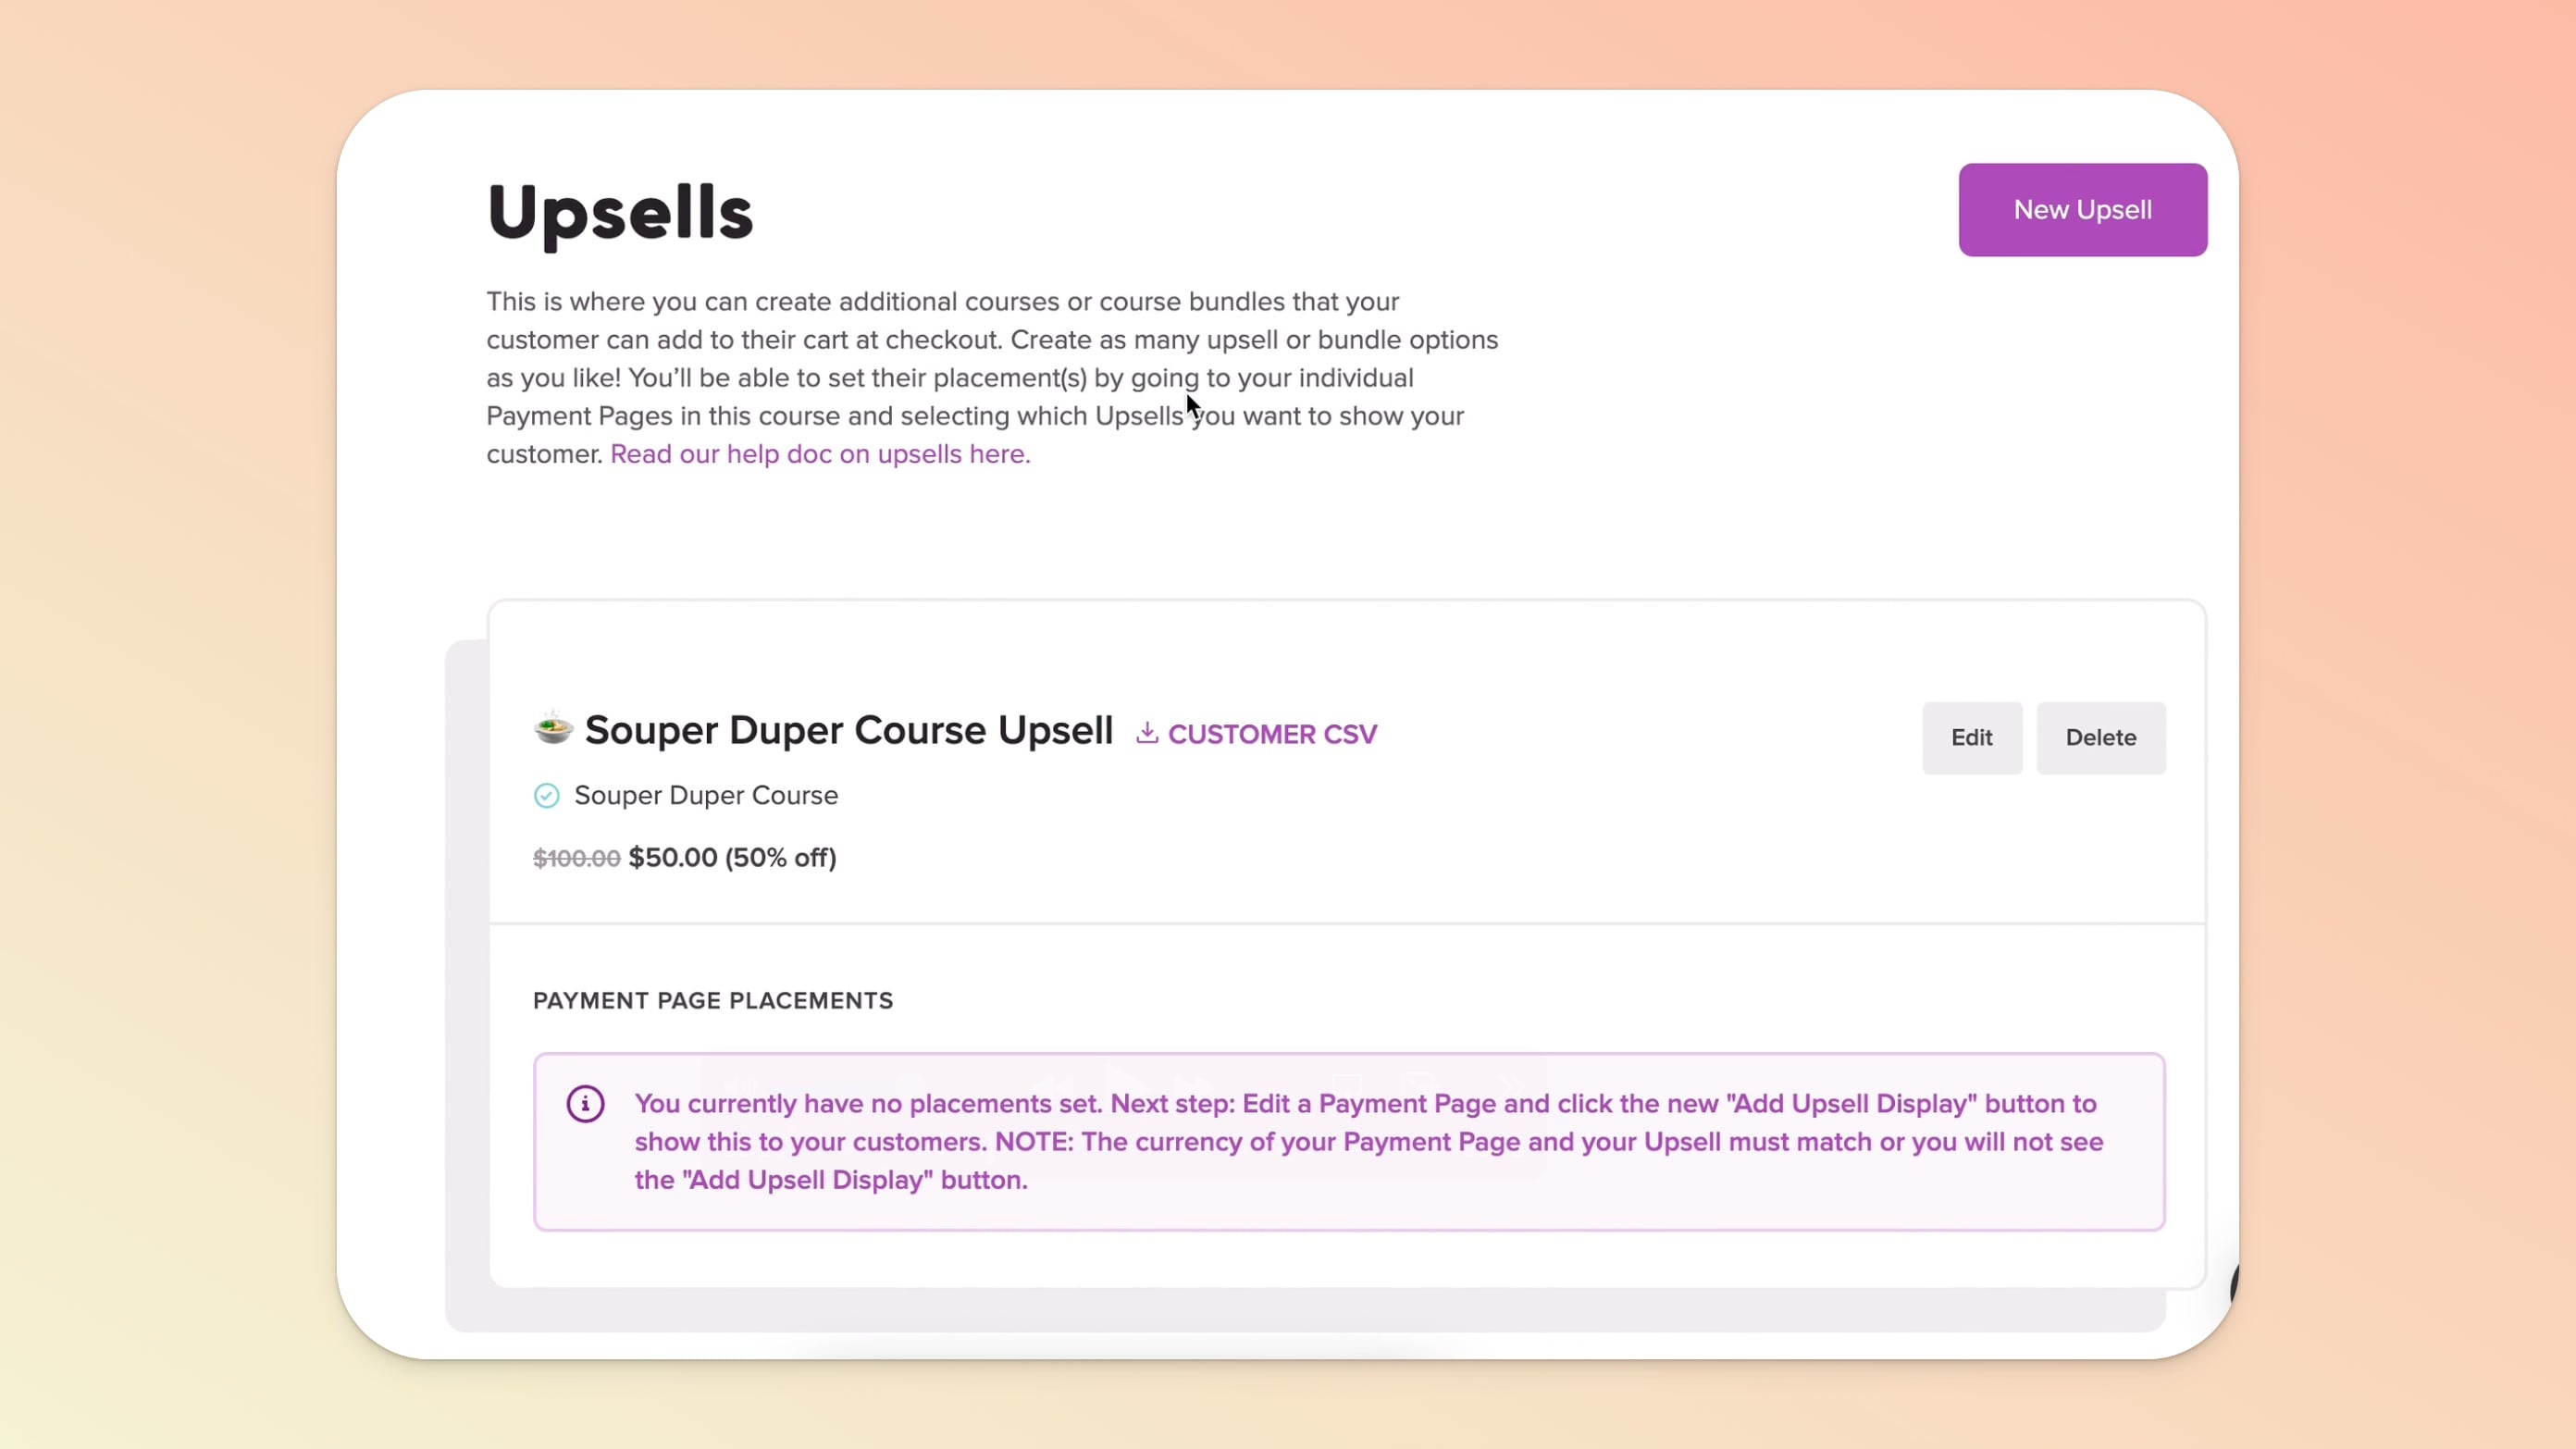
This is where you'll add your Upsell as an option for your customer to add on during checkout.
In the Payment Pages section of the left sidebar, you'll want to click in to edit the payment page you want to add your newly created Upsell to.
Once you're viewing the payment page, scroll down below the Payment Information section and you'll find an orange Add Upsell Display toggle button. Then choose your Upsell from the dropdown menu that appears.

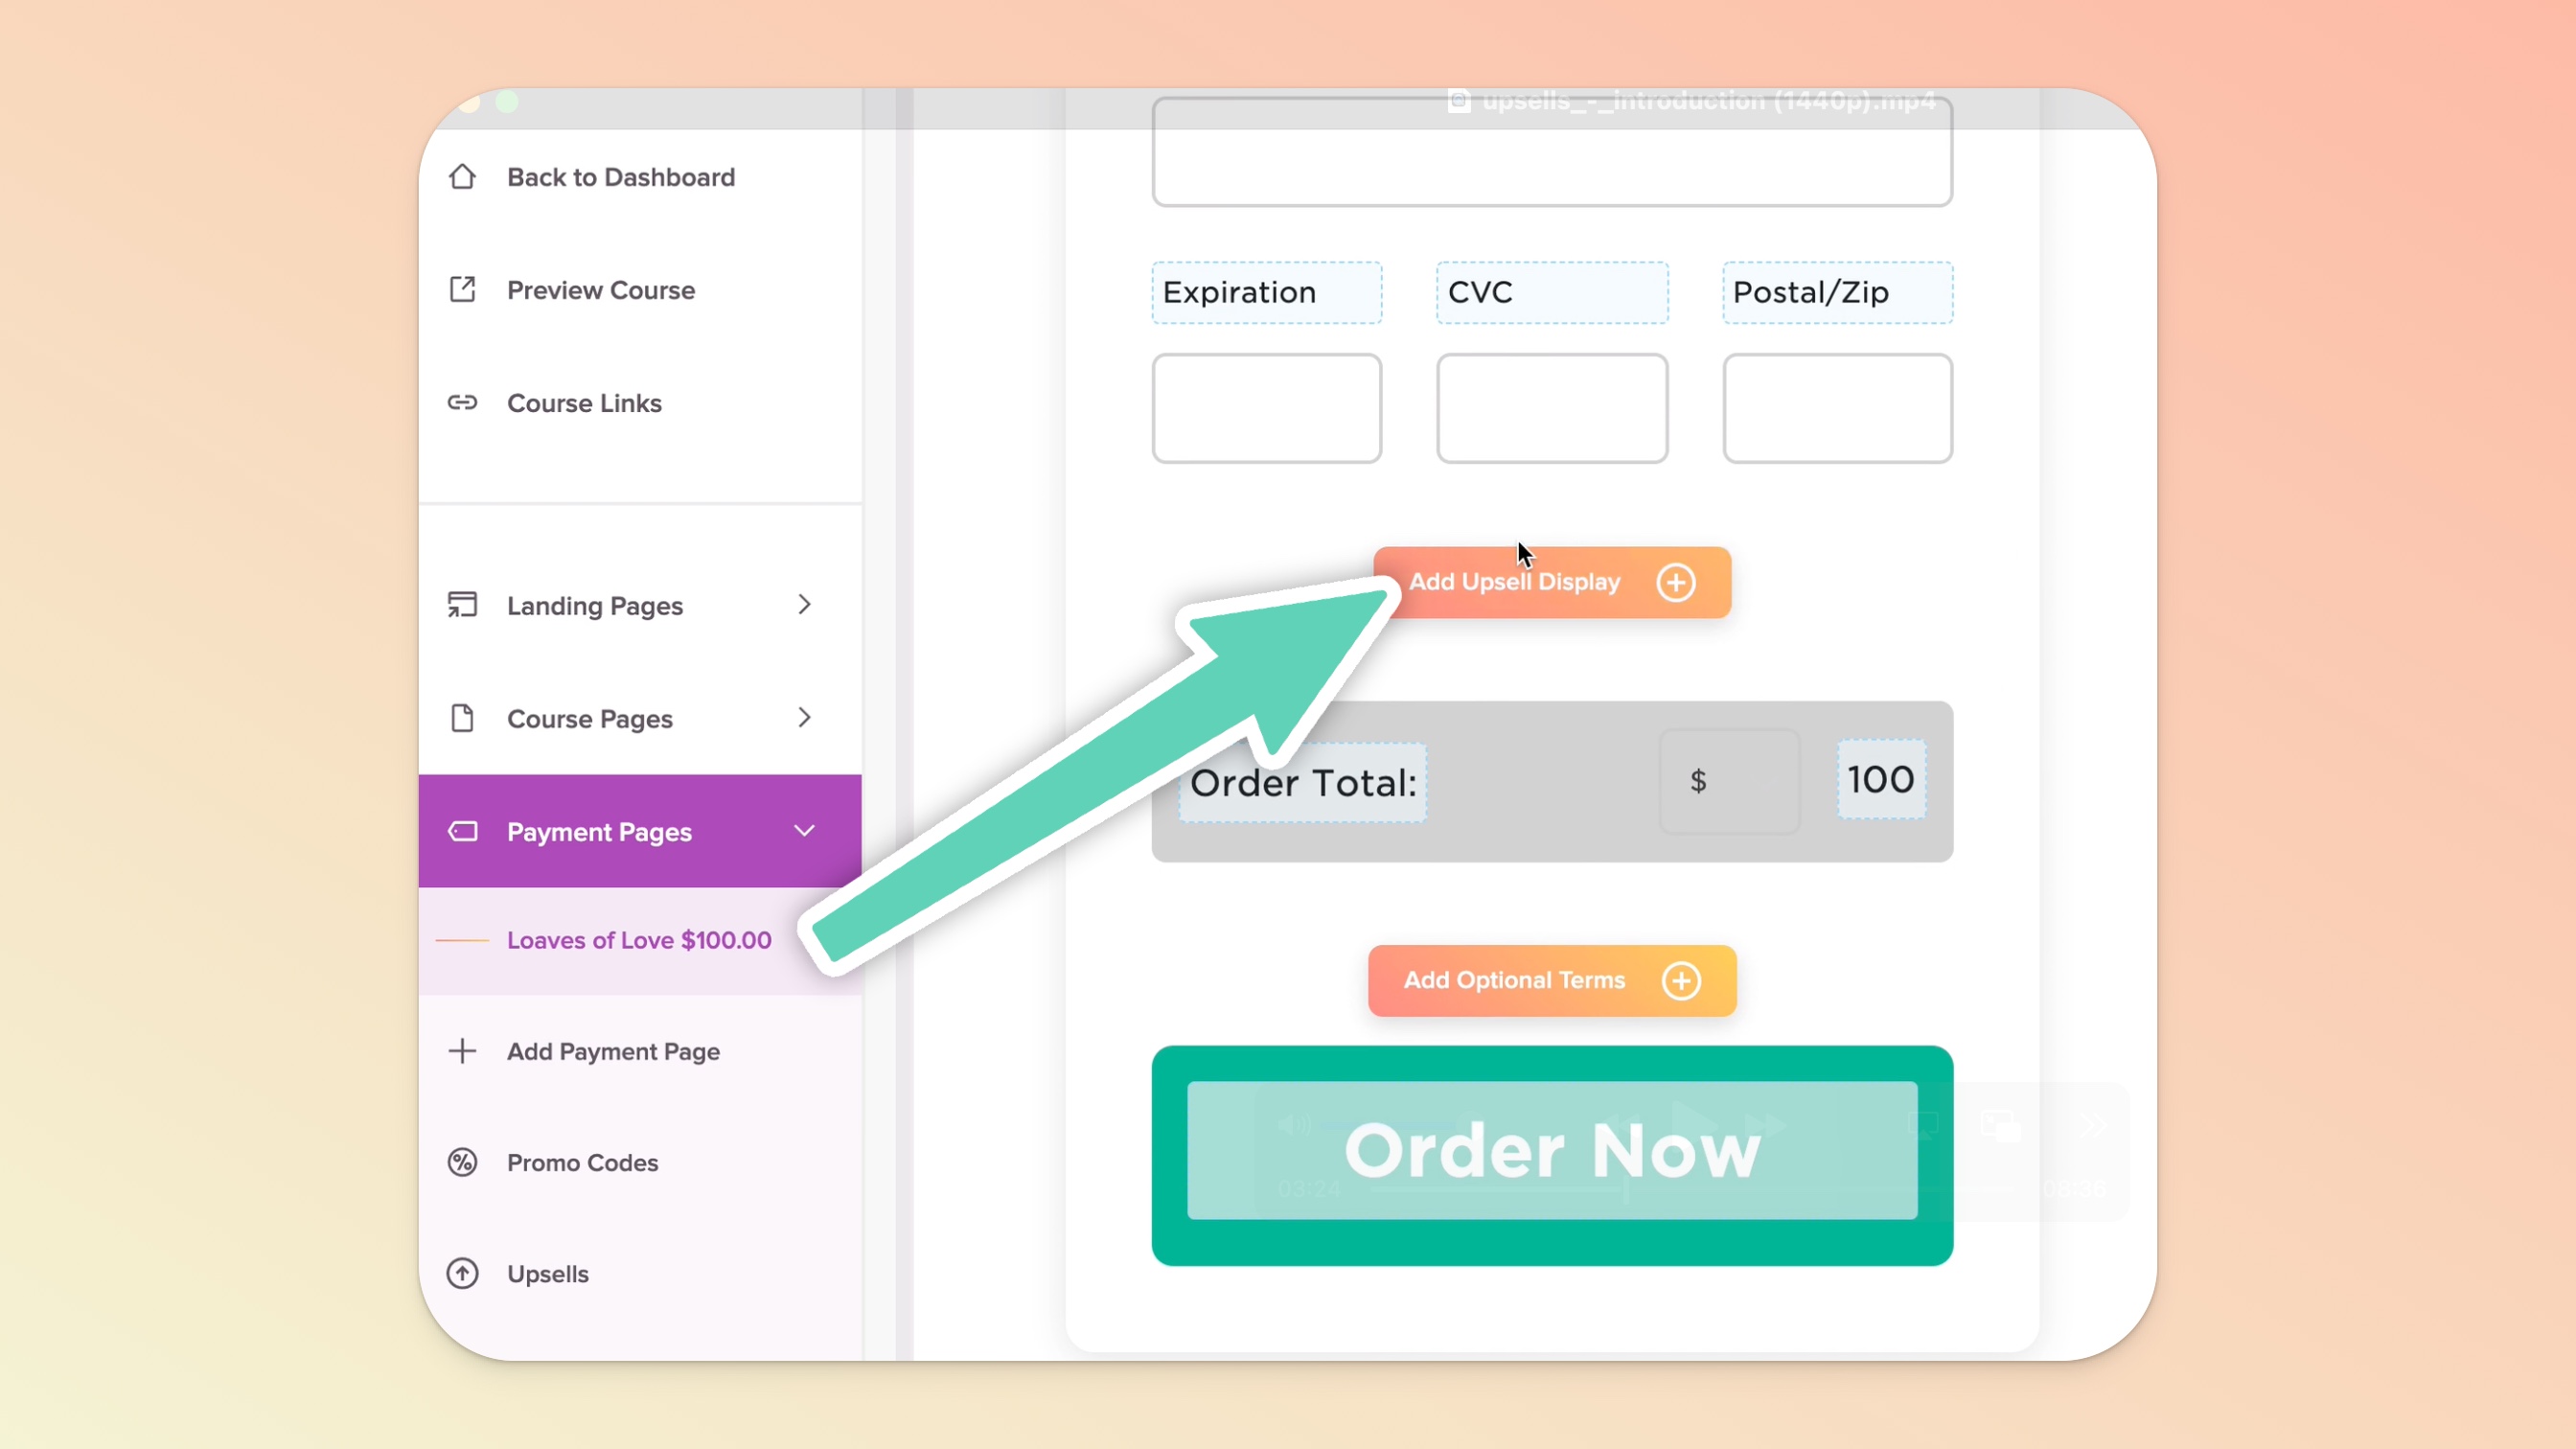
Great! You've added the Upsell to your payment page and will now see editable areas which you can customize (see the next step).
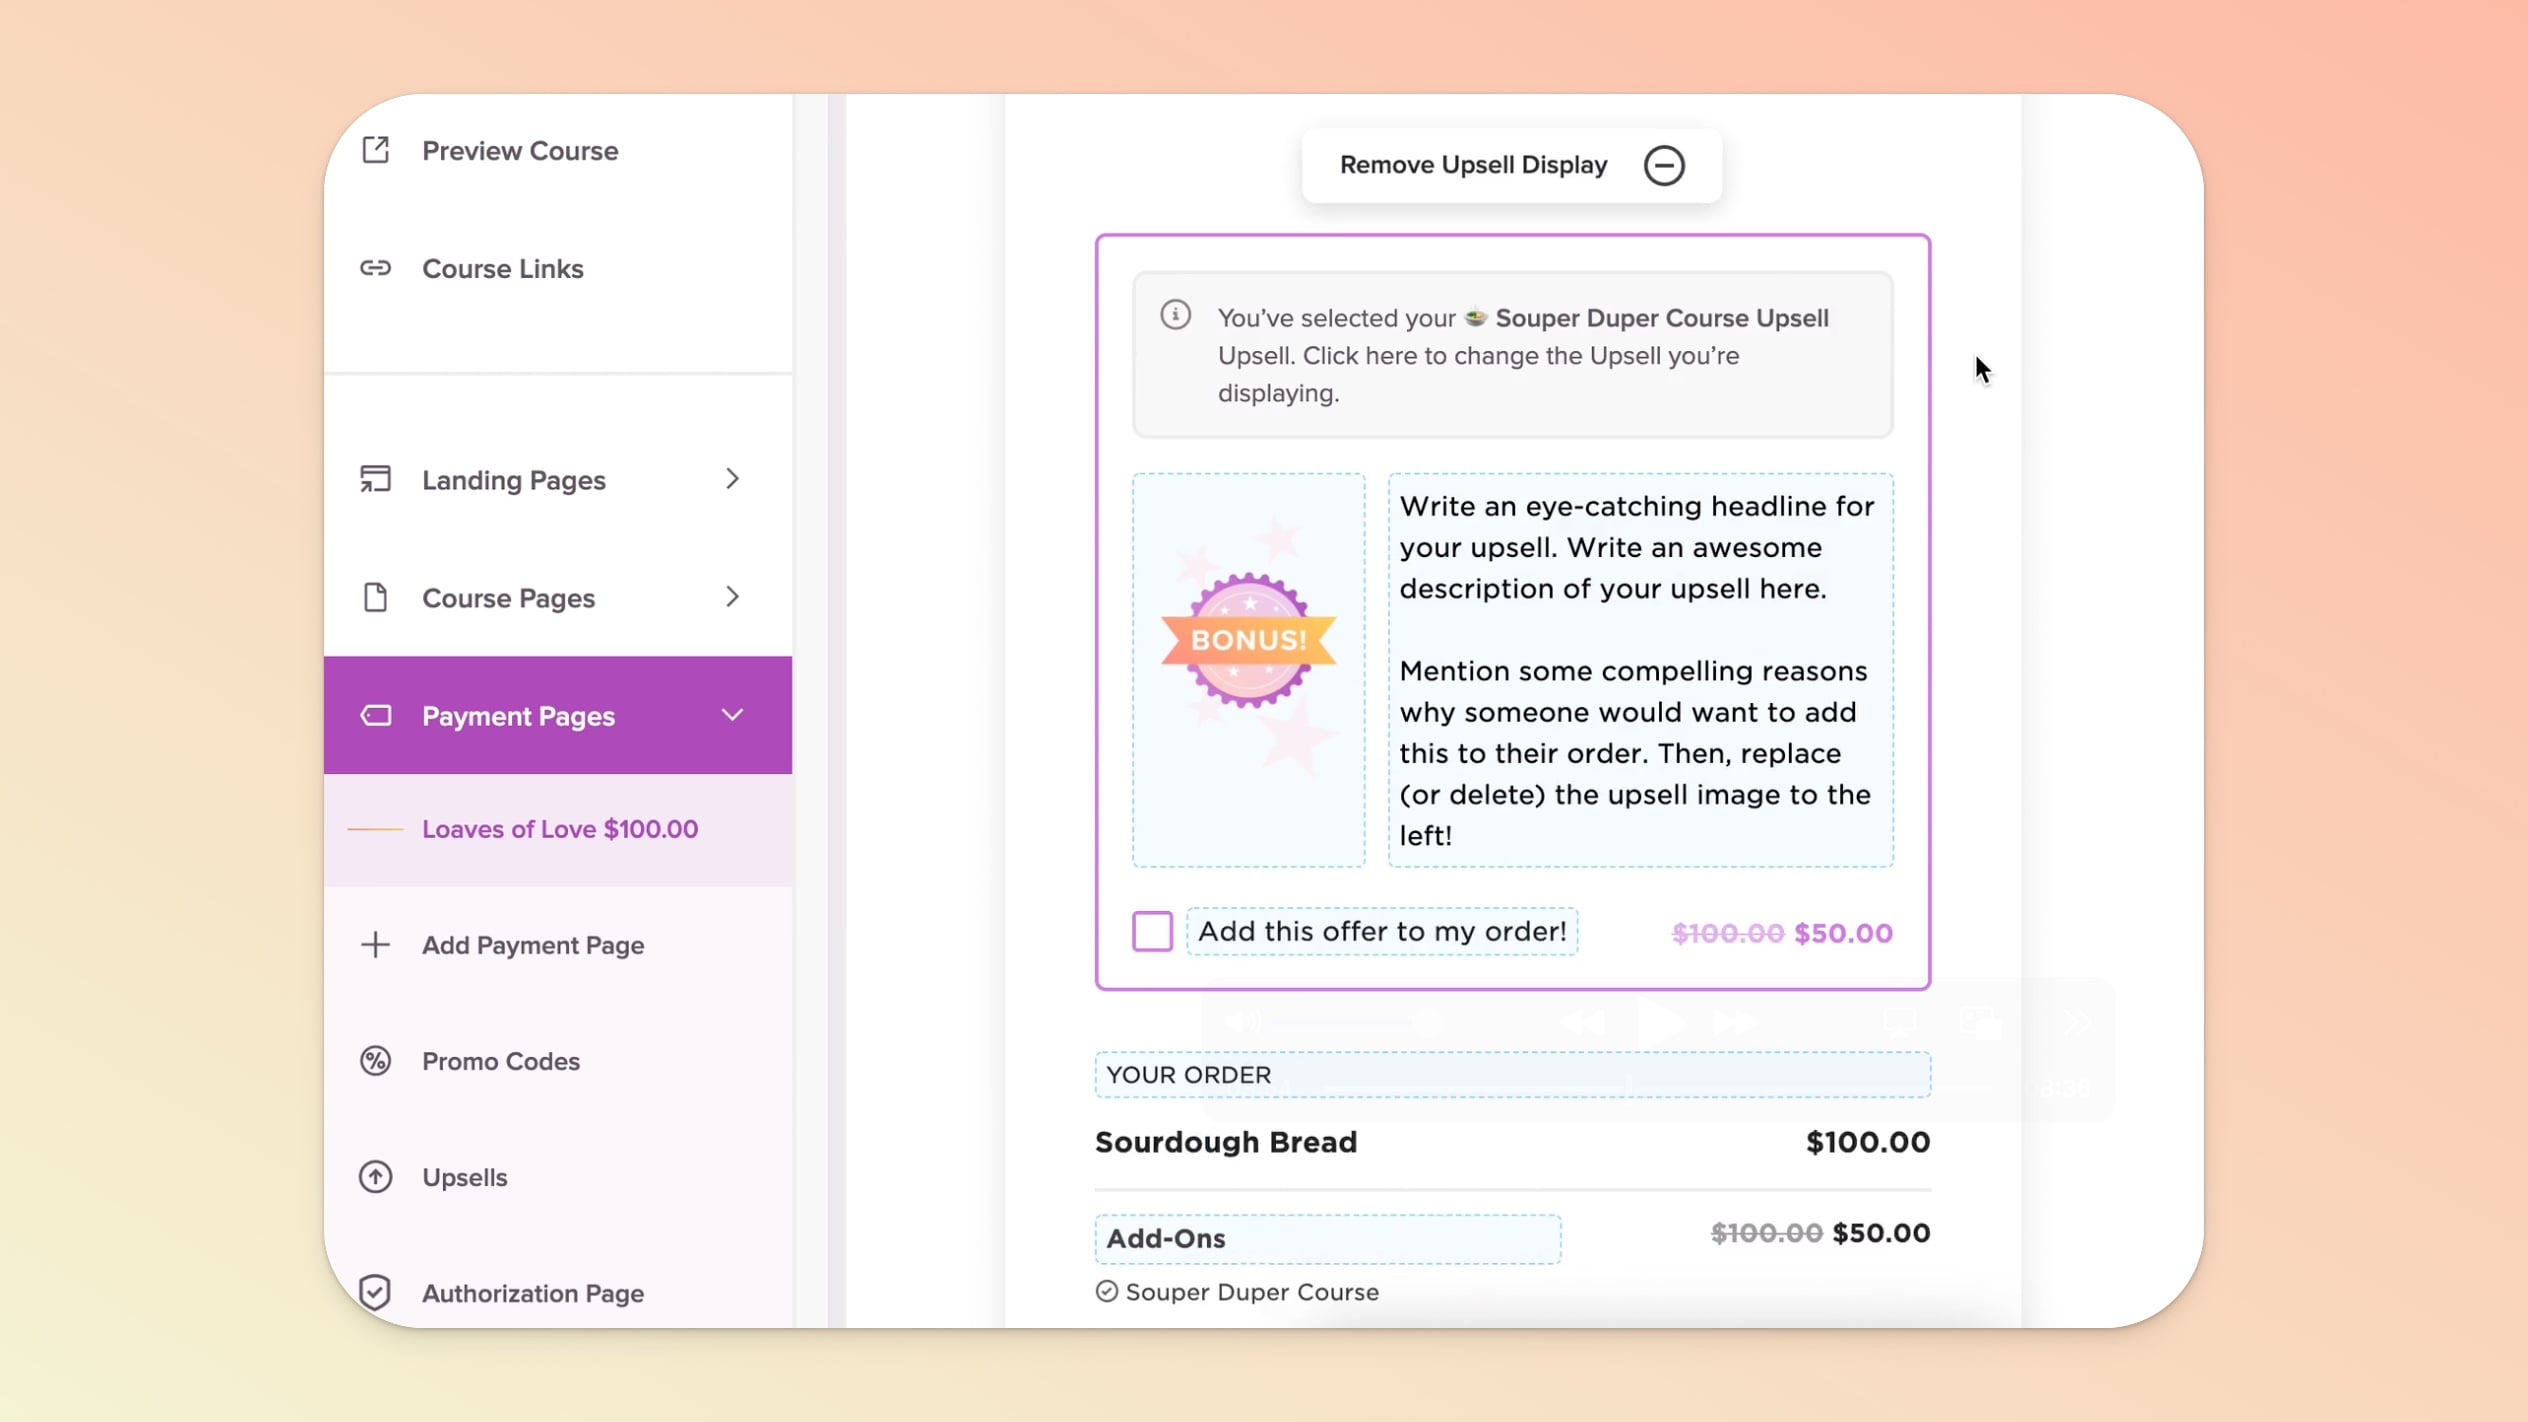
We've created a simple "bonus" image 🖼 as a placeholder for you and you can easily remove that image and add your own.
The dimensions we recommend for an Upsell image are: 430px (wide) by 640px (tall).
If you don't want to use the left column of the Upsell, simply delete the image out of it and leave it blank. This will cause the right column text editor area to span the full width of the Upsell section (you will see this when you preview/view the payment page).
In the Actions menu of your payment page, select the Copy Page URL option to grab your page’s URL and share it or hyperlink to it where needed.
Your Upsell has been set on a payment page, you've customized it, and a customer has purchased the Upsell during the checkout process. 🎉 🥳
By default your courses have the welcome email turned ON. When a customer purchases your payment page (with added Upsell), they will receive a welcome email for EVERY course/product included.
In our example, that would be welcome emails for:
Main Course - Sourdough Your Life 🍞
Second (Upsell) Course - 🍲 Souper Duper Course
Once your customer completes the purchase they will get immediately dropped into the Main Course (Sourdough Your Life 🍞 in our example). They will receive the welcome email to the Second (Upsell) Course (🍲 Souper Duper Course).
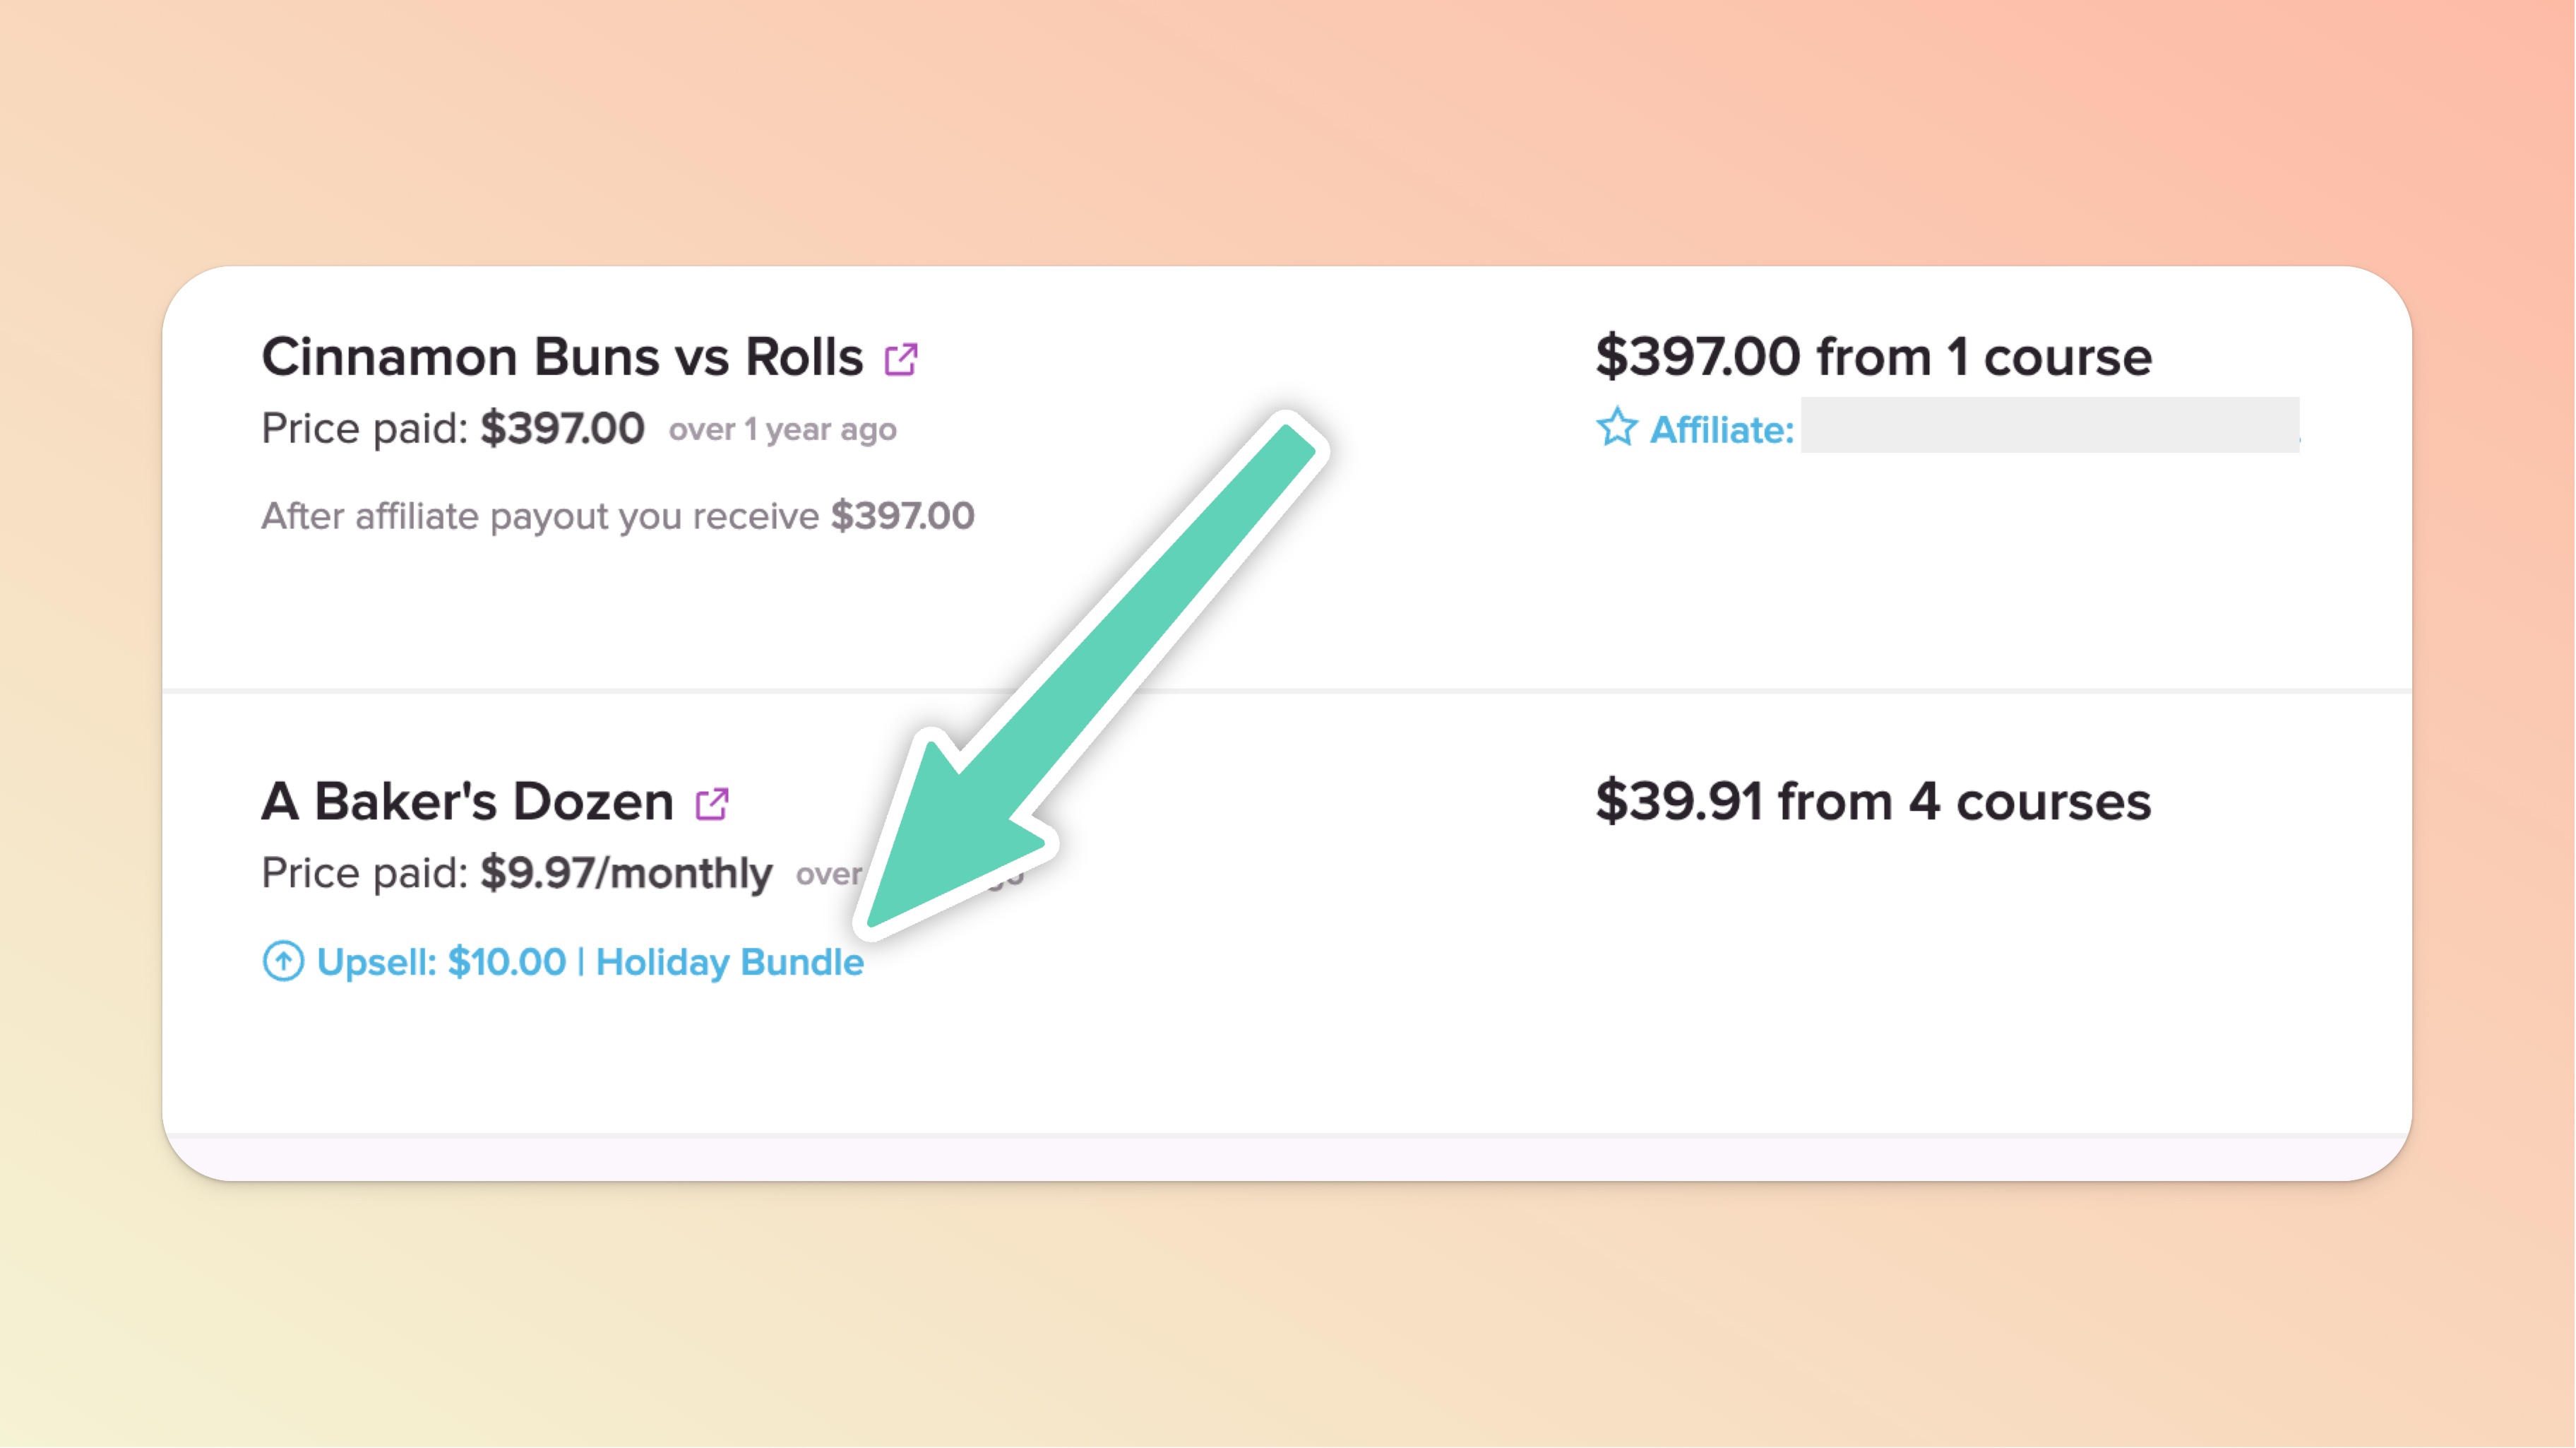
In the activity feed on the Customers page in your account, you'll see an added note with the Upsell (in blue 🔵 text).
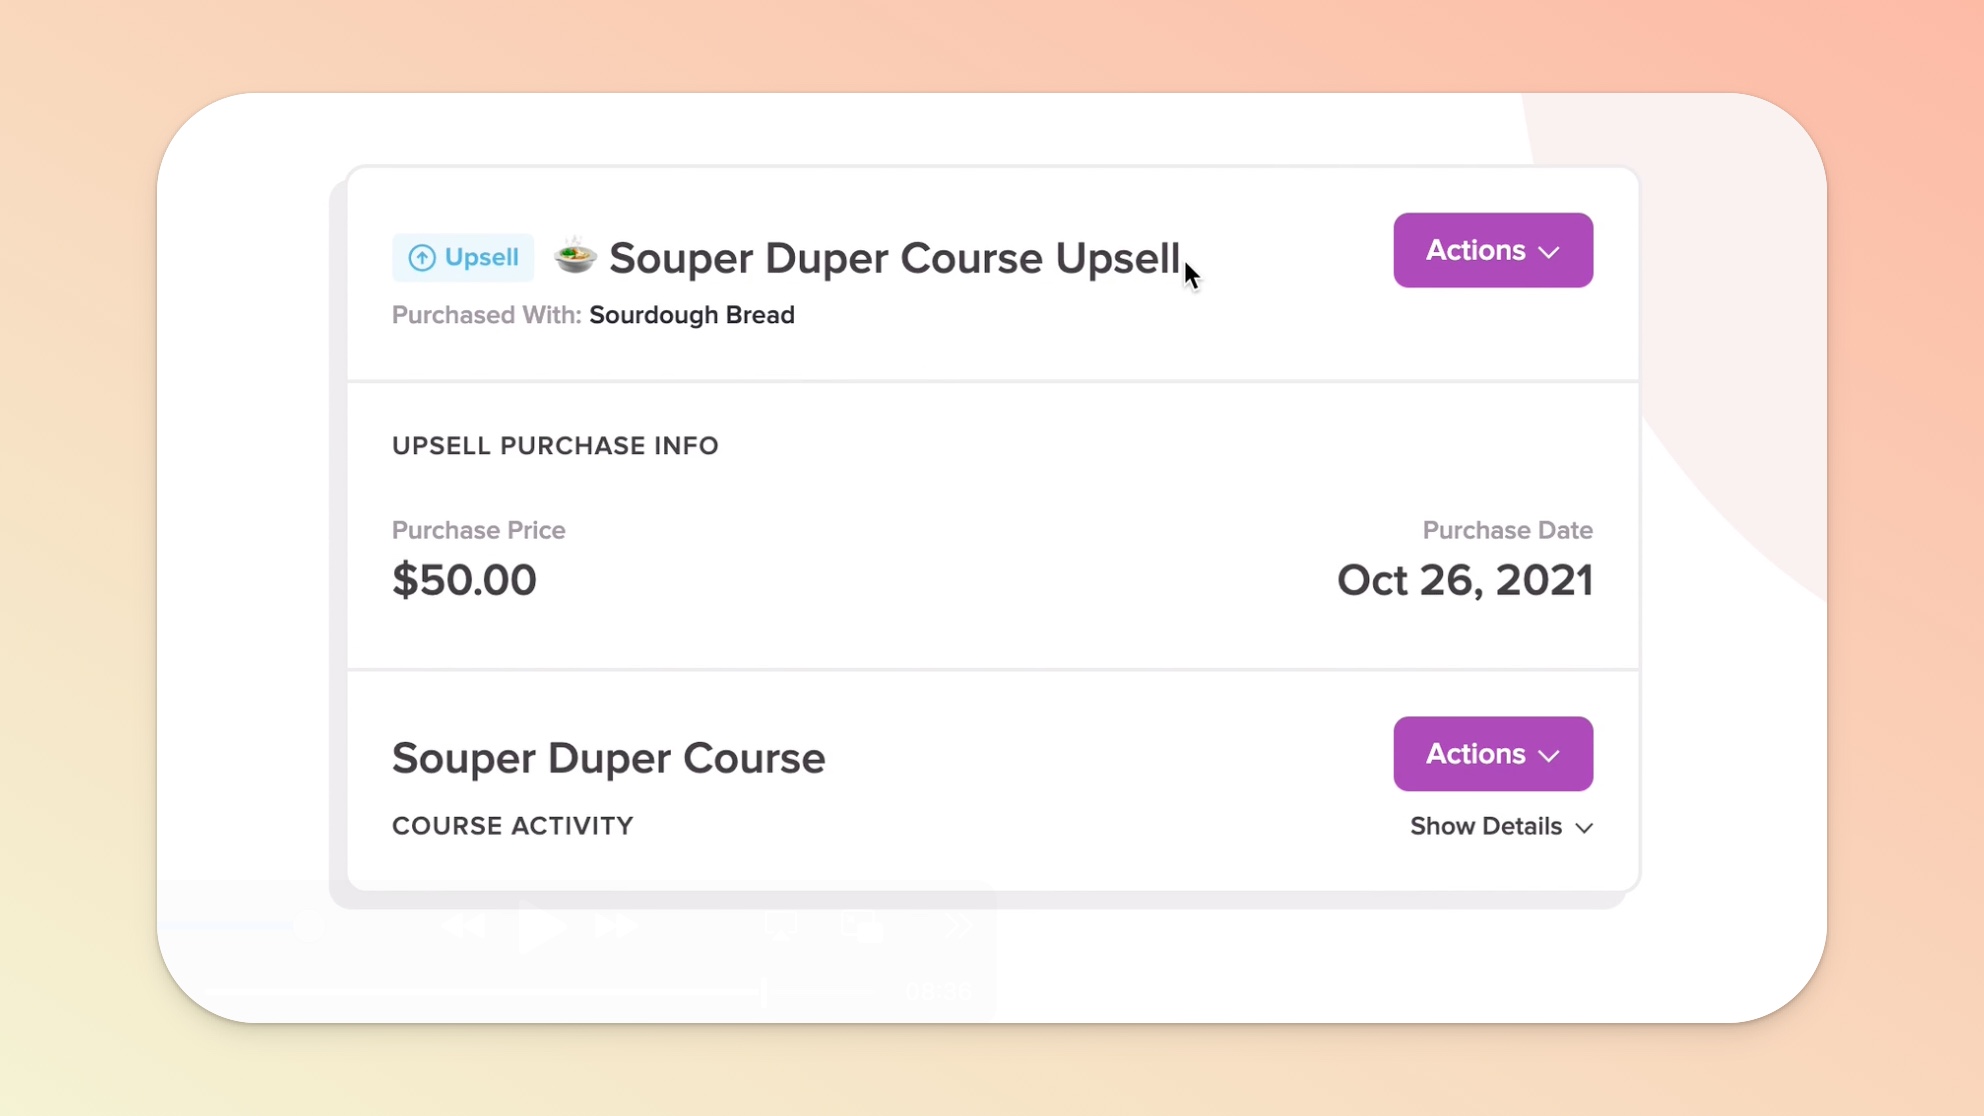
If you click into view your Customer's Profile, you'll see we add a secondary "course card" for the Upsell course/product. We do this so you can take the following actions on the Upsell itself (separate from the "Main Course"):
Issue an Upsell refund (full or partial)
Revoke Upsell course/product access
Edit Upsell purchase date (this is helpful if the course has a specific Start Date, Expiration Date, etc)
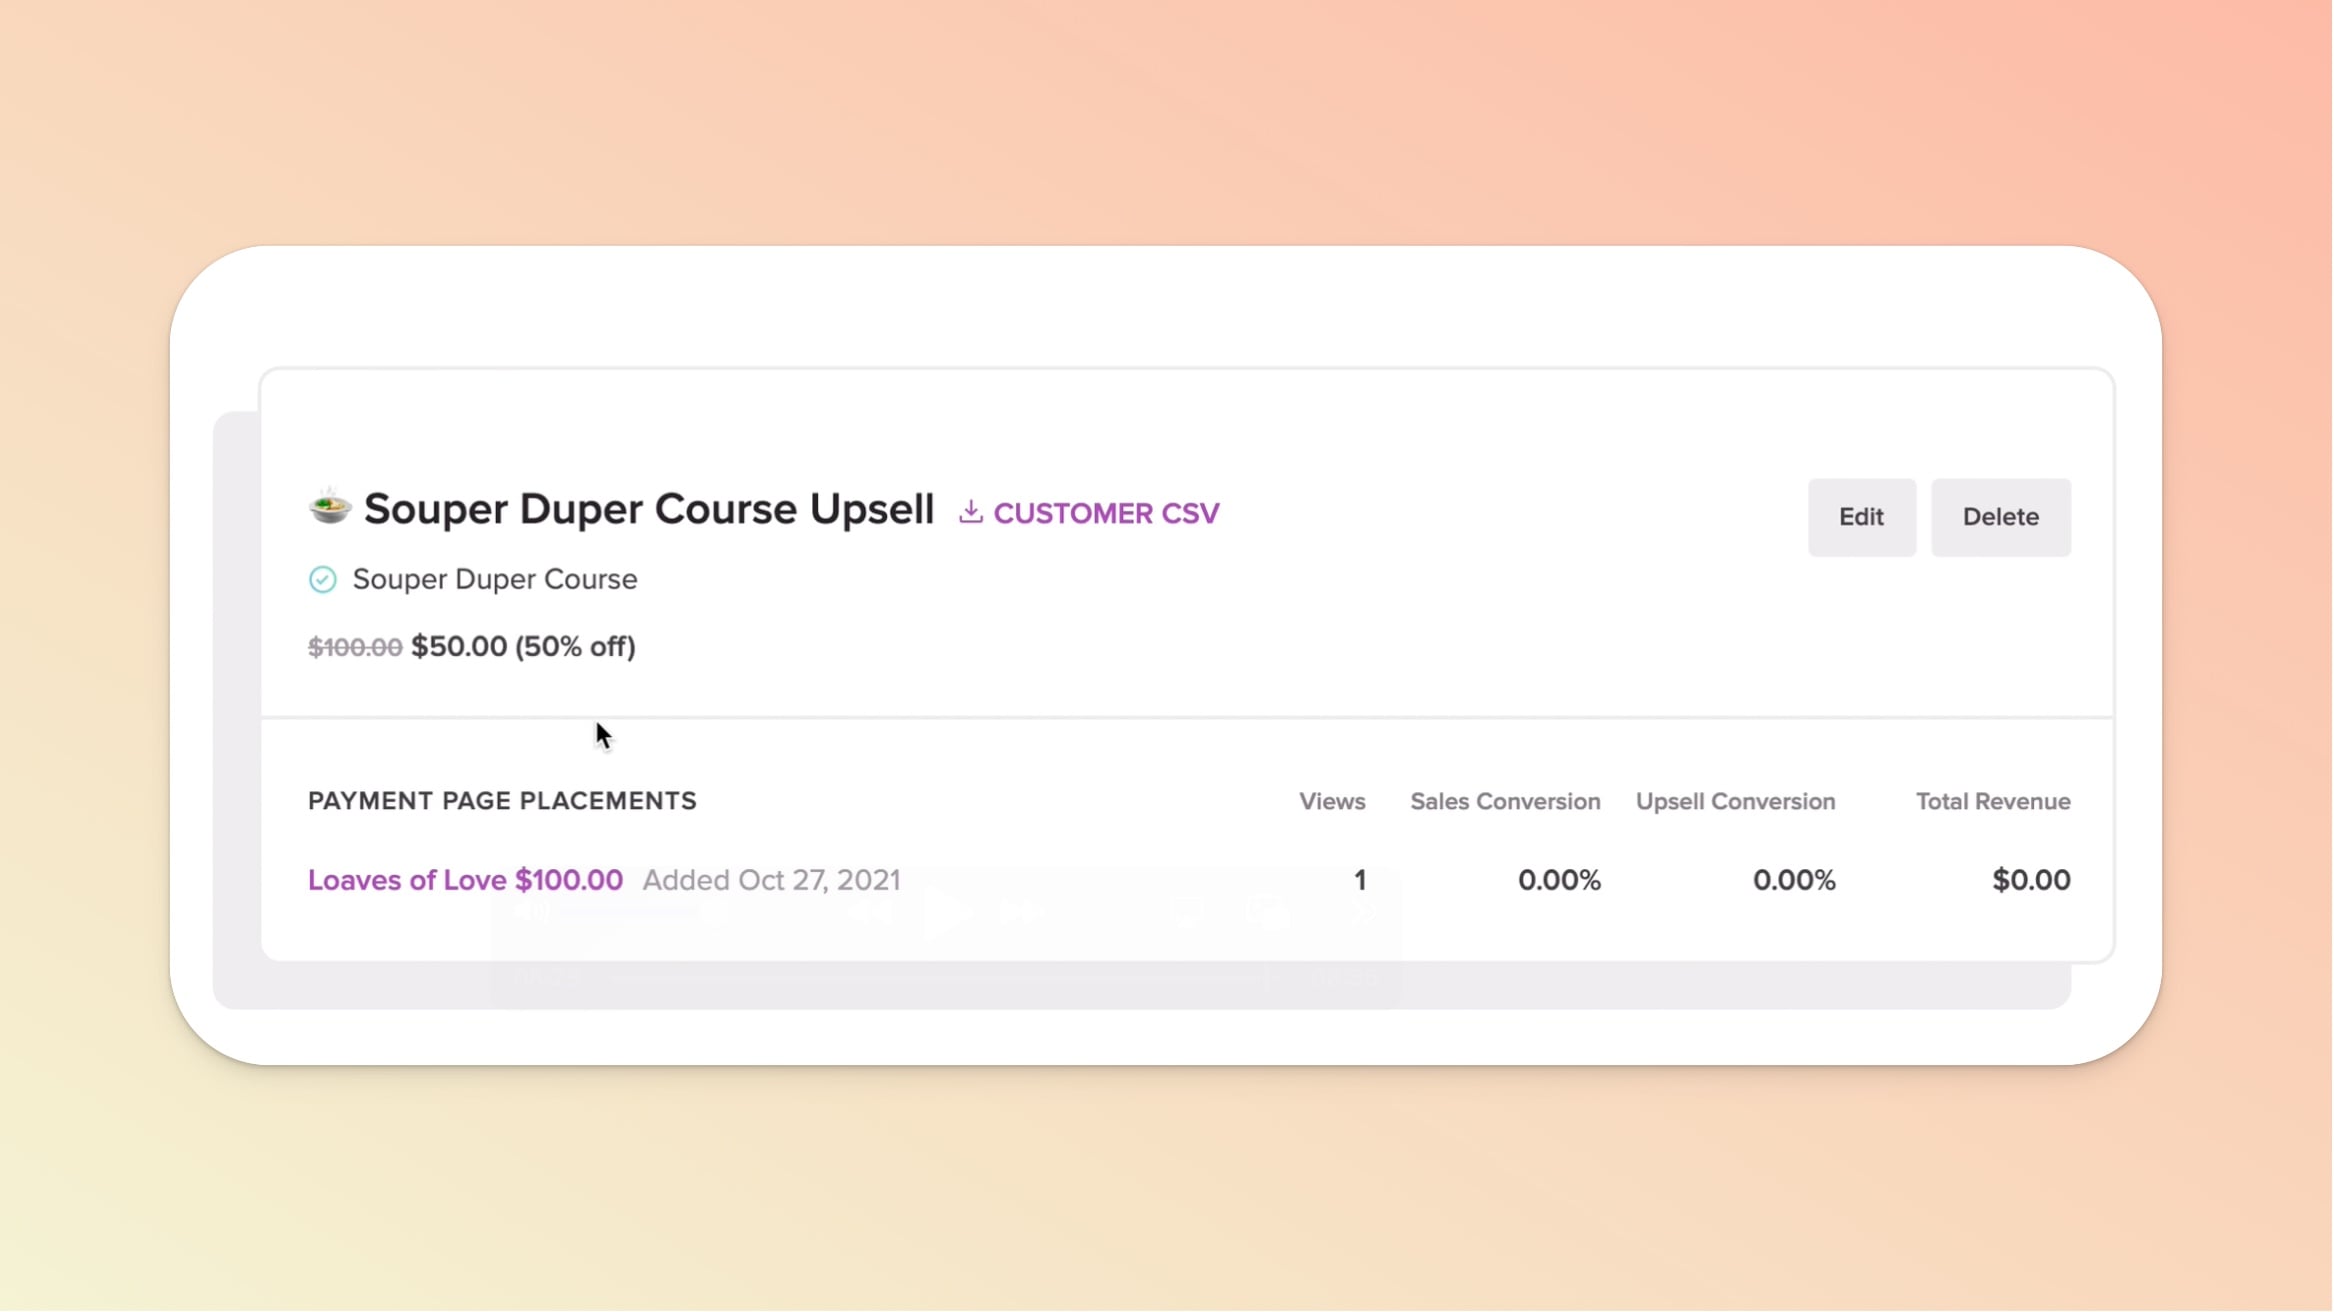
We want to give you data to see how your Upsells are performing based on Views, Sales Conversion, Upsell Conversion, and Total (Upsell) Revenue generated. Upsell analytics start tracking the moment you create and place an Upsell on a payment page (and start sharing the payment page URL). This data is available to you in the Upsells section of your course/product.
In the example below, the payment page has been viewed by three individual customers. One of those customers purchased and included the Upsell in their purchase.
If you want more information as your payment page gets more views and purchases you can always download the CUSTOMER CSV for each Upsell (depicted below, beside the Upsell’s name).
Once you have an Upsell created and placed on a payment page, you can pre-check the Upsell box by appending a small bit of text onto the payment page’s URL:
While editing your payment page (that has an Upsell placed on it), click the Actions menu (purple button) in the top right.
In the Actions menu and click Copy Page URL.
Paste your URL somewhere and now add ?upsell=true to the end of the URL (example: your-course.teachery.co/purchase?upsell=true)
🎉 Share that URL! That'll pre-check the Upsell box for your customer.
Use the chapter markers on the timeline of the video to jump to the specific steps that were outlined in the text above.
💬 If, at this point, you hit any hurdles/doubts and can’t find the answers elsewhere in our help center, please use the support chat bubble* in the bottom right of your screen. Make sure to include course/product info, customer info, helpful screenshots, or anything else that may be relevant to your query.
* Support hours are 09:00 to 17:00 GMT.