If you want to create links to PDFs, spreadsheets, or any other files for your customers to download, simply highlight any text and upload a file to it. With our built-in file manager, you can now upload/import, organise, and delete your files all in one place.

The file manager is pretty intuitive but it’s worth familiarizing yourself with all its options so that you can stay organised from the get-go. 🤓 Simply drag-and-drop or click the upload icon to import your files.
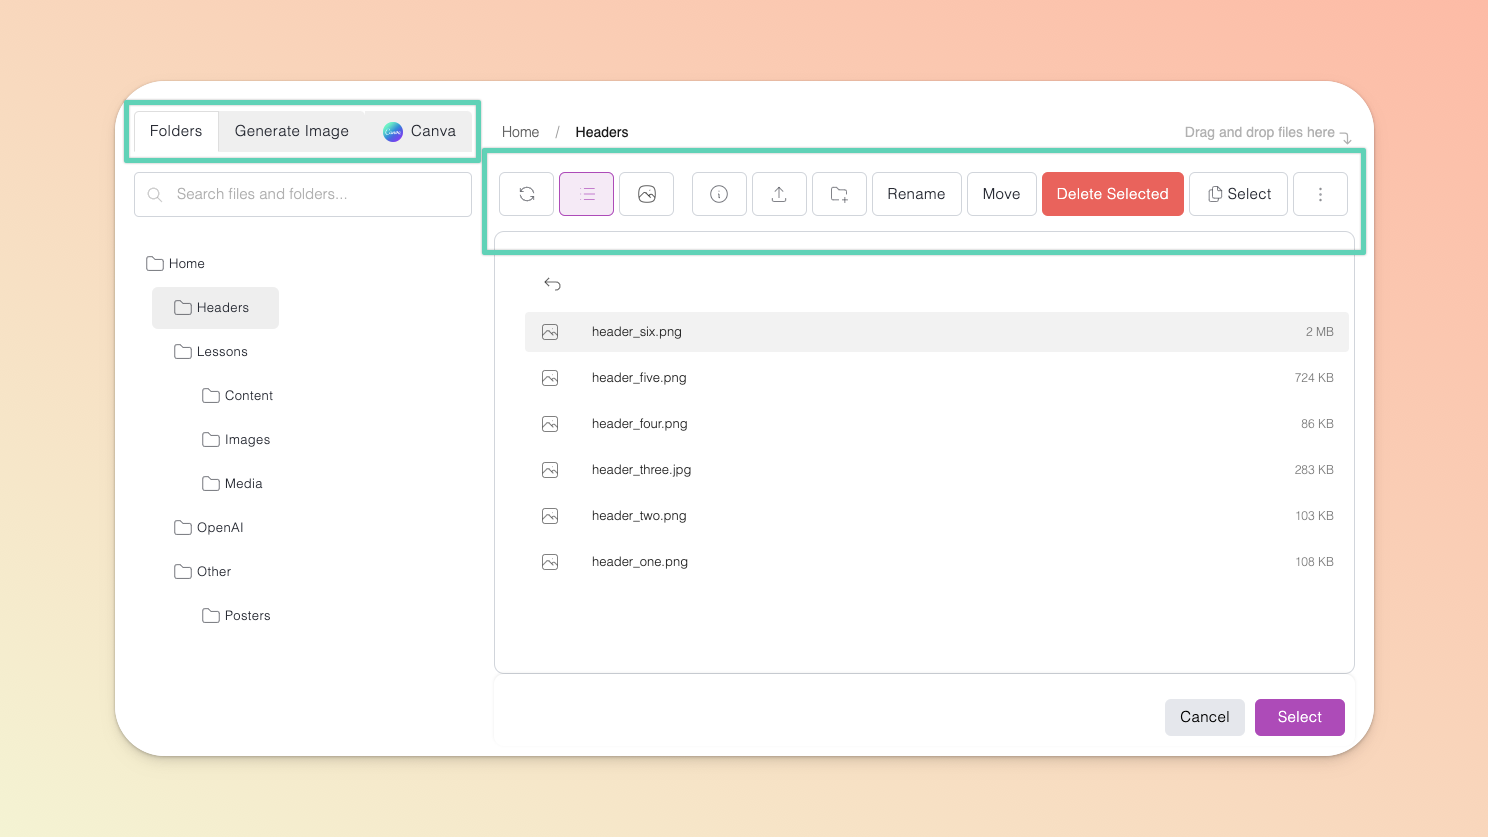
On the LEFT side of the file manager window, going from left to right:
Folders tab: This is essentially your Teachery file explorer (think of it as your Mac Finder or Windows File Explorer, but for Teachery). It comes with a search bar and displays your folder tree/directories.
Generate Image tab: It’s here you can connect to OpenAI and create images by inputing prompts, image dimensions, and preferred image quality. When created, the images are automatically saved to your Teachery file manager.
Canva tab: This is a space dedicated to your Canva assets. It has its own search bar, folders selector menu, and refresh button. Read more about our Canva integration here (coming soon).
The Icons/Buttons on the top right side of the file manager window, going from left to right, you’re able to:
refresh your folders/files;
switch to List view*;
switch to Gallery view*;
upload or import a file;
create a new folder;
select one or more files or folders at once (and then move or delete them as needed); and
*additional layout options for your list or gallery view.
Where ever you can add an image or downloadable content (e.g. PDF or ZIP files) is where you will find your file manager. 🤩 This can look different depending on which page you’re on.
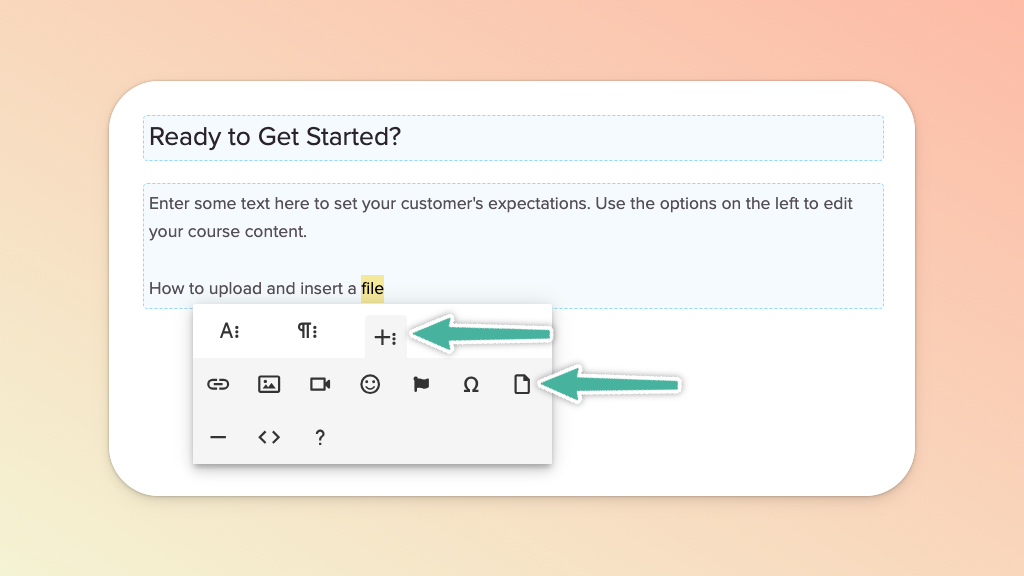
Click into any text area and highlight the text to which you want to link your file, click the (+) icon in the menu widget that pops up, then click the upload file icon to open the file manager.
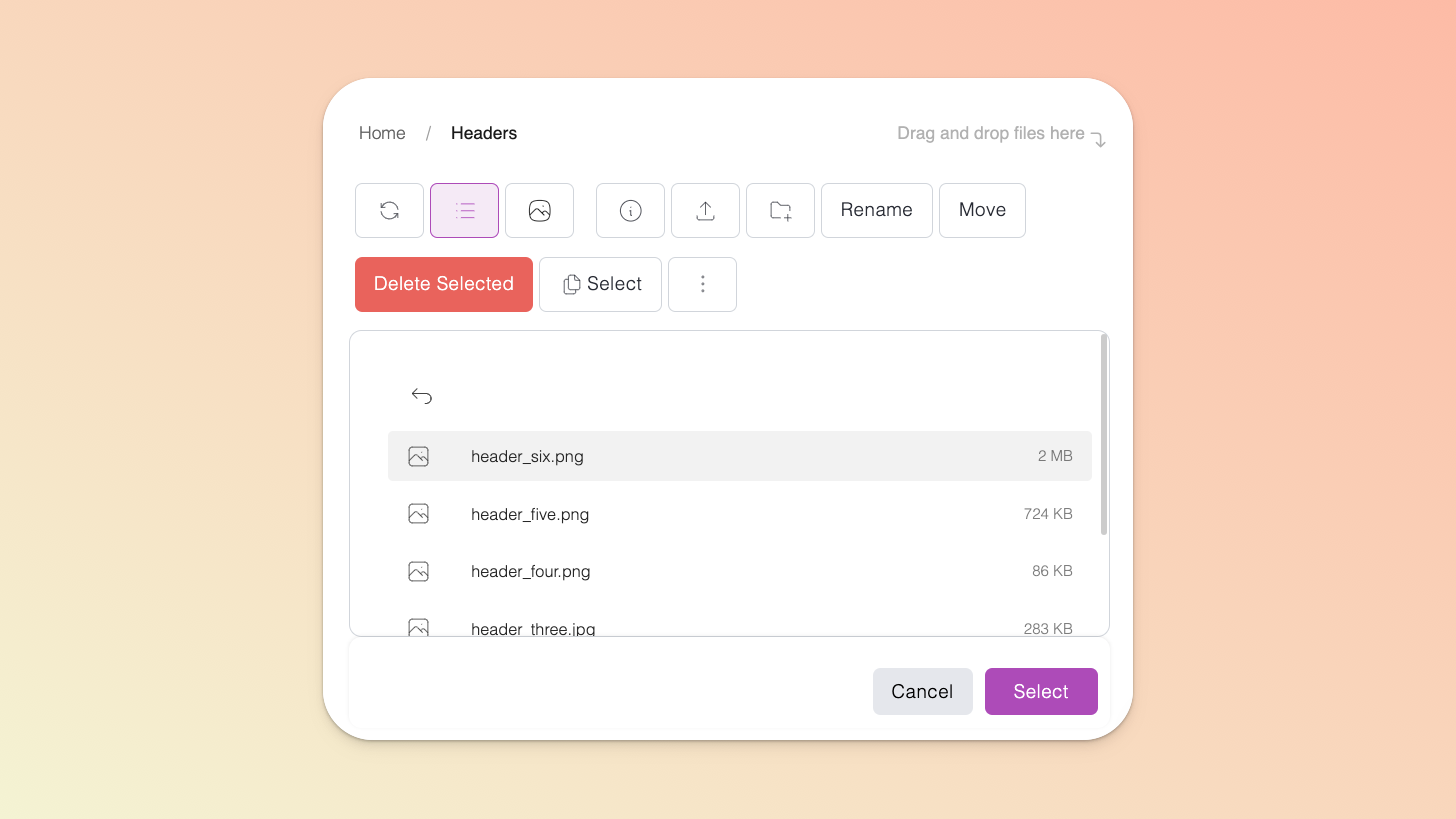
Import a new file from your computer (or select one already in your file manager) and click the Select button in the bottom right corner of the file manager. The file manager window should automatically close and hyperlink the text you had highlighted.
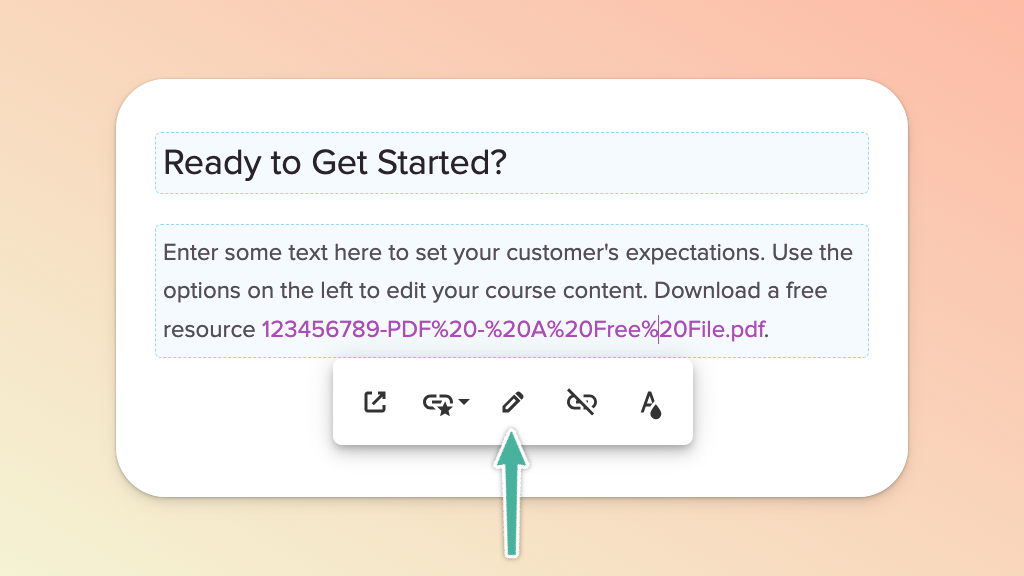
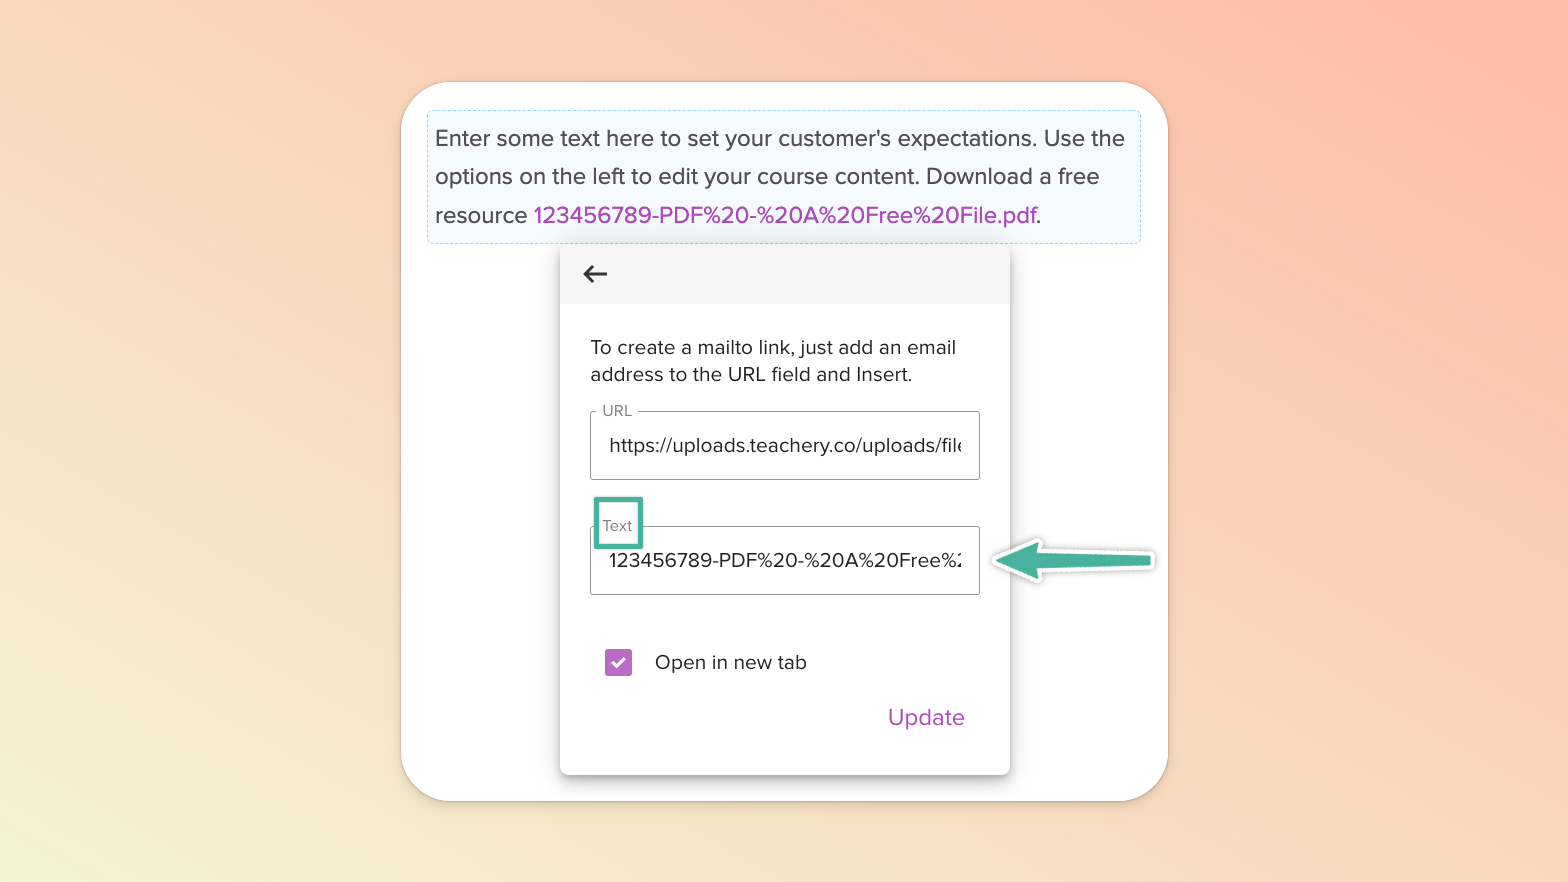
To correct/change the hyperlinked text itself, click into it and then select the edit (pencil) icon in the menu widget that appears, make the change and click Update to apply it.
If you’re using our old landing page template, you will find the file manager just as you would on any lesson or payment page (see above).
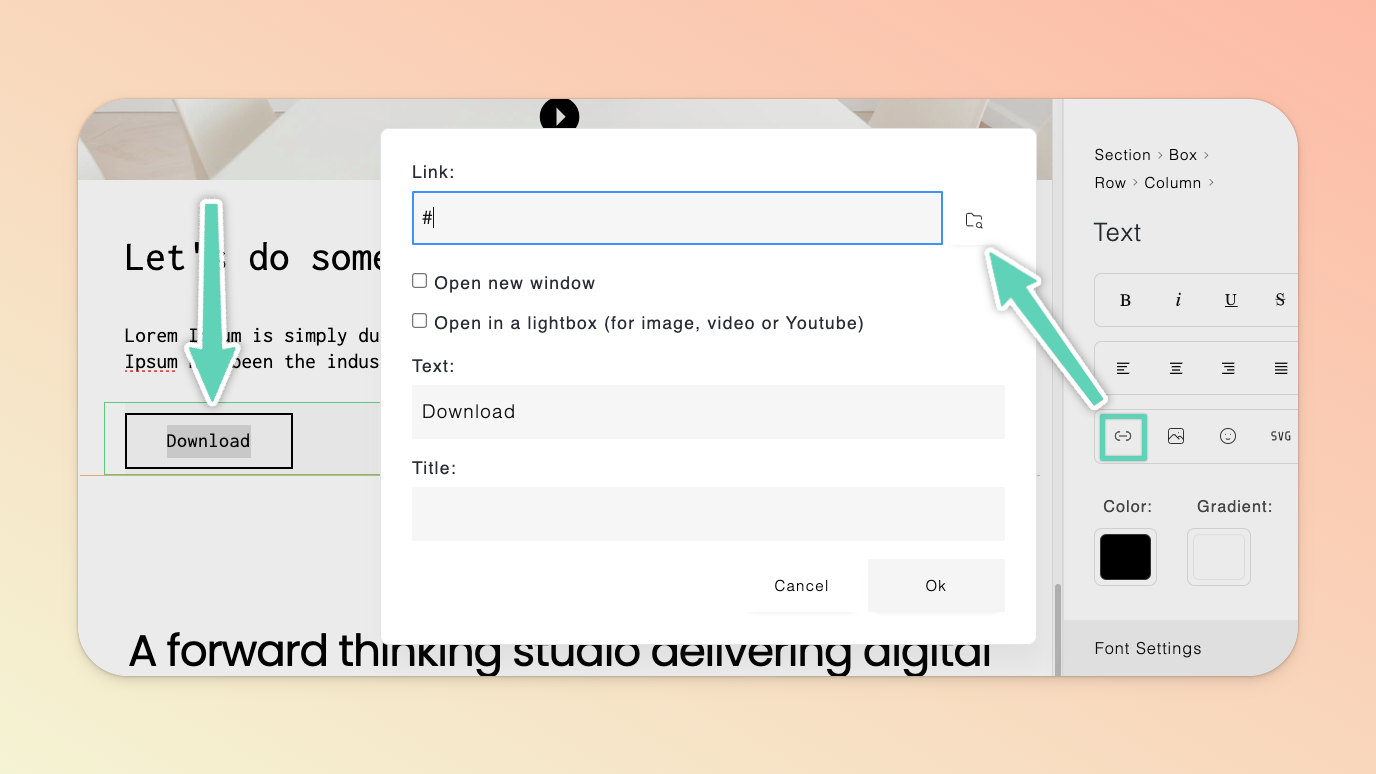
If you’re using our new landing page builder tool: highlight the text element you want your downloadable file linked to and click the link icon in the edit/settings panel. In the window that opens, click the file manager (folder) icon. Once in the file manager, import a new file from your computer or select one already in your file manager and click Select.