This help doc goes hand-in-hand with Creating a Course Hub.
When you create a hub that has MORE than one course/theme/product added to it, we give you the option to toggle on a “Buy All” button.

Let’s walk you through how to set up a payment page with an upsell that will act as the “Buy All” action for your customers!
You can watch the video below or keep scrolling to read the step-by-step tutorial:
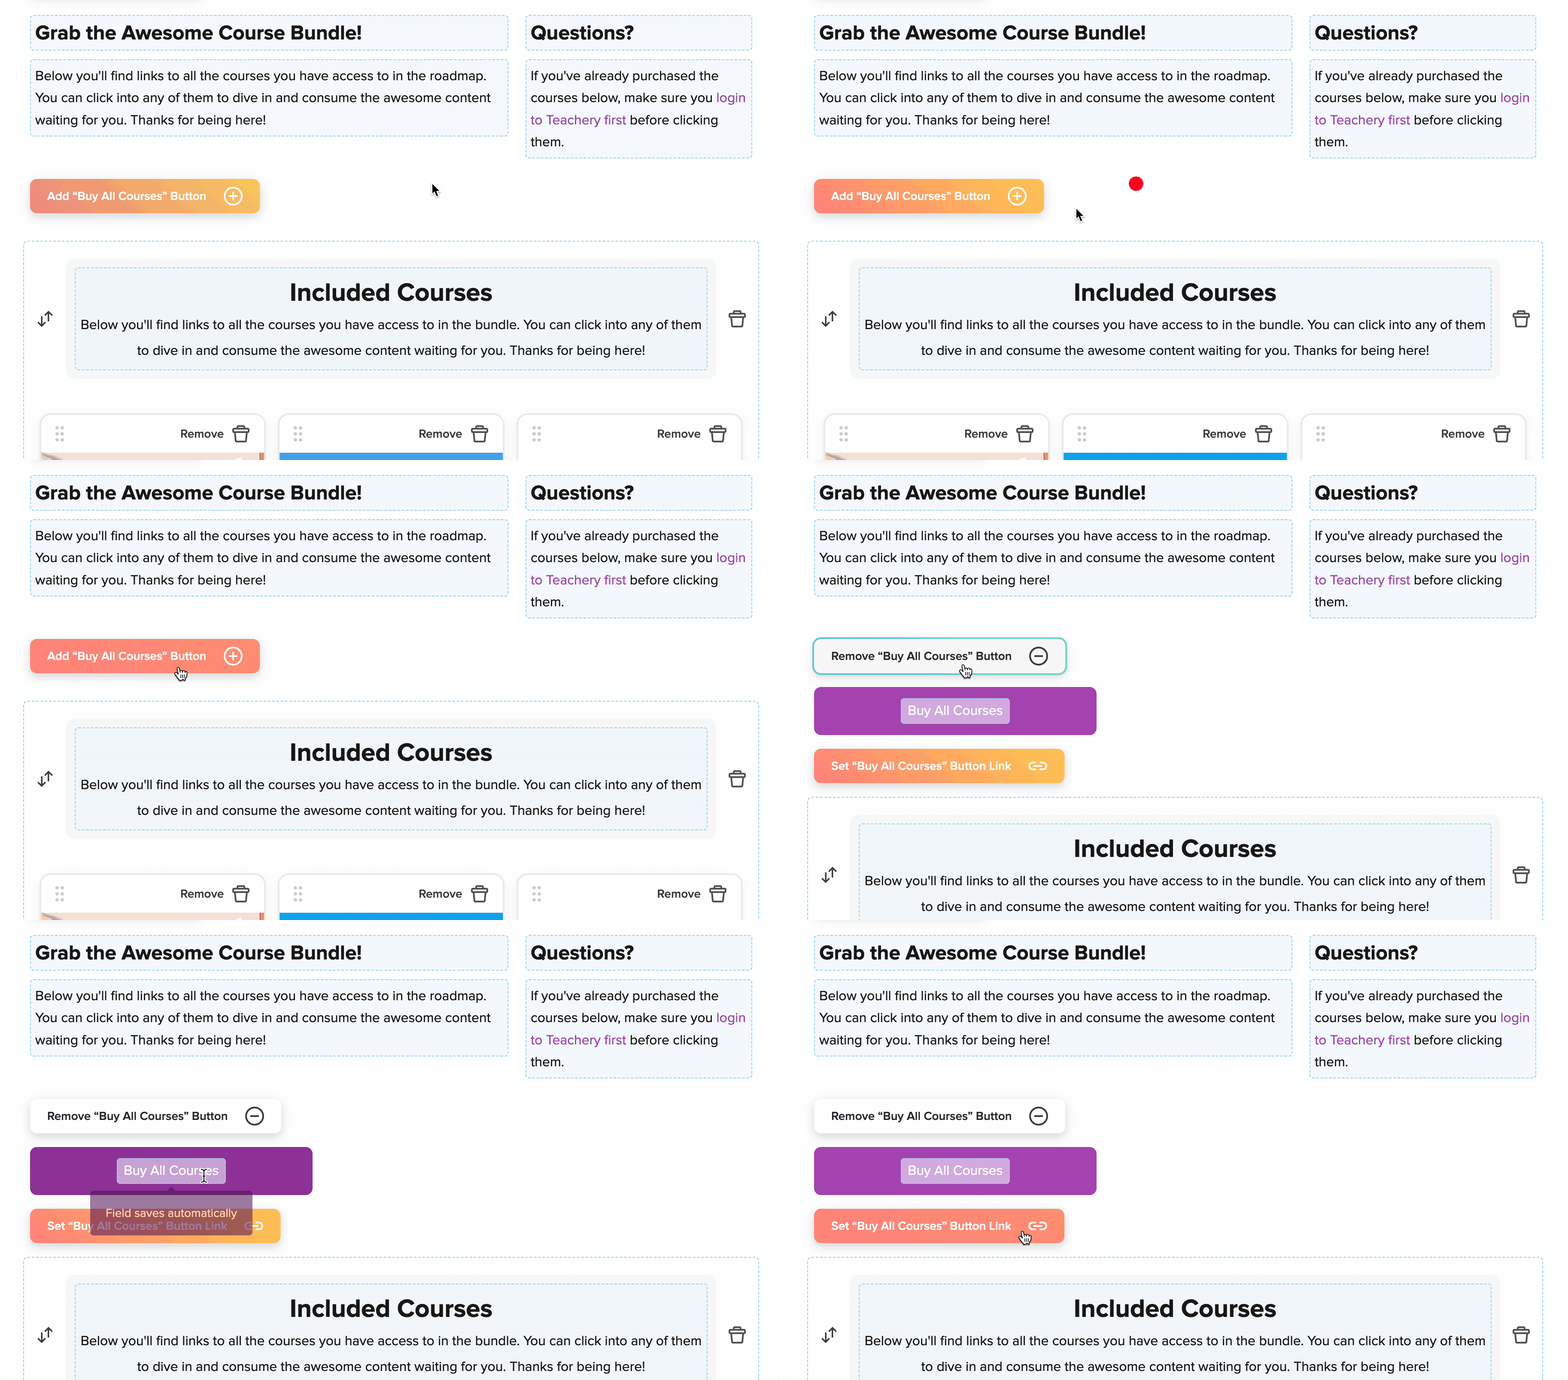
It’s likely you’ve already done this simple step, but we didn’t want to skip over it just in case. Once you have your hub fully created, click the Add “Buy All” Button to toggle this feature on.
Our upsell feature is going to help you sell and deliver all the courses/themes/products in your hub to your customers.

Let’s say you have four courses added to a Hub: Course A, Course B, Course C, and Course D. It does not matter which course of the four has the upsell created in it, so for our example let’s say you choose Course A.
Inside Course A’s editor, you’ll:
Navigate to Payment Pages in the left sidebar editor, and then to Upsells.
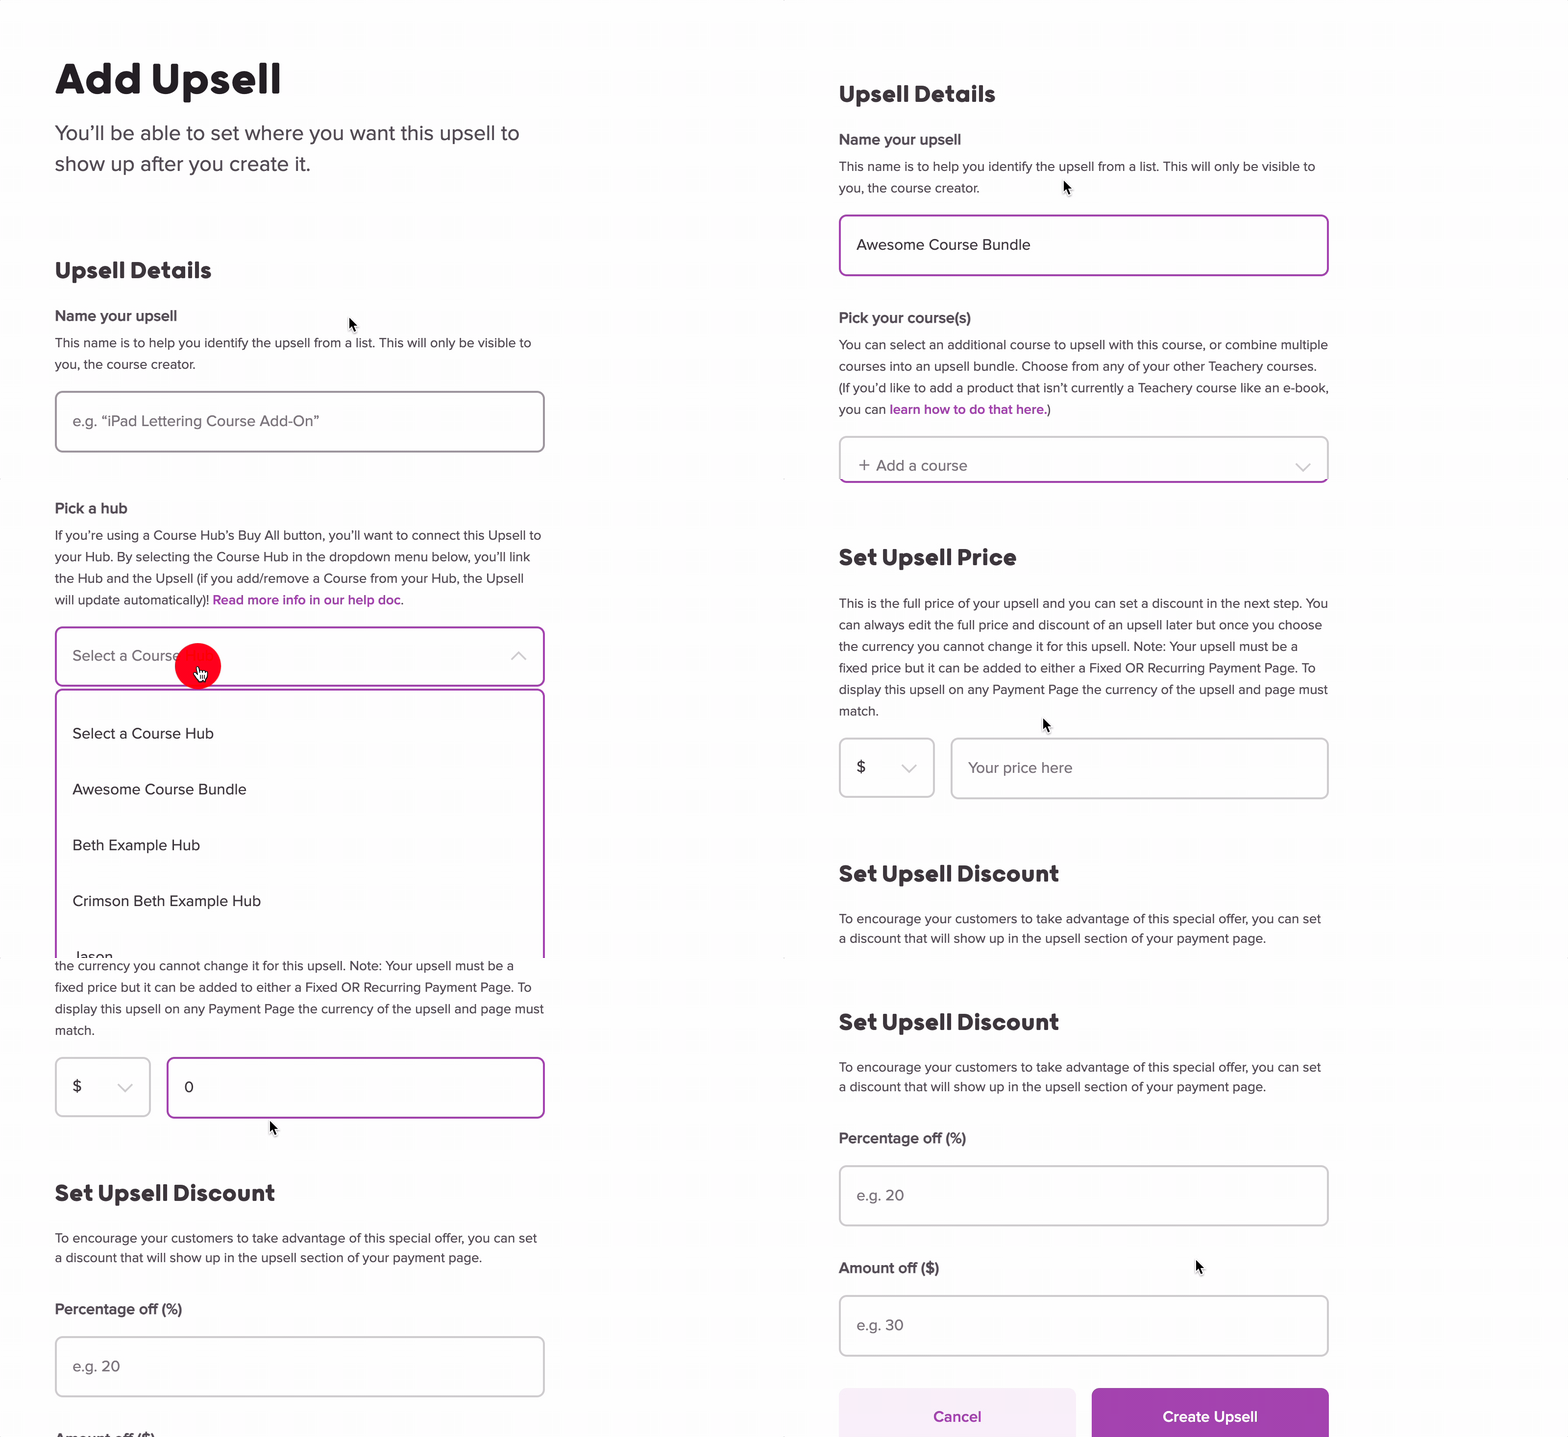
Click the New Upsell button.
Name your upsell something related to your Hub. 🚧 NOTE: The name WILL be displayed on the payment page your customers see.
Look for the Pick a hub dropdown option and select the hub (this will create a link between the upsell and the hub. 🚧 NOTE: If you add/remove items to/from the hub, the upsell will automatically match/reflect it).
Set the upsell’s price to $0.00 and click Create Upsell.
Once you finish creating the upsell in Course A, it’s time to create a payment page in Course A too! Here are the steps to take:
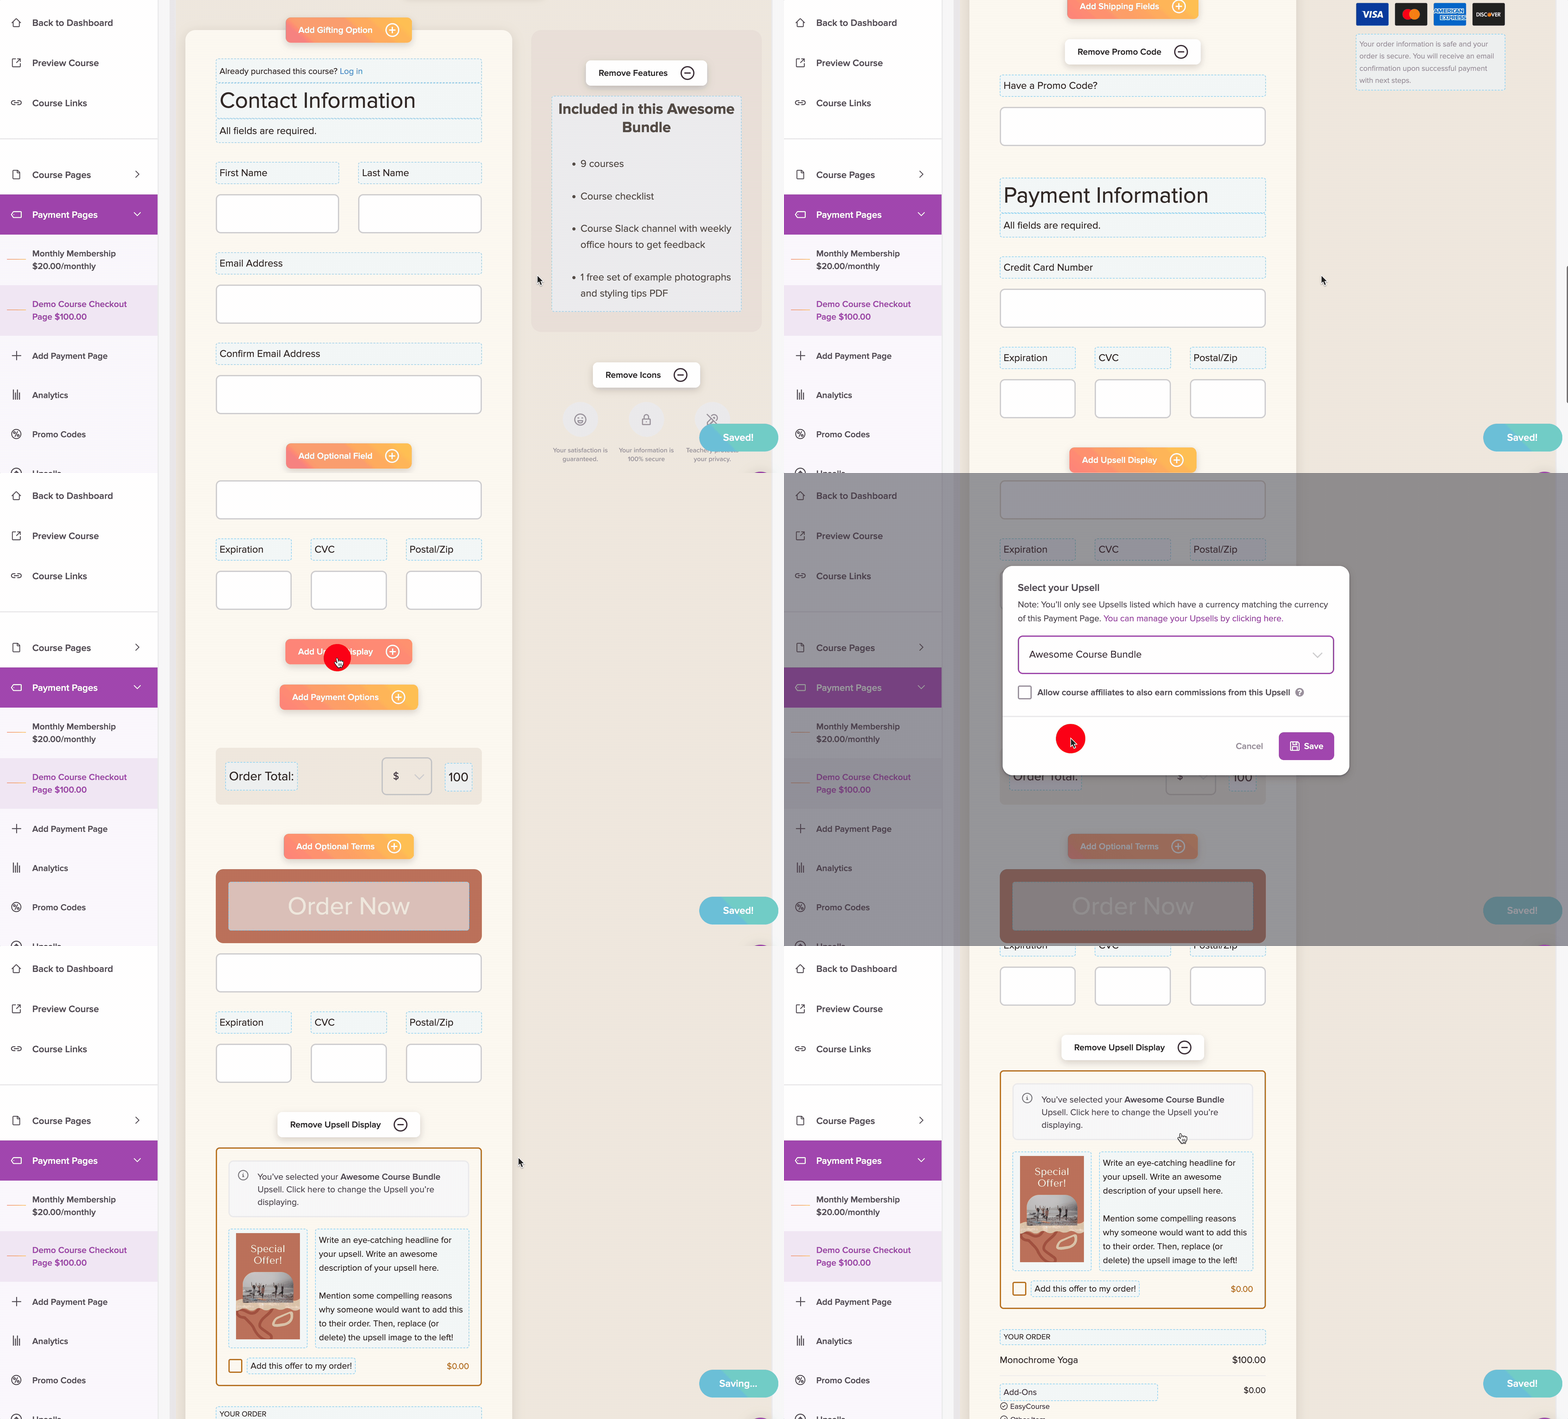
In the left sidebar editor under Payment Pages click + Add New Payment Page.
Name your payment page something easy to identify/pick from a list (you’ll see why later, in Step 4: the Buy All button’s payment page selector will pull in every payment page across your whole your account).
Set your payment page price for your entire hub (if you’re also going to offer a payment plan option, please complete the additional steps explained here).
Customize the payment page to your liking (be sure to mention how awesome of a deal this is to your customers!).
🚨 MOST IMPORTANT STEP 🚨 Toggle on the “Add Upsell Display” option and select the Course Hub Upsell you created in Step #2! Don’t forget to customize the Upsell text and image.
By now, you probably see where all of this is going!
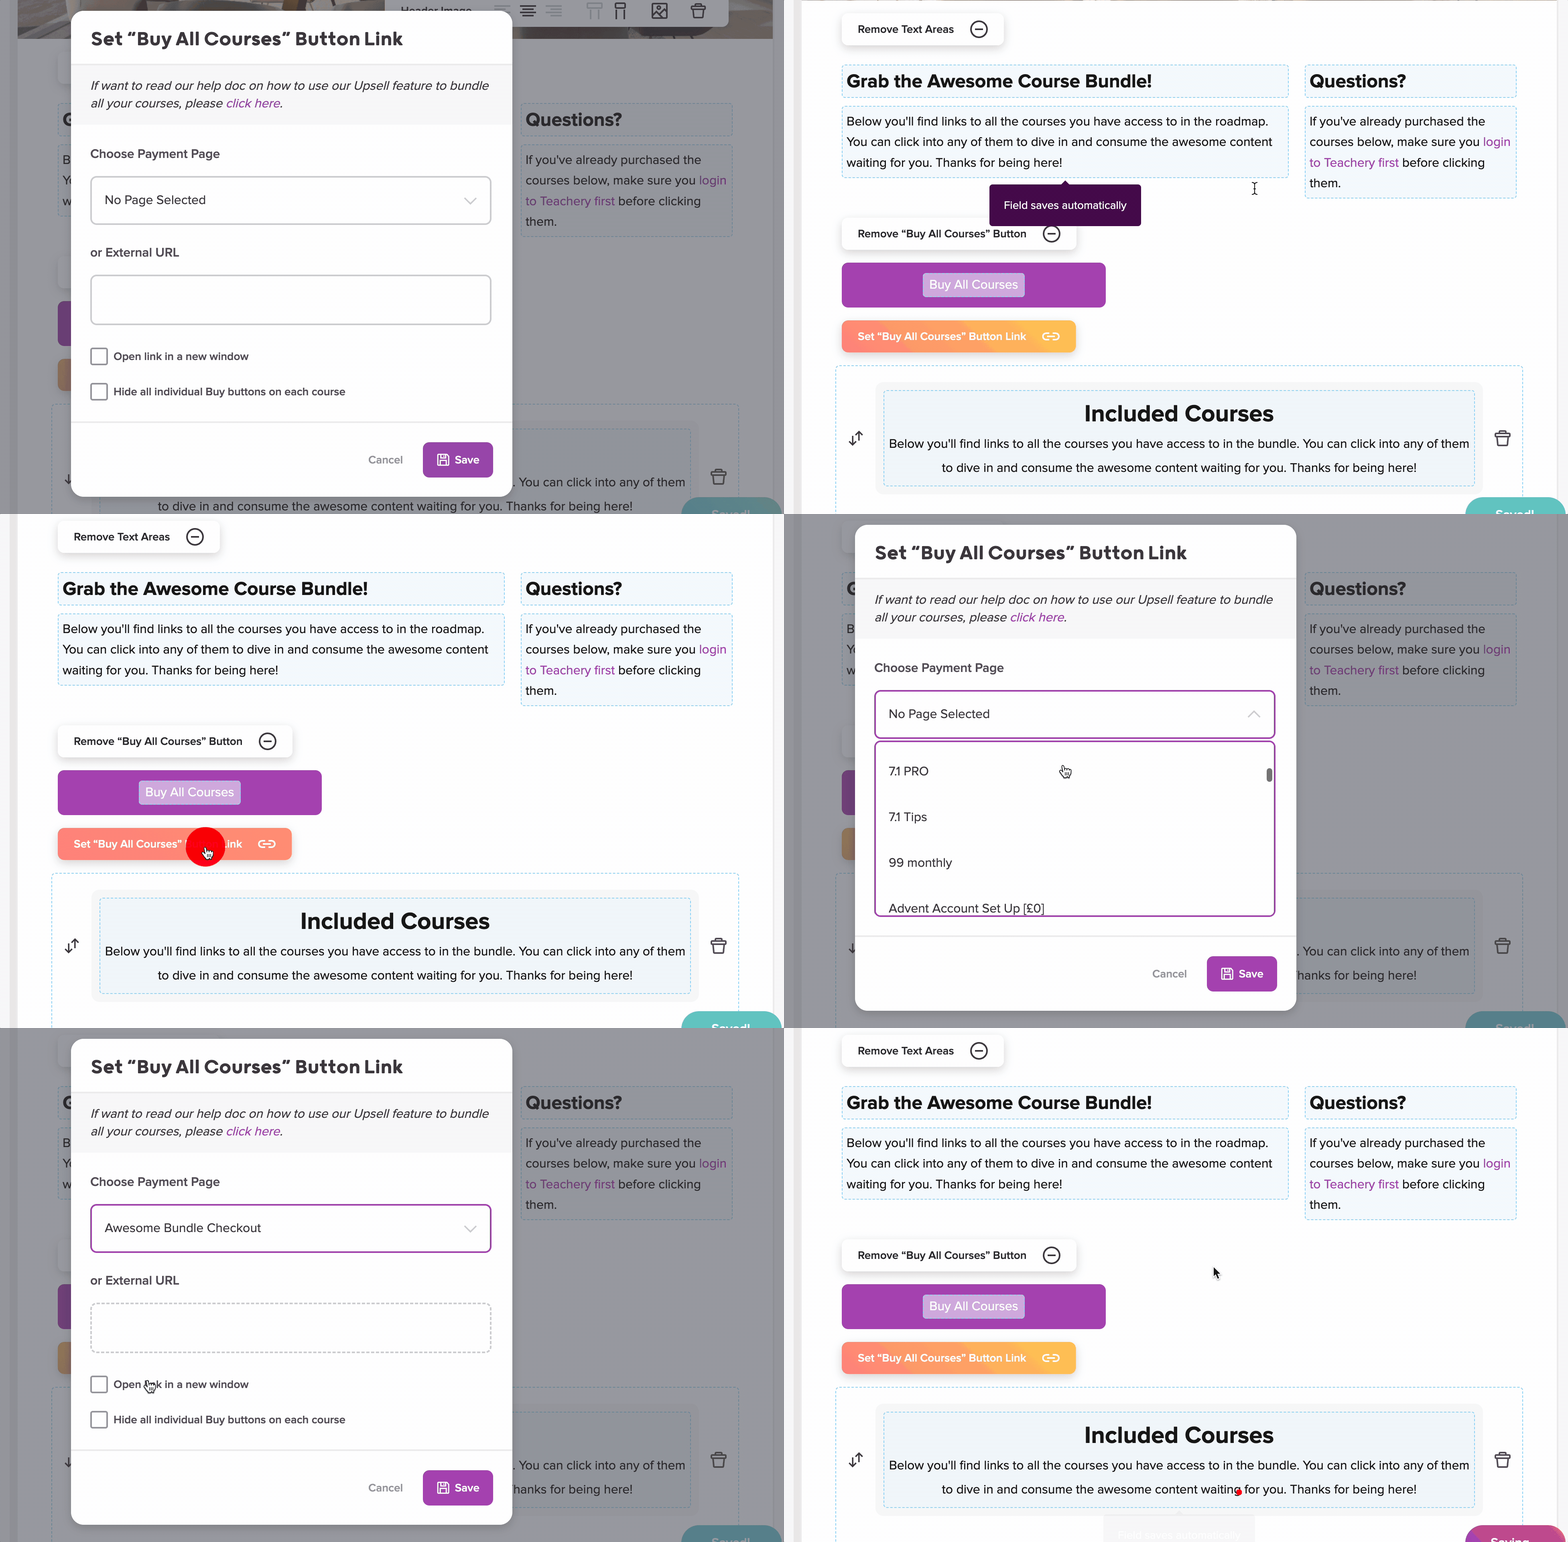
Navigate back to your hub and click the Set "Buy All" Button Link. In the modal window that pops up, use the dropdown menu to find the payment page you created in Course A.
You can choose to open the Buy All button link in a new window or not (we recommend NOT opening it in a new window for the best customer experience once the purchase process completes). You can also choose to hide all other Buy buttons in the hub in this modal window.
With your Buy All button payment page created, you are ready to share your hub URL (available in the left sidebar of your hub edit page) with your customers.
Great question! It’s a very similar process to what happens after a course/theme/product is sold with an upsell added to a payment page.
✅ Your customer will finish the payment process and get redirected back to the hub where they will see ALL courses/themse/products in the hub labeled/flagged as Purchased.
📬 Your customer will then receive ALL the welcome emails for each of the courses/themes/products in the hub. This is especially recommended if you’re using our new Payment Page Builder and any of the courses/themes/products have a downloadable file included. At a bare minimum the welcome email for the item that is housing the payment page and upsell must be enabled to ensure your customers are onboarded successfully.
🙈 Your customer will no longer see any buy buttons in the hub. (The only exception is the Buy Now buttons for any products you have listed in the hub - these will still appear because products can be purchased repeatedly.)
🧾 YOU will be able to navigate to the customer’s profile in Teachery and see a course purchase record for Course A (the course that had the payment page and upsell in it) as well as an Upsell [Hub] with all the other courses/themes/products listed there.
If you add a new course, theme, or product to your hub further down the line, any customers that used the Buy All button BEFORE you added the new item will now see the Buy All button again and individual Buy buttons beneath any newly-added item.
You’ll want to communicate to your customers to only make use of the Buy buttons beneath the newly-added item (unless you want to refund their initial purchase and revoke their access to allow them to use the Buy All function again).
If you’re using your hub as a membership portal and existing customers are not required to pay for the new item, either create a free payment page in that course, theme, or product and link that item’s Buy button in the hub to that free page (i.e. existing members need to self-enrol into any new item) OR provide them with a dedicated promo code if you’re making use of a paid payment page (e.g. in the case where you may also want any non-members to have the option to only buy that item).