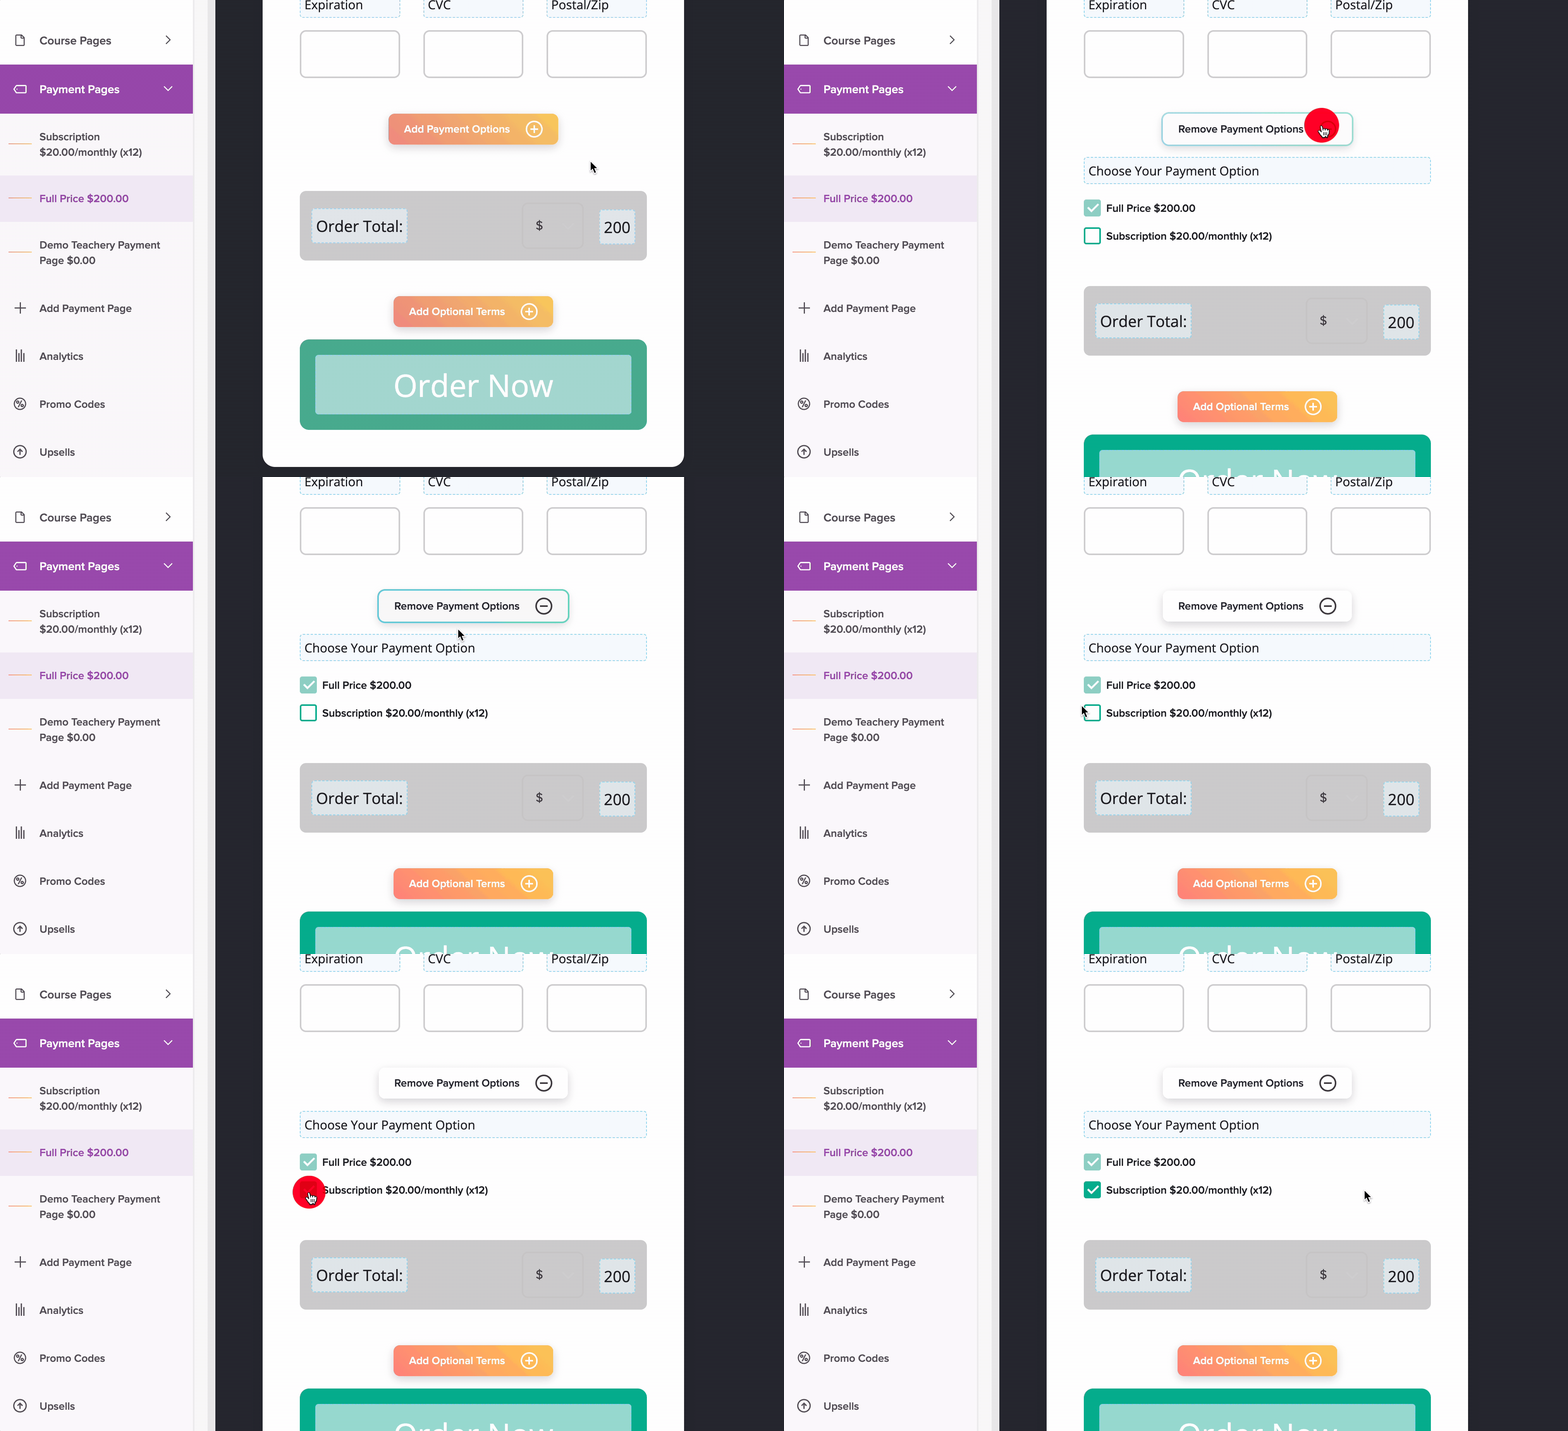
We want to give you and your course customers as much flexibility when it comes to purchasing your courses. Here’s how you can go about displaying multiple payment options/payment plans for your users.

🤲 Multiple Payment Options on ONE Payment Page
Let's say you have a course with two payment options:
$200 1-time ("Fixed") payment
$20 monthly for 12 months ("Monthly Recurring") payment
The first thing you'll want to do is create EACH payment page separately. Name the pages, set the price, and customize the pages to your liking.
The second thing is to decide which payment page will be your primary/default payment page. In other words, this page’s URL is the one you’ll share or embed wherever you’re promoting your course.
Display the payment options by checking the ☑ boxes
In your chosen primary/default payment page, toggle ON the Add Payment Options button, then check the boxes ☑ for the payment options you want to be displayed on the payment page.

You can display as many payment options as you like!
Now, you can share your primary/default payment page and your customer will see multiple options they can choose between.