We understand that you are a VERY creative person and may have something other than a course you want to add as an Upsell on your Payment Page - yay, you!
You CAN offer something other than a course as an Upsell BUT that offer does have to be created as a course in Teachery 🤪.
🎥 If you enjoy a video walkthrough, you'll find one at the bottom of this help doc.
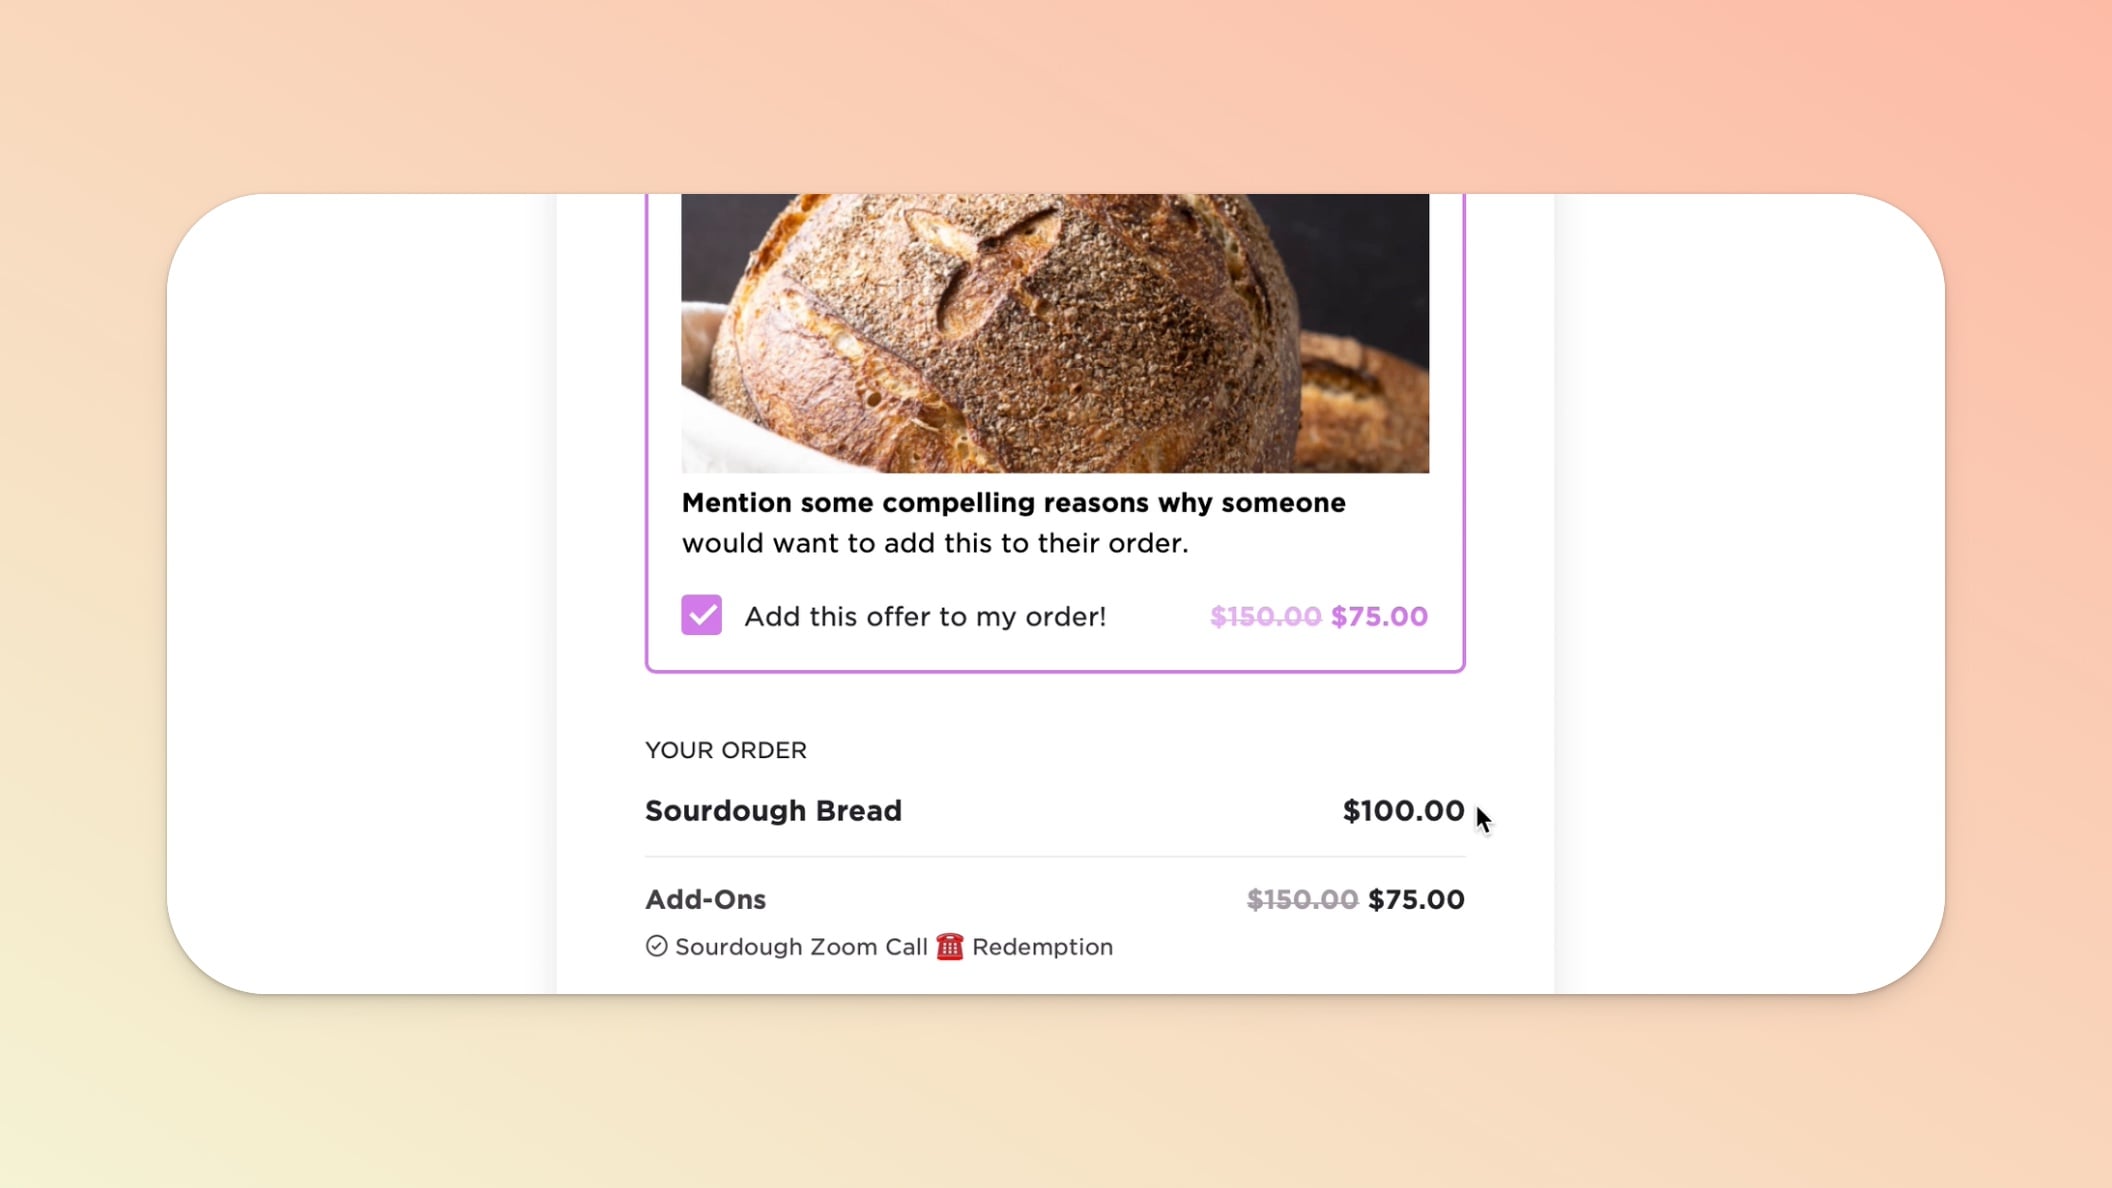
Let's pretend you have an awesome $100 course about sourdough bread-baking called Sourdough Your Life 🍞
As an Upsell, you are offering a 1-Hour Live Zoom call and want to price the zoom-zoom at $75 (you typically charge $150 for this call)
You are going to create a *NEW* Teachery course just for your 1-Hour Live Zoom call. The course welcome email can do ALL the magic for you!

You are hopefully very familiar with creating new courses.
The only important thing to note is the *NEW* Course Name will be displayed in the Upsell offer box, so make sure to name your course appropriately (in our example, the new course is named "1-Hour Live Sourdough Zoom."

Here's the example "1-Hour Live Sourdough Zoom" course with a simple header image and text added to the Overview Page:
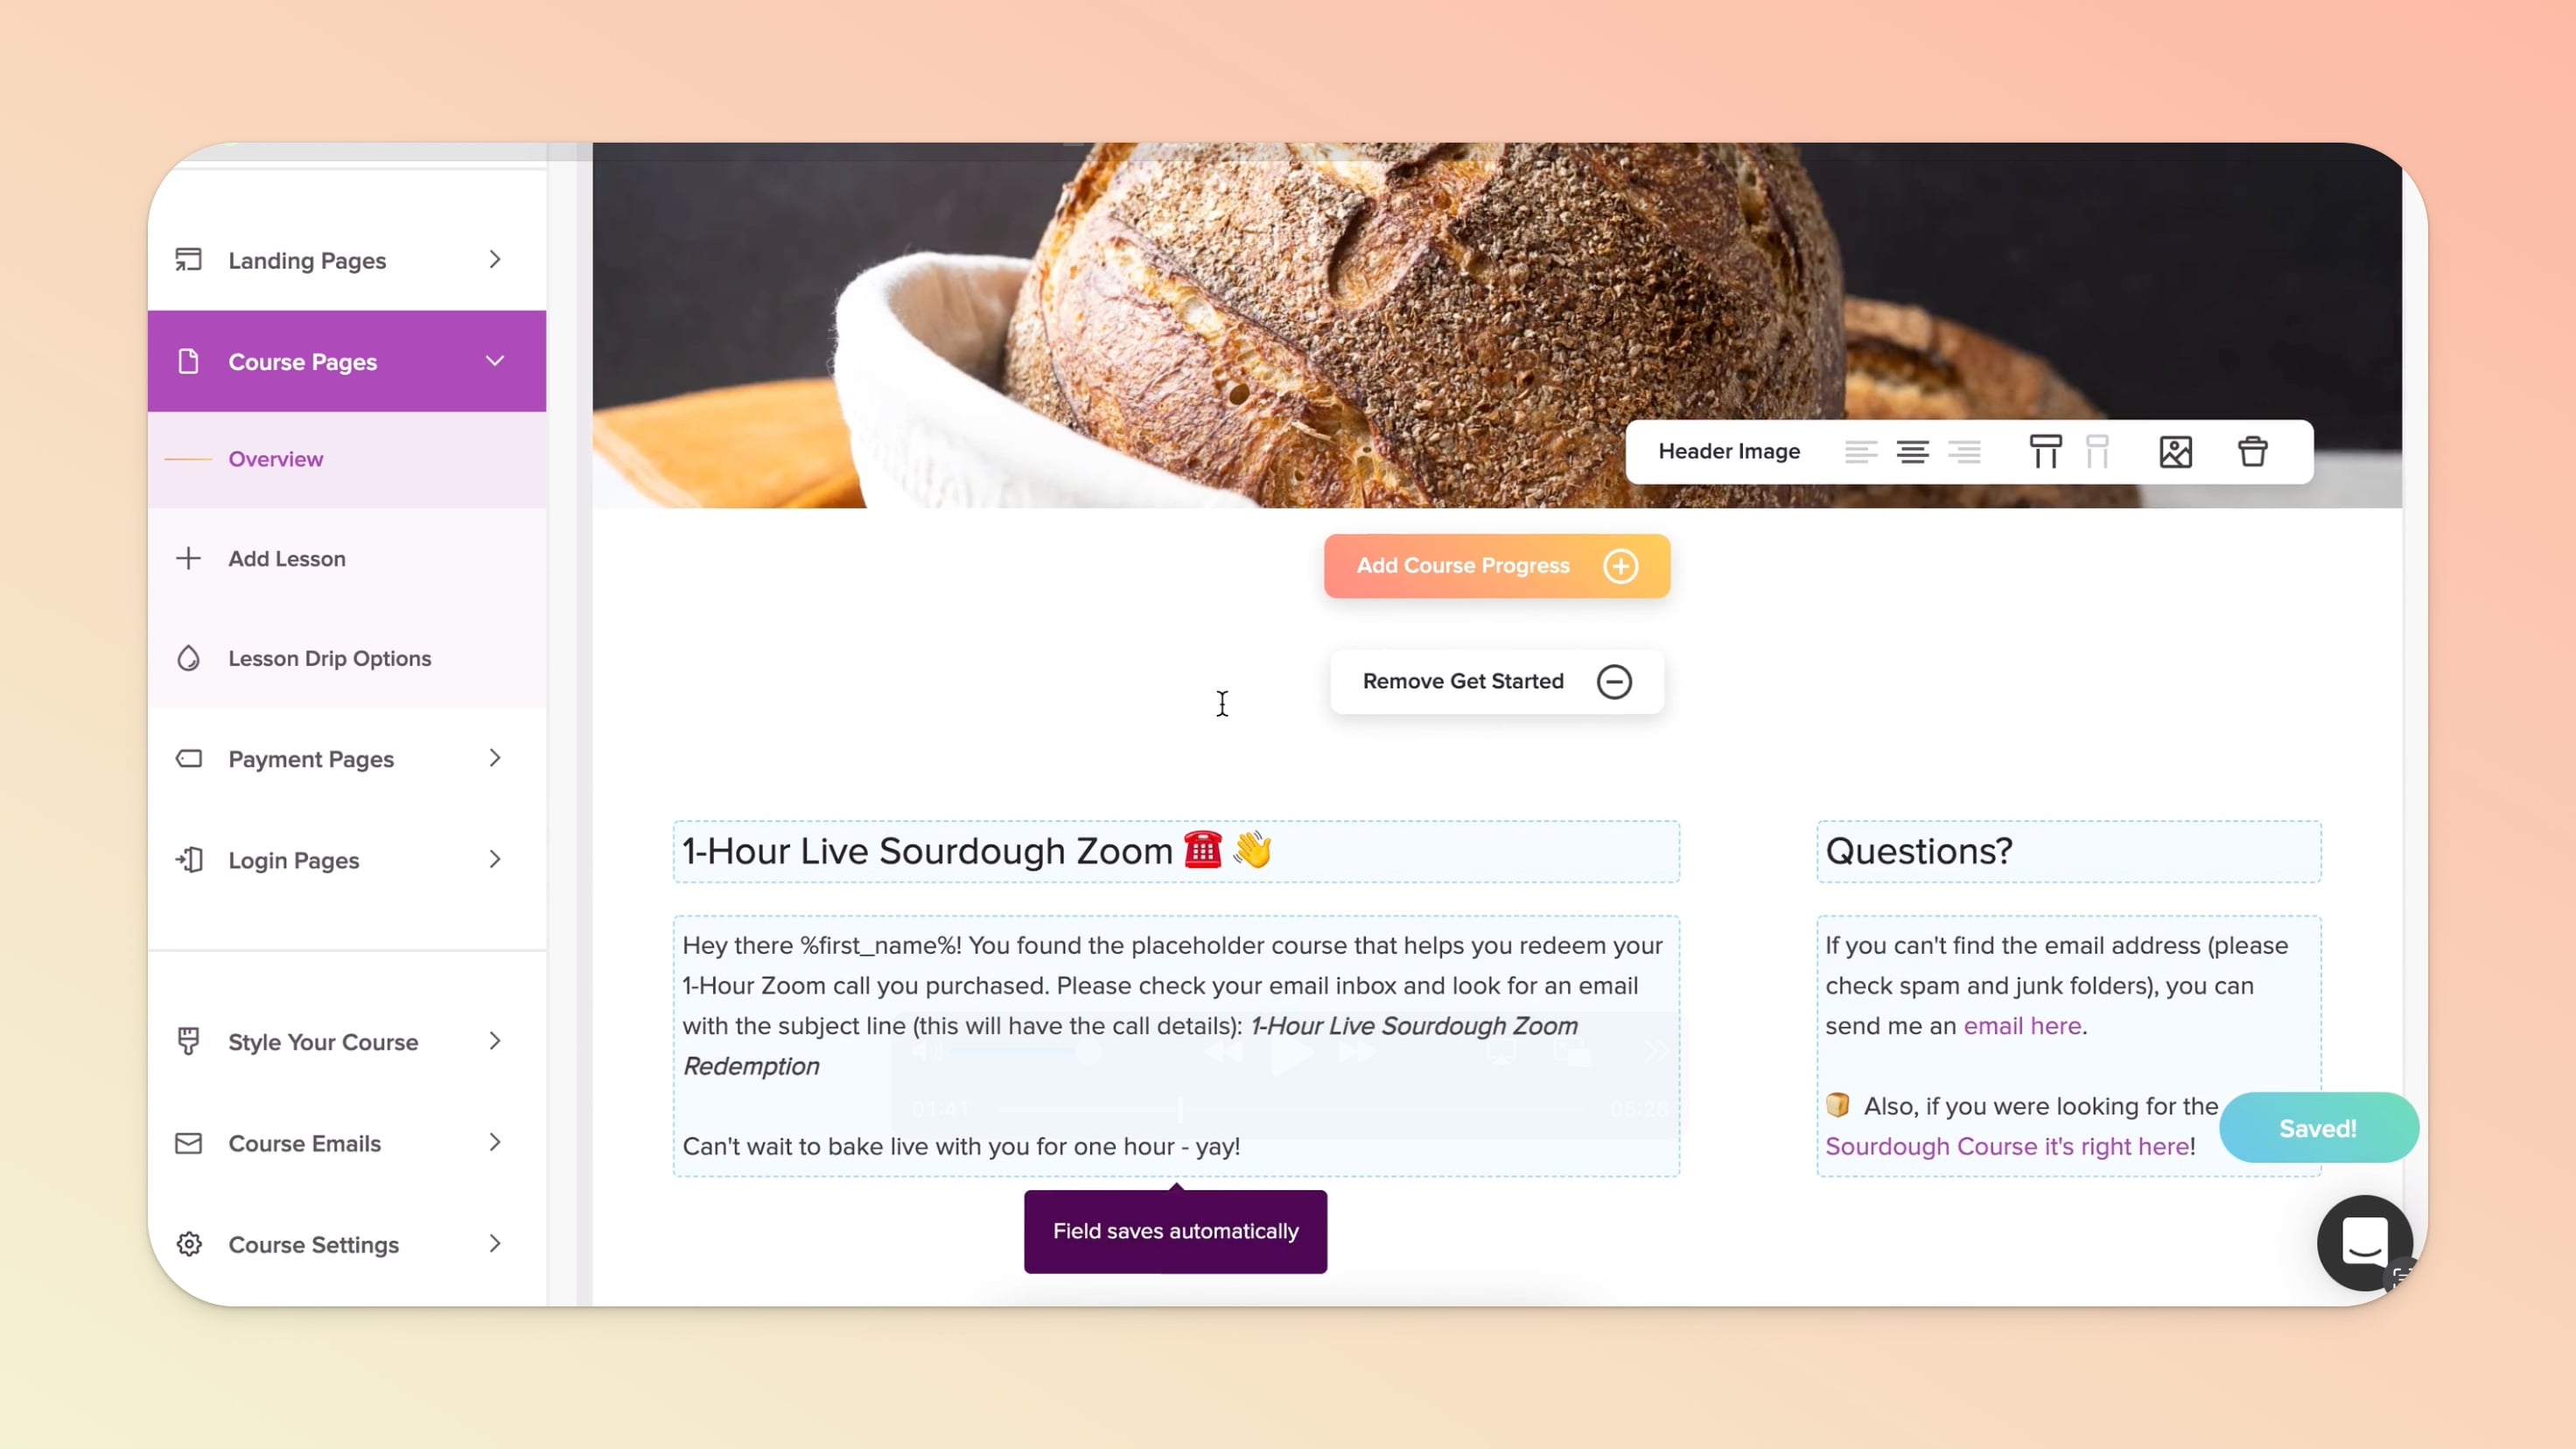
Pro-Tip: If you're creating a "fake" redemption course, it's a great idea to add a link to the Course Login page for the main course. It'll help avoid any confusion if your customer was looking for the main course and clicked into this one 👌.
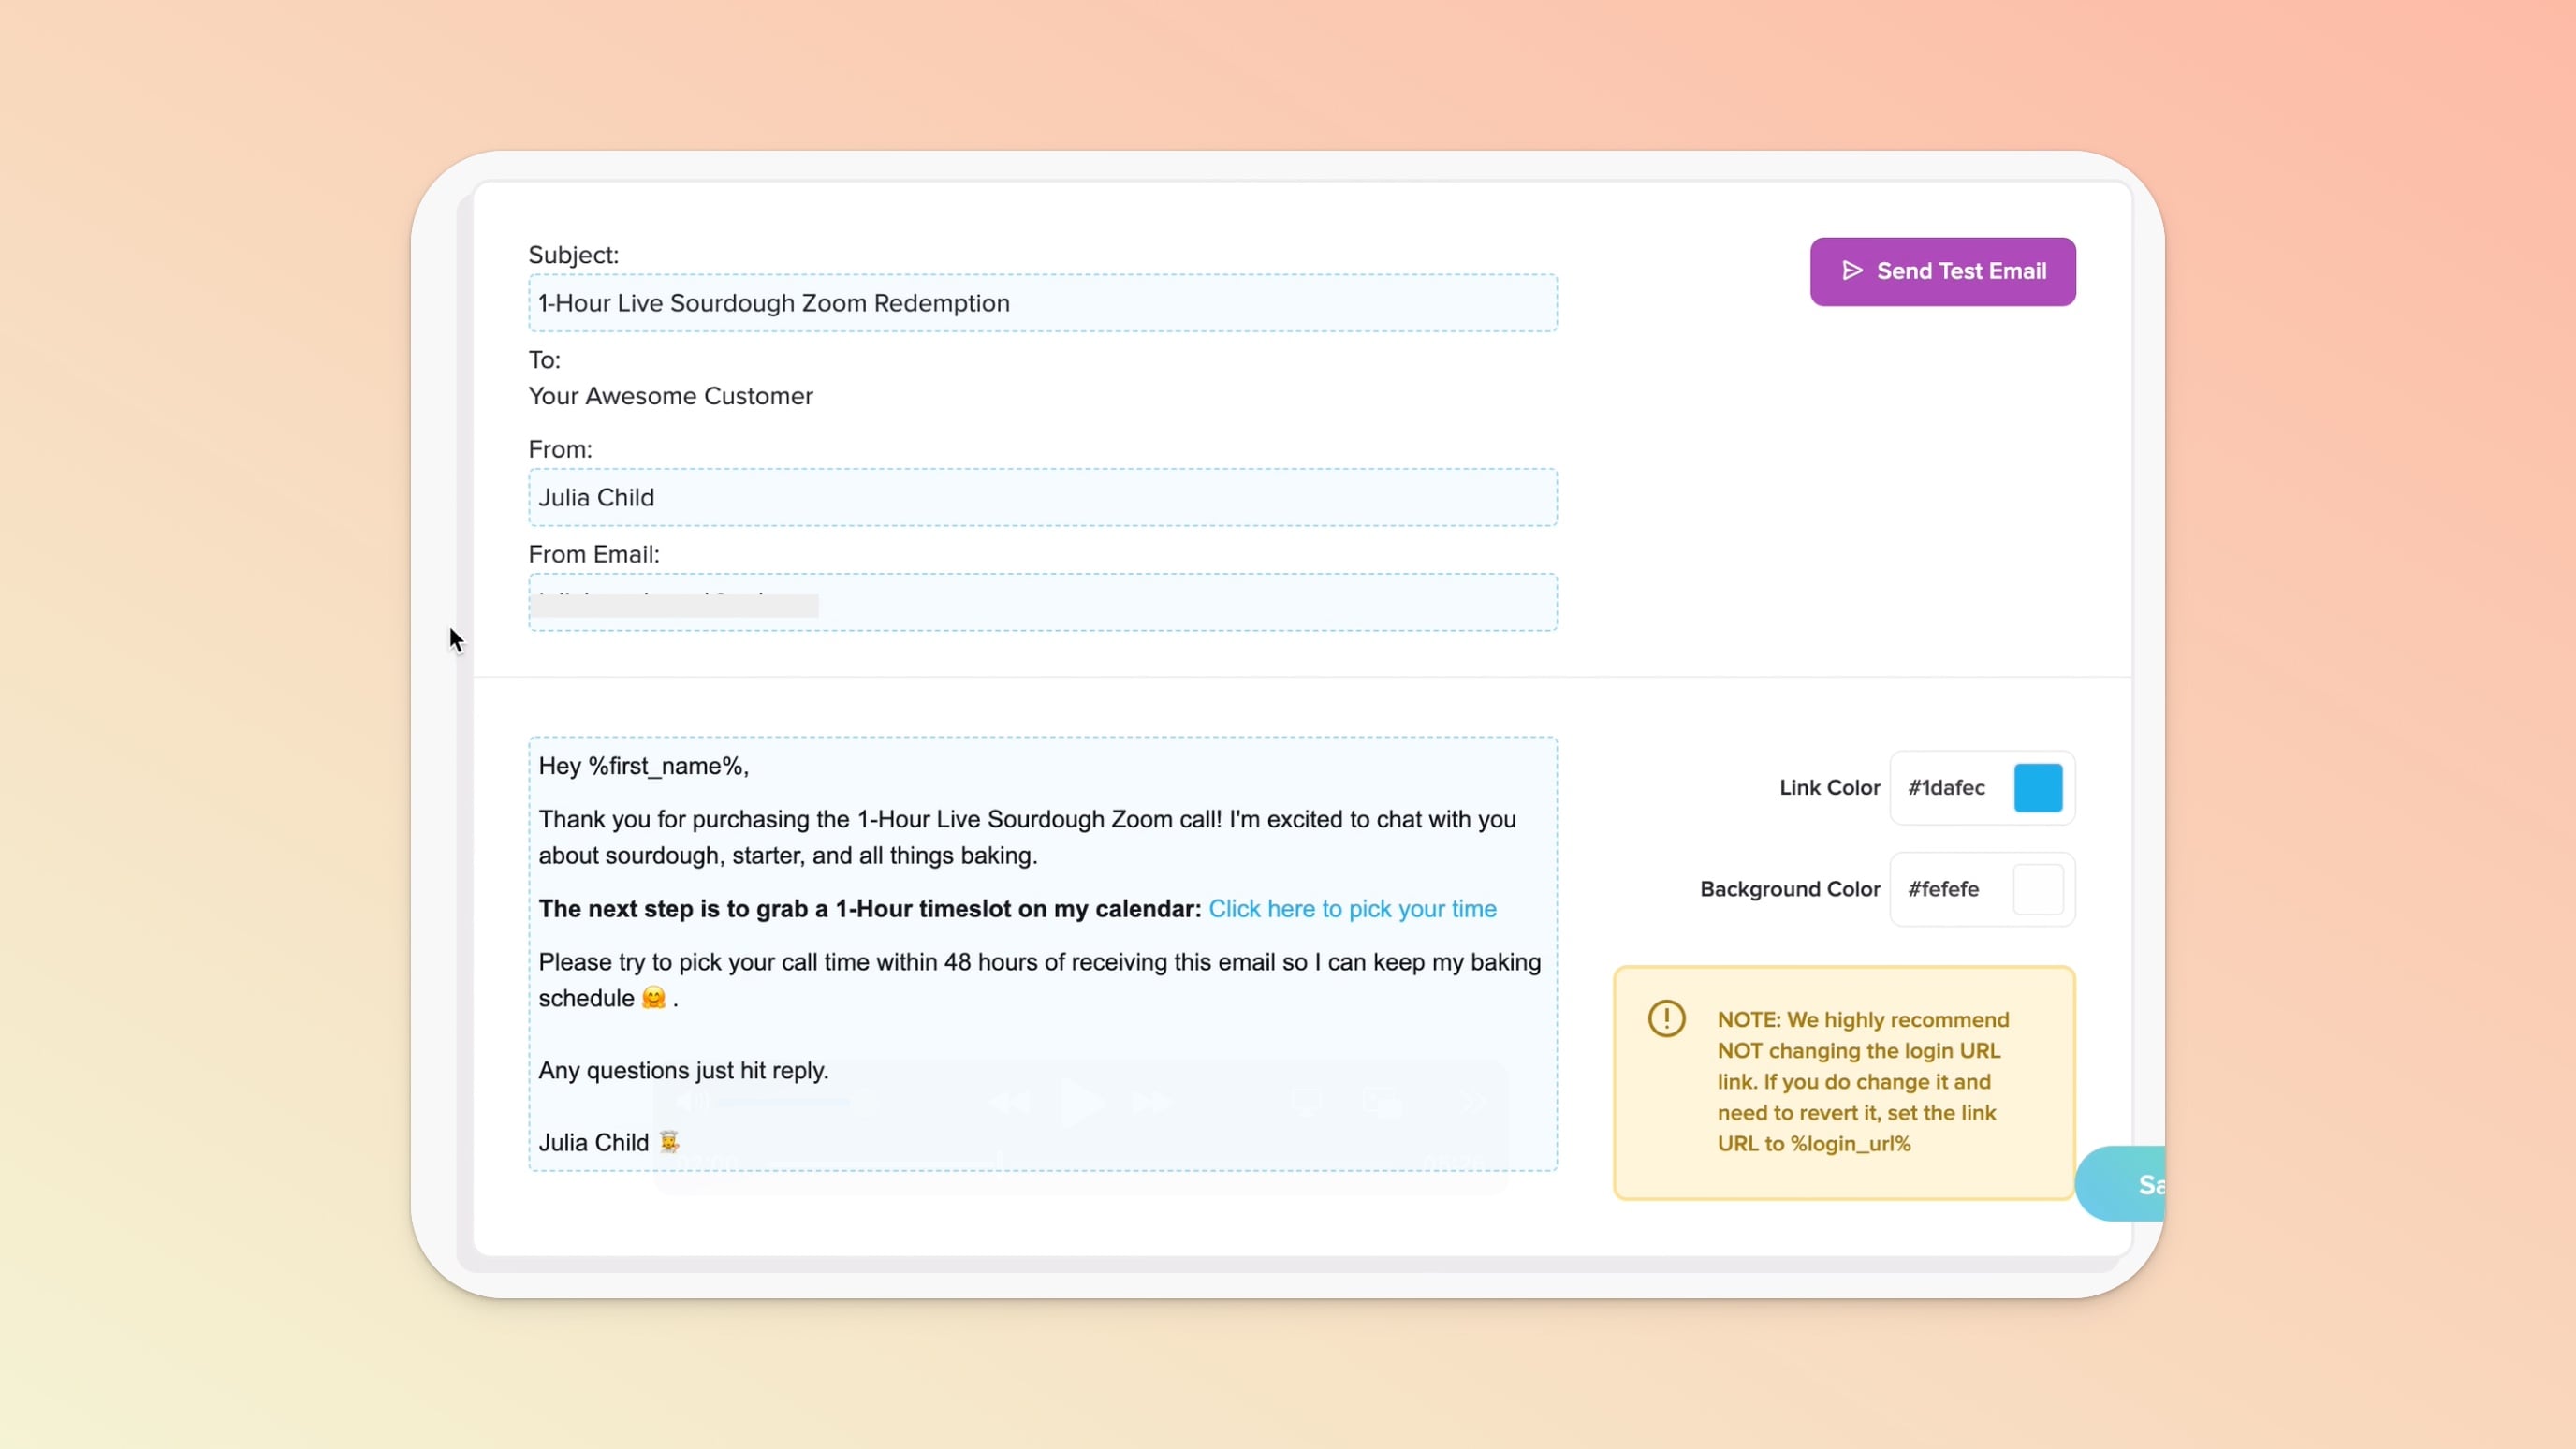
While editing your new course, go into the left sidebar, scroll down to Course Emails, and click into the Welcome Email.
You'll want to edit the email’s Subject Line, From Email (if you want to change it), and then the actual email content itself.

We normally advise against this but for this Upsell course, you probably don't need your customer to ever view this course. If you do for any reason (e.g. perhaps you’ve included other helpful content in there), feel free to leave it in. Write your email content and include any next steps to redeem the Upsell offer.
Now that you have your new course created, let's go ahead and navigate back to your Main Course. In the Payment Pages section you'll create a new Upsell.
Name your Upsell
Add your *NEW* course as the add-on
Set your Upsell price (and discount if you like)
Save to create your Upsell!
You're at the home stretch! All you have to do at this point is pick a Payment Page (or create a new one) that you want to place your Upsell on.
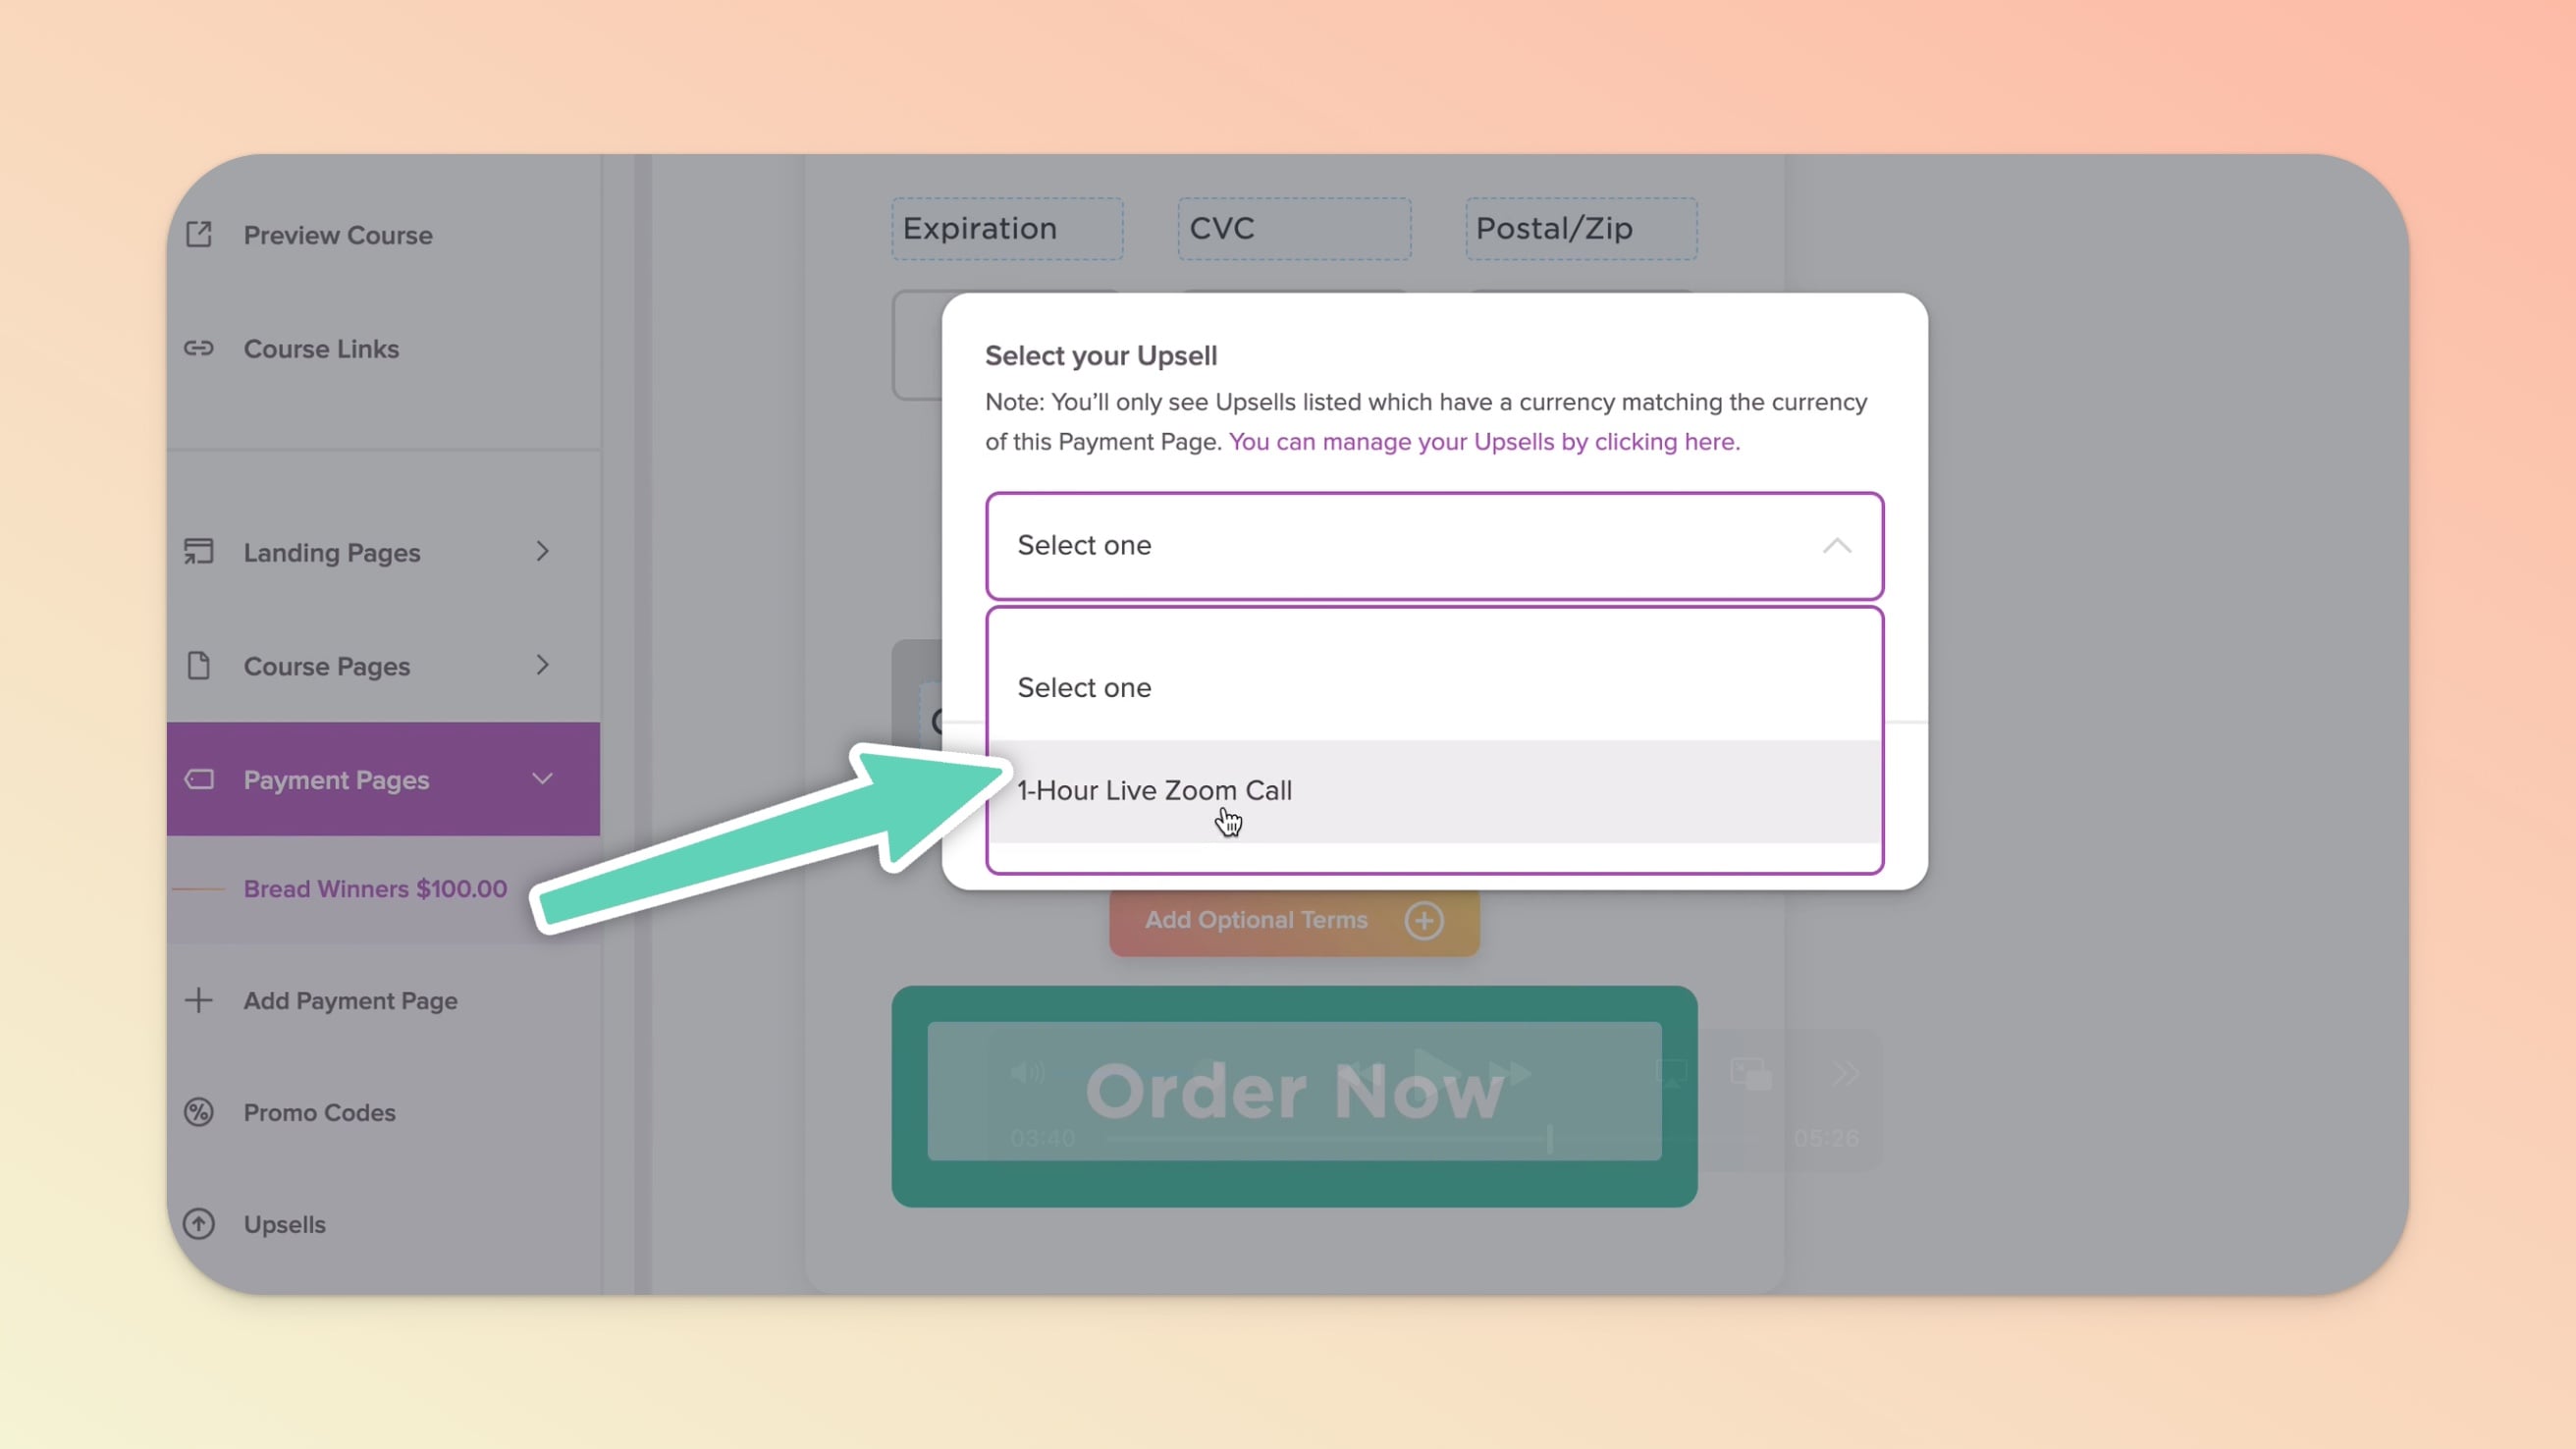
In the Payment Page editor, look for the "Add Upsell Display" button and then select your Upsell.
Customize the image and text and you're ready to promote your Payment Page!
Once they purchase your Payment Page and select the Upsell, they'll receive two welcome emails (one for your Main Course and one for the *NEW* course).
They'll redeem your add-on based on your welcome emails for the *NEW* course and that's it!
Use the chapter markers on the timeline of the video to jump to the specific STEPS that were outlined in the text above.
💬 If, at this point, you hit any hurdles/doubts and can’t find the answers elsewhere in our help center, please use the support chat bubble* in the bottom right of your screen. Make sure to include course/product info, customer info, helpful screenshots, or anything else that may be relevant to your query.
* Support hours are 09:00 to 17:00 GMT.