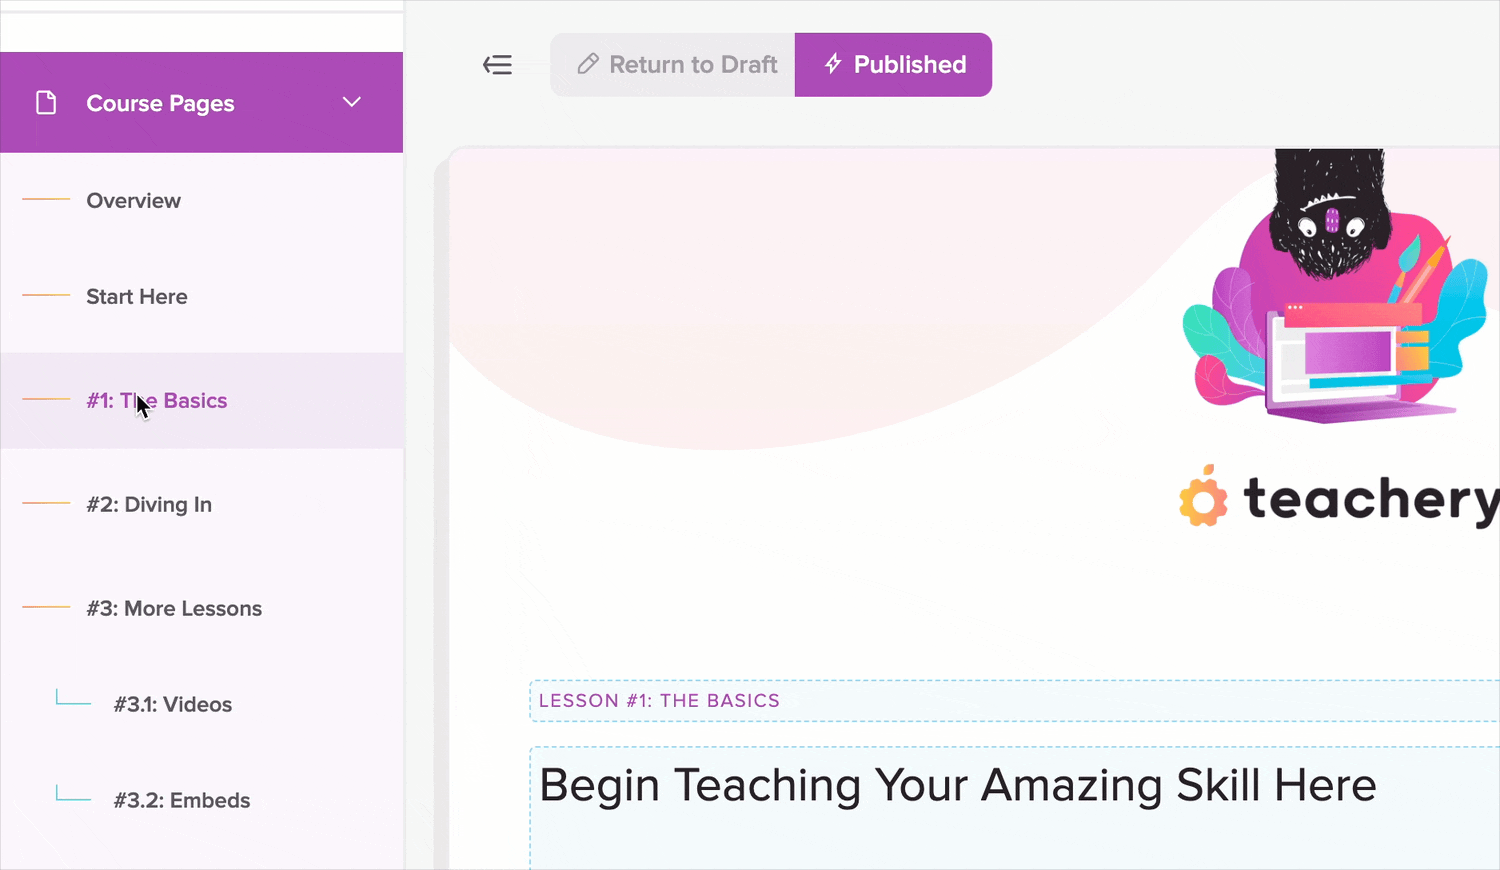
Your courses can have as many Lessons (and Sublessons) as you like!
If you want to dive right into the lesson walk-through video, go ahead and do that below. You'll learn how to add images, PDFs, videos, and other content in your Teachery course.

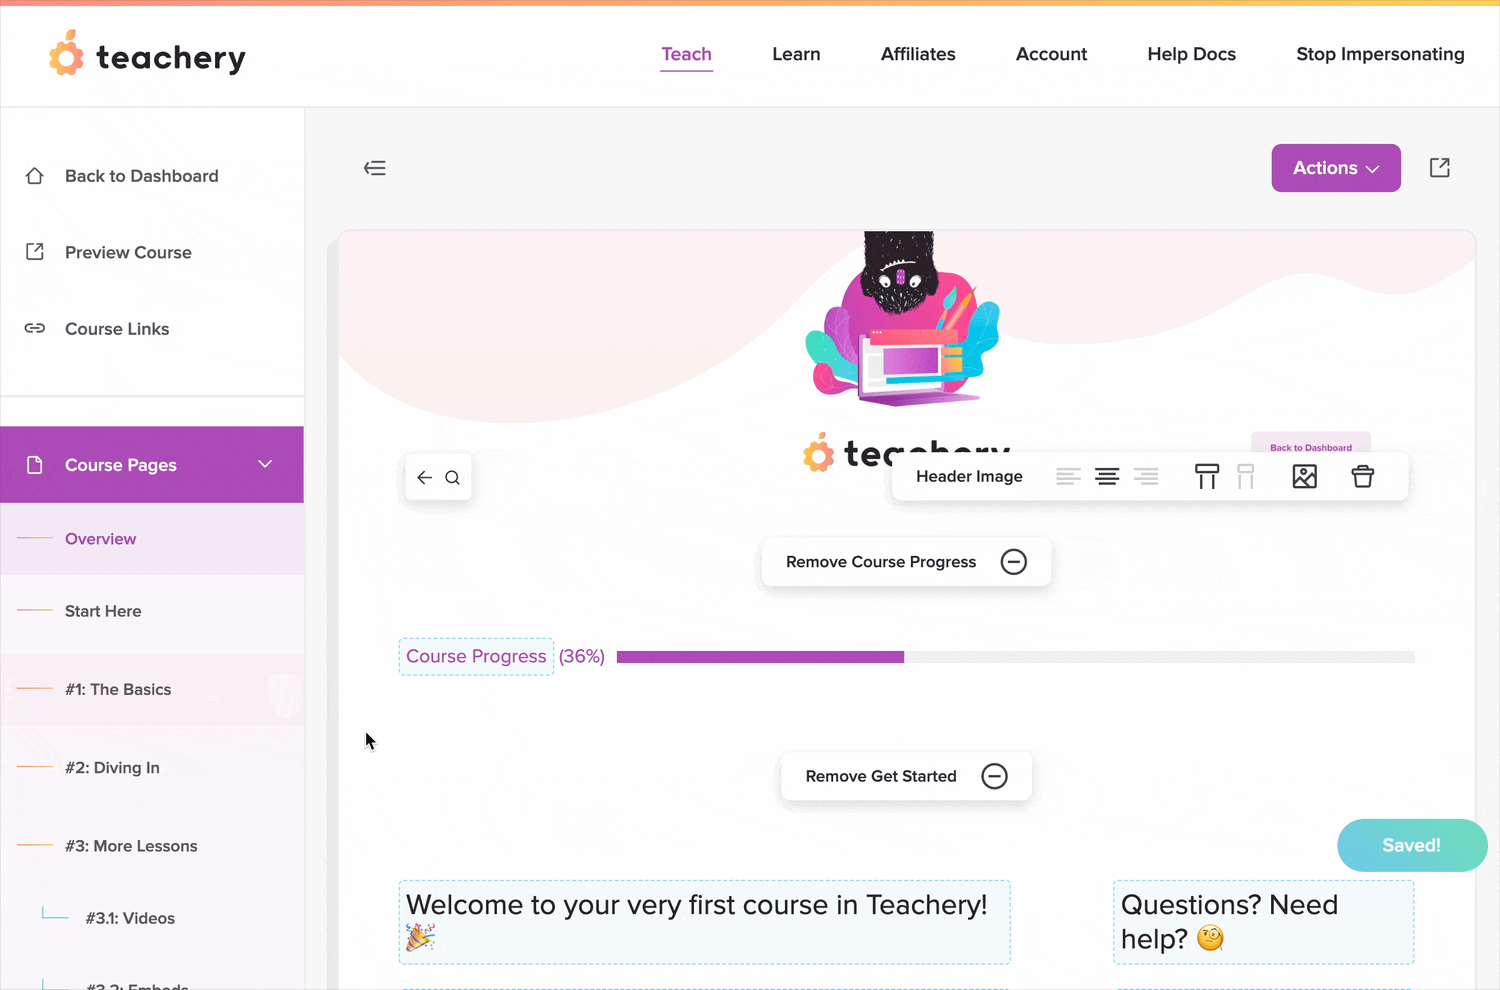
Lesson Name
Lesson Title
Intro Text content block (a large text area)
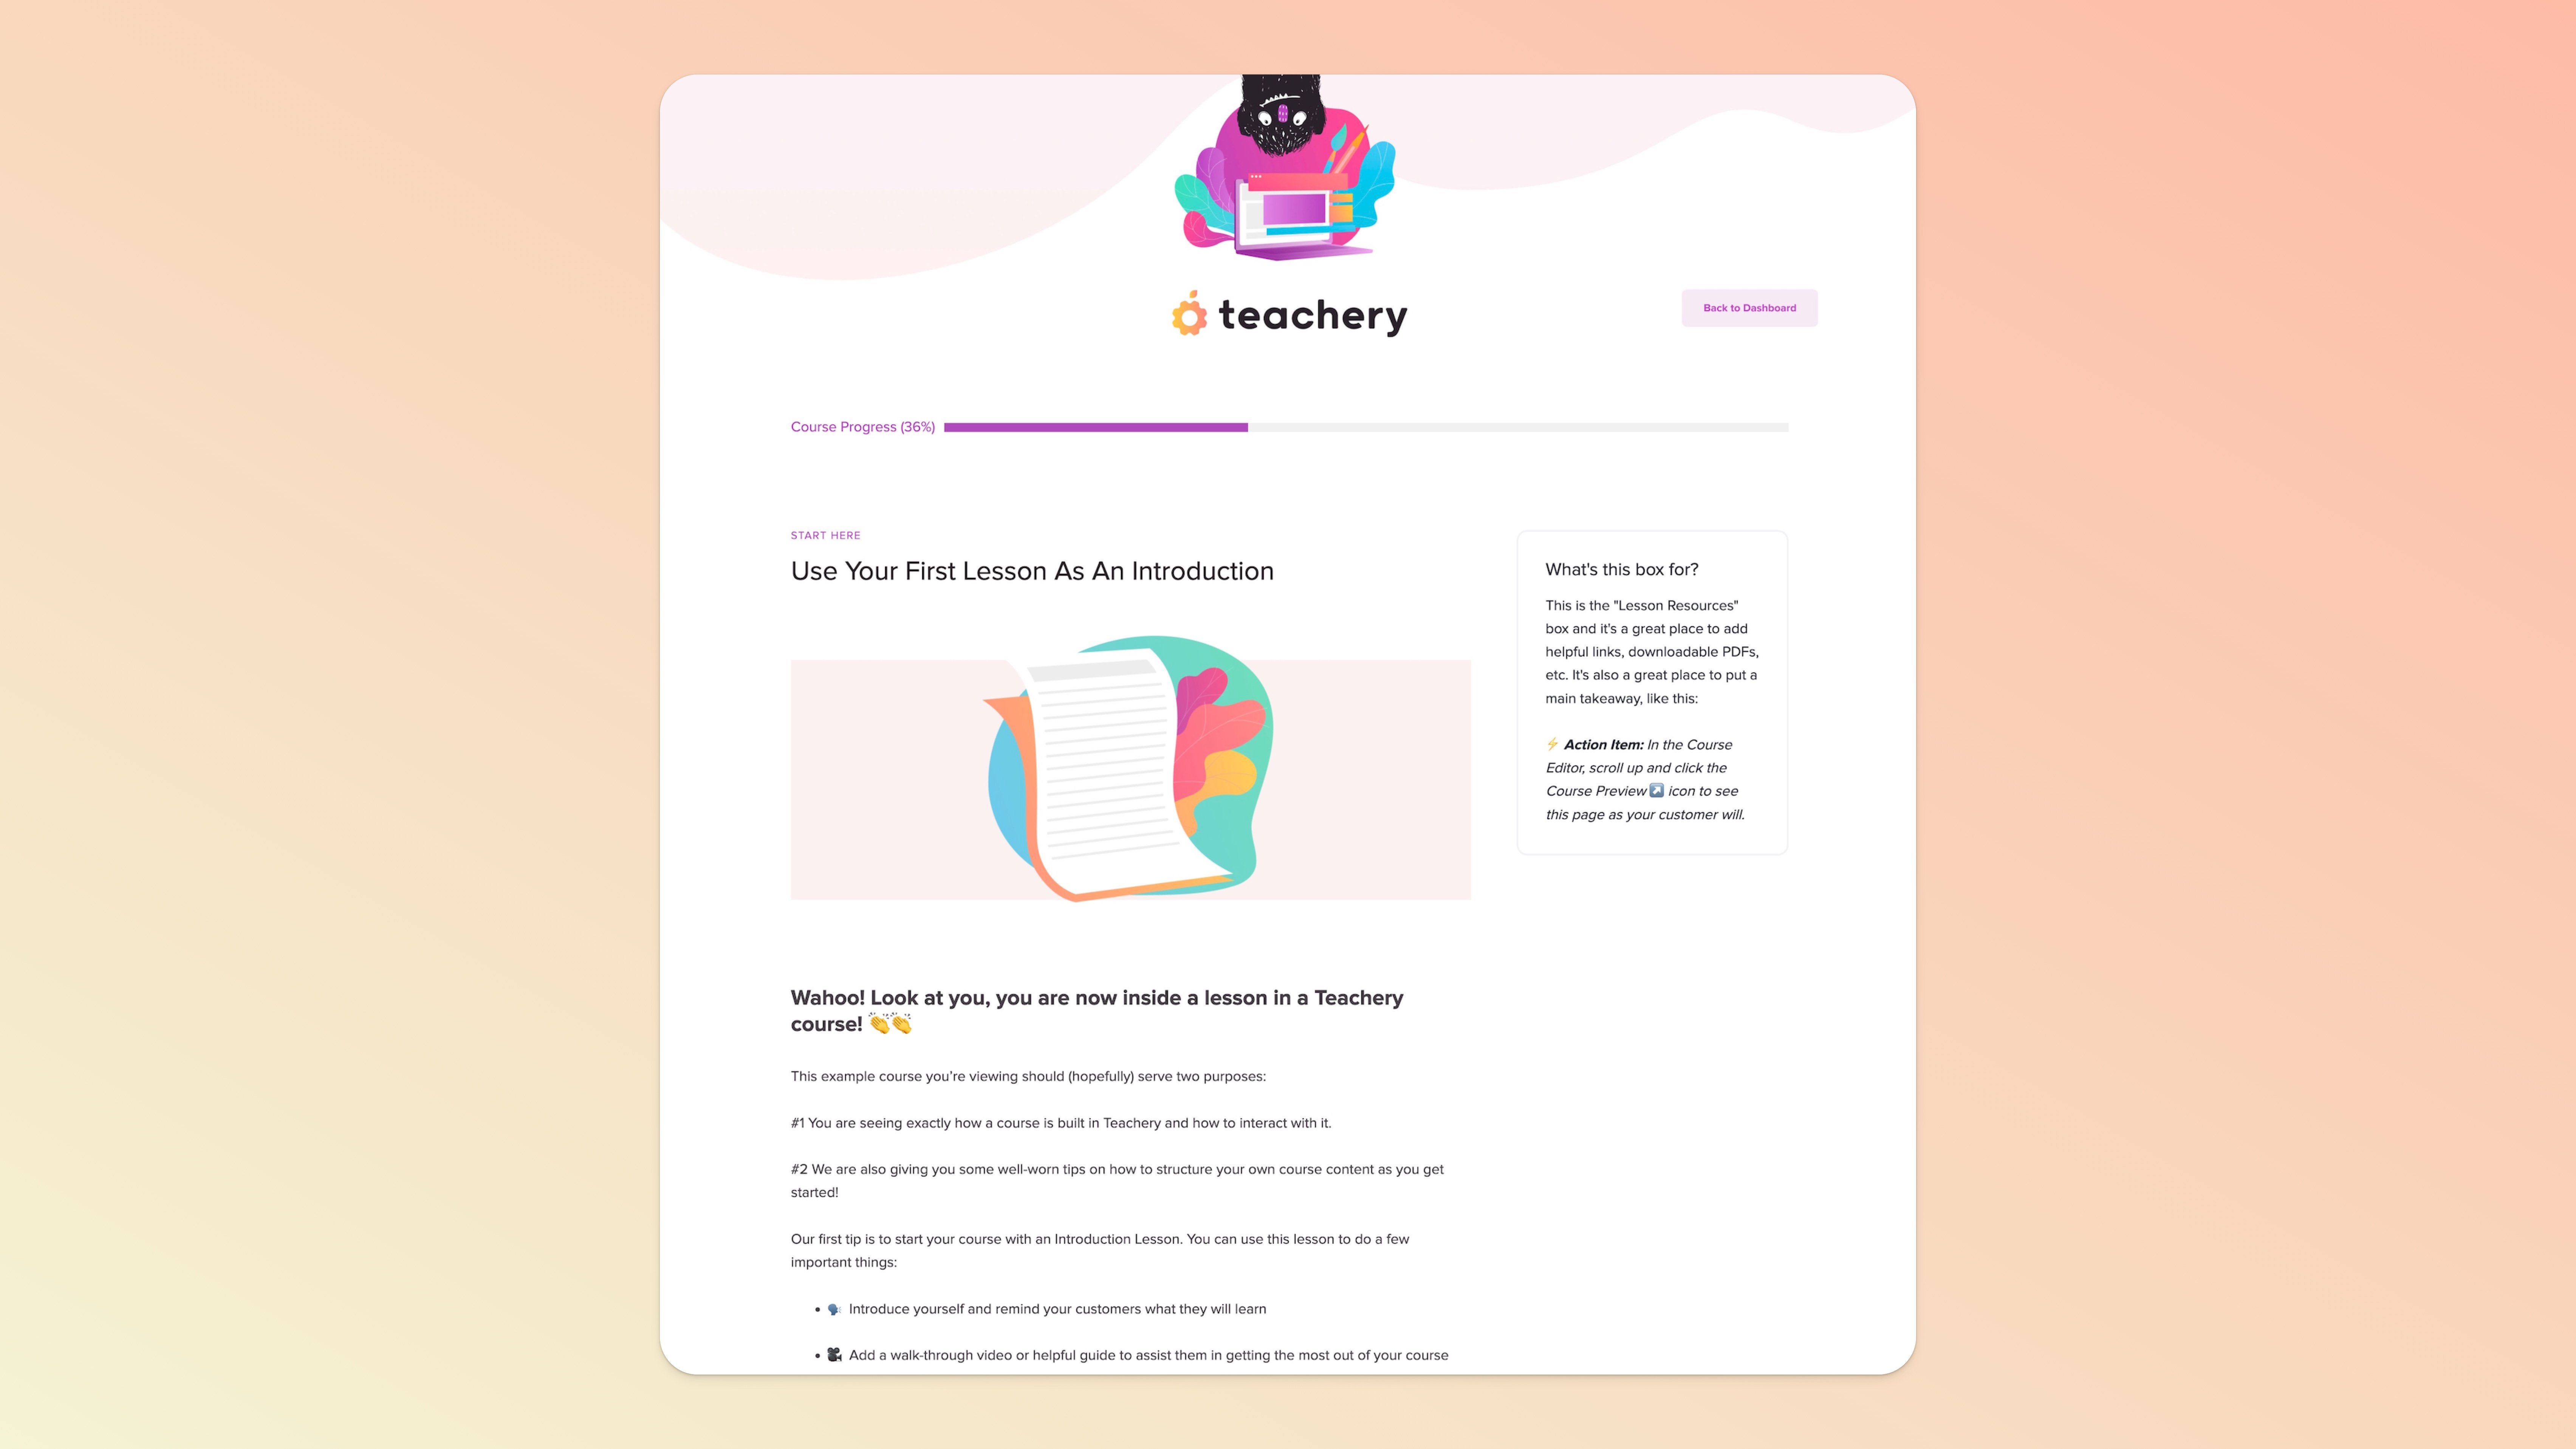
Lesson Resources Box*
Add Content (Video/Audio, etc)
Transcript Section (just another large text area)
Add Comments with Disqus (learn more here)
Completed Button
Next Lesson Button
All of these different sections of a lesson are editable and will save automatically while you are making updates or changes (yay!).

Lessons are going to be the core of your amazing online course, so let us walk you through how they work in our online course platform. The video below breaks down the basics of lessons and lesson controls, including:
Adding new Lessons and Sublessons
Editing the Lesson Name or Lesson URL
Copying the Lesson URL (remember, someone has to have access to your course to view a Lesson URL or your course has to be publicly available)
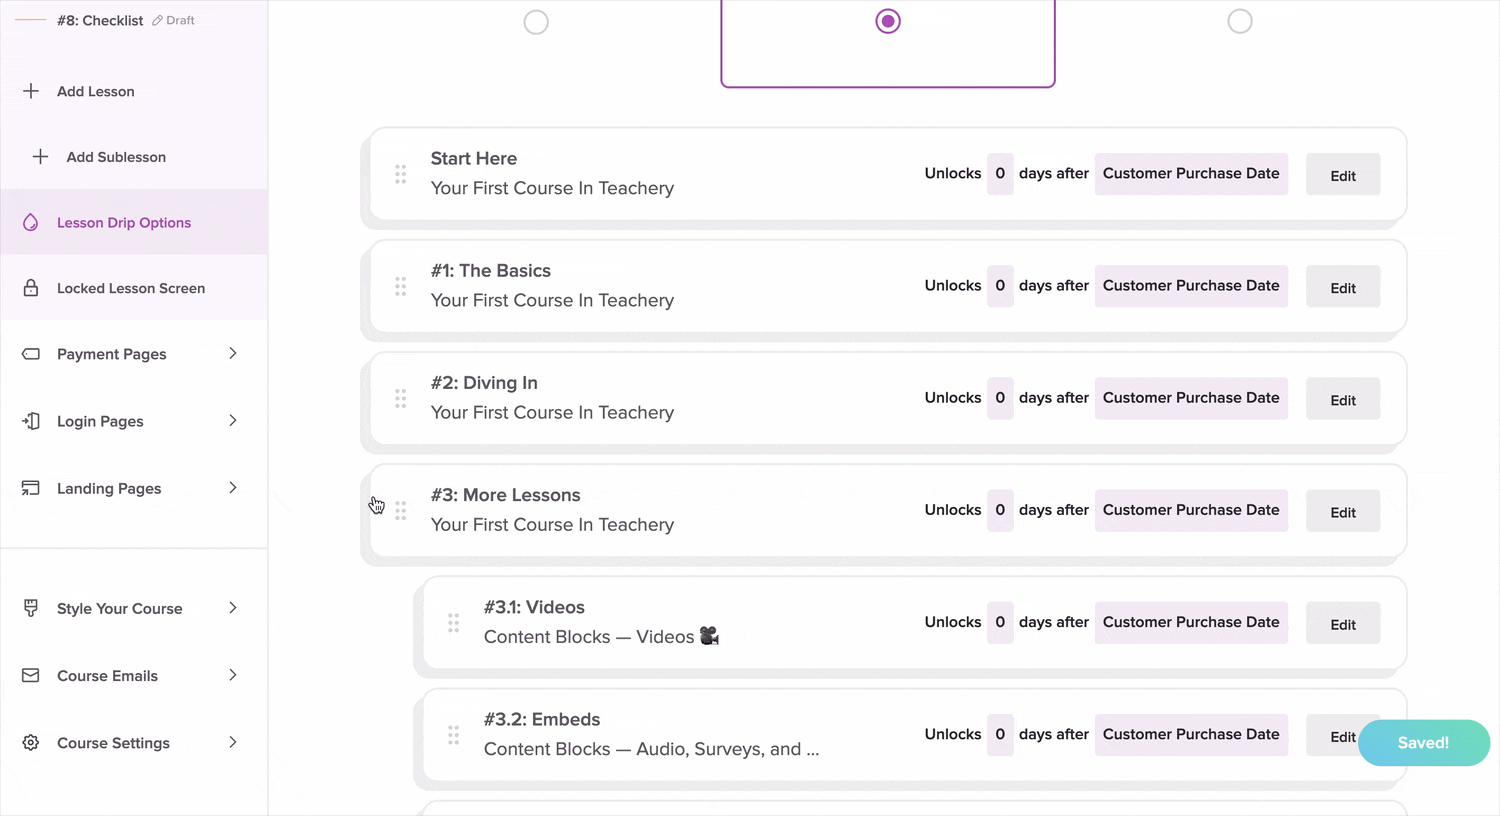
Editing the Lesson Drip Schedule (Locking Lessons)
Duplicating a Lesson
Deleting a Lesson
Previewing a Lesson
Once you've created a Lesson (or Sublesson), if you want to edit the name of it in the left sidebar of Teachery's course editor:
Click into edit that Lesson
Click the Actions (purple) button
Click "Edit Lesson Name/URL" and update the name!
Our lessons have a simple layout and structure to them. Watch the video below to get the hang of editing a lesson, adding content to it (images, videos, etc), as well as a bunch of other helpful tips.
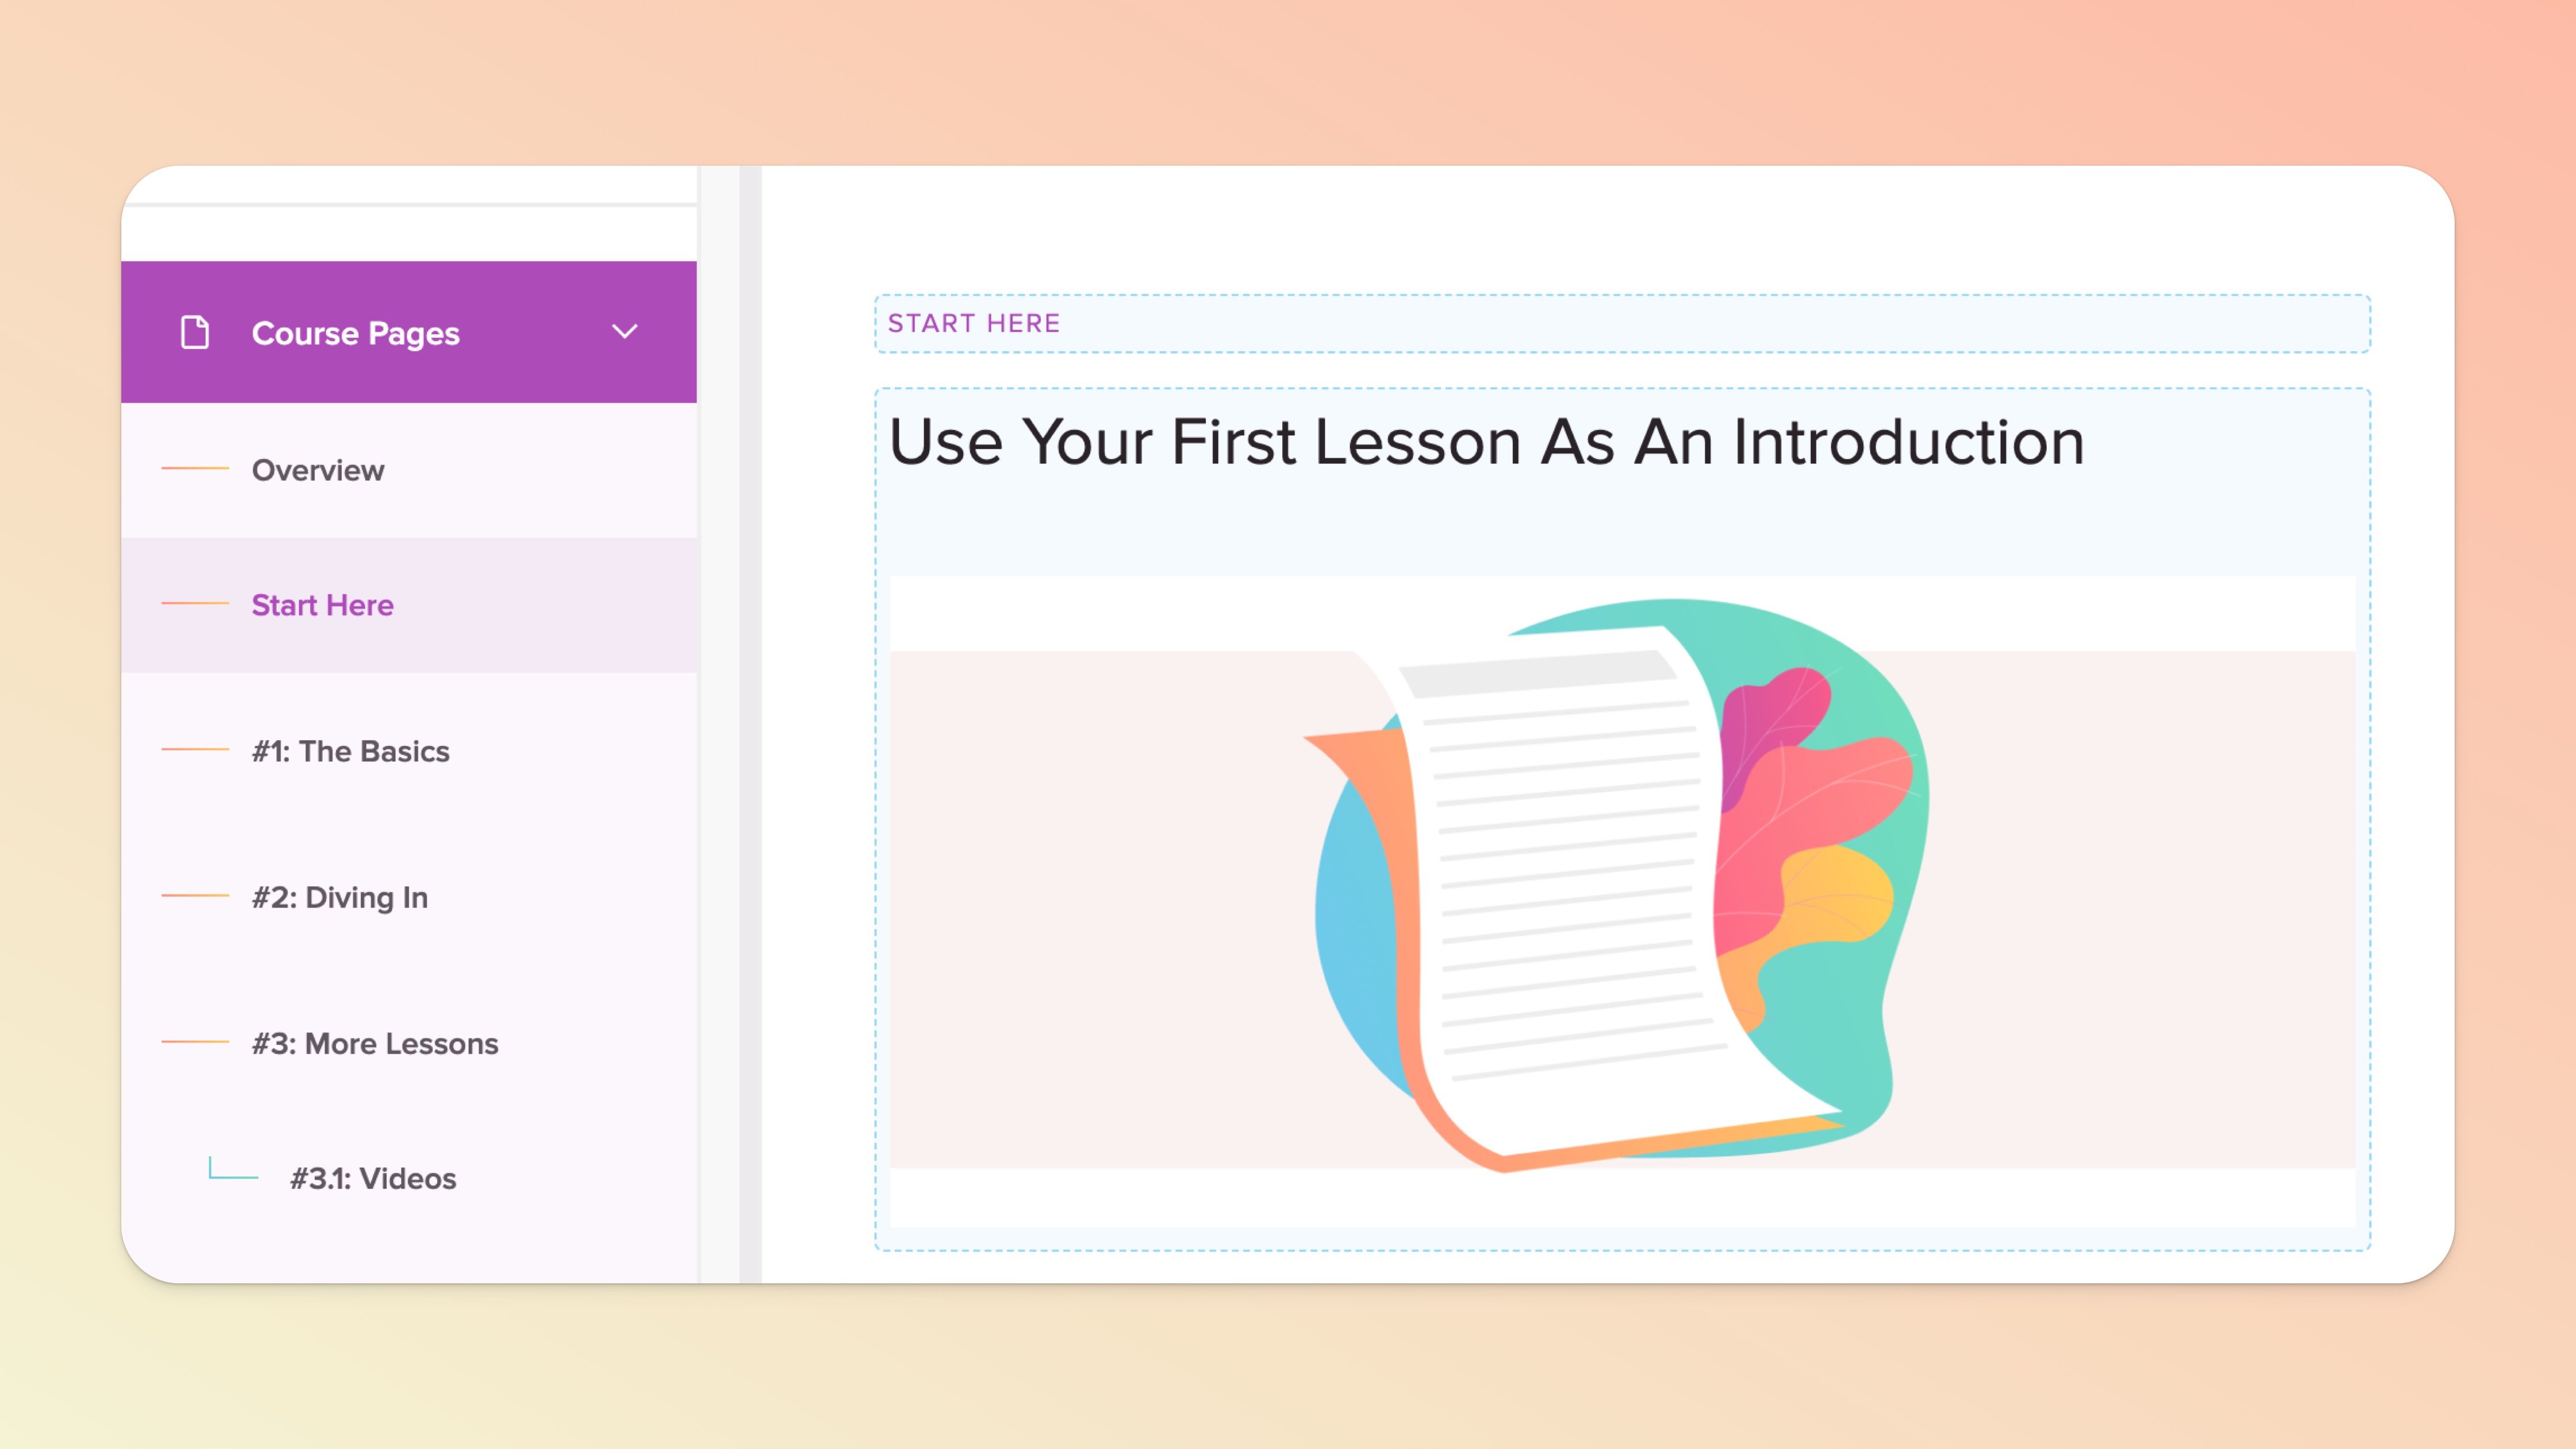
Once you’re inside a lesson, the first three text blocks immediately available on the page are dedicated to:
the lesson name,
the lesson title/heading, and
the lesson intro text.
These three key text/content blocks are also discussed in the video walkthrough below.
The lesson’s intro text is the text that will appear on the course Overview page and will serve as a preview of the lesson’s content. If you don’t want any text to appear on the Overview page, leave this block blank and add additional content blocks below is, as described below.
Using our built-in image tool is a breeze!
Click into any text area
Hit enter/return on your keyboard to start a new line
Click the Quick Insert button and then the image icon
Select the image from your computer
Ta-da! 🤗 (See the GIF below as an example)
Read our help doc on uploading images if you want to learn about adding images from external URLs, creating image thumbnails on the Overview page of your course, and more!
If you want to create links to PDFs, spreadsheets, or any other files for your students to download, simply highlight any text and upload a file to it. Below, we have a quick GIF and an additional short walkthrough video for you.

We let the video hosting pros handle this task in Teachery (Wistia, YouTube, Vimeo, etc). There's an example video shown below for Vimeo.
Read our full help doc on adding videos for more information, as well as walkthrough videos for YouTube and Wistia.
If you want to change the order of your lessons, we give you two ways to sort your lessons.
Sort Lessons Option #1: Drag and Drop
Drag and drop lessons directly in the left sidebar. If you are using Sublessons, you can drag these to new parent Lessons.
Sort Lessons Options #2: Lesson Drip Options
Use the Lesson Drip Options Page if you have more lessons or just want a larger viewing experience to drag and drop lessons.
While Teachery lessons aren't designed out of the box to have image thumbnails on the Overview Page of your course, you can accomplish this very easily:
Step #1: Click into the Lesson you want to edit
Step #2: In the "Lesson Title" field you'll want to add an image below the Lesson Title text (or you can remove the text if you don't want text).

Step #3: Click back to the Overview Page of your course OR click the "Preview Course" link in the top left of the sidebar to see your course overview page in action!
That's it! You now have lesson preview images on the Overview page of your course. You can read our related help doc on Lesson Preview Images here. 🤗
You can link content on a page to other sections within the same page by making use of “anchor links”. This is how you can go about it in your course overview page or any lesson page. Please only proceed if you’re comfortable with coding in HTML.
Switch to “code view” in the content block to which you want to link by selecting any text, clicking the (+) icon in the menu widget that appears, and then the code view (bracket) icon.
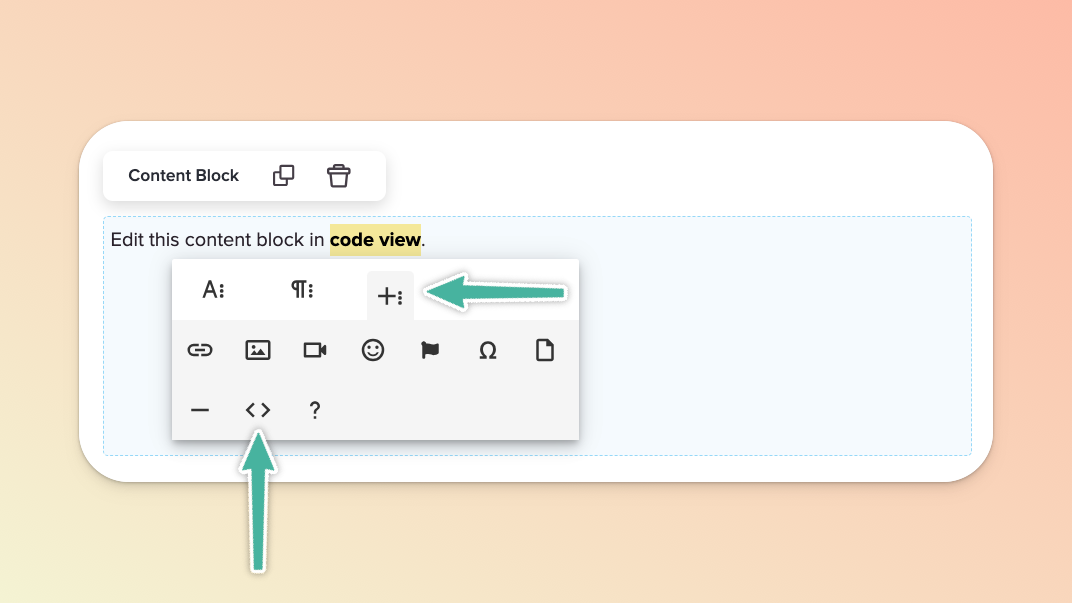
Add paragraph syntax and give it an ID (in other words, an obvious and simple label) e.g. “contact”, if you want users to jump to a content block with contact details. To switch back to normal view, click the bracket icon indicated below.
<p id="contact">section text goes here</p>
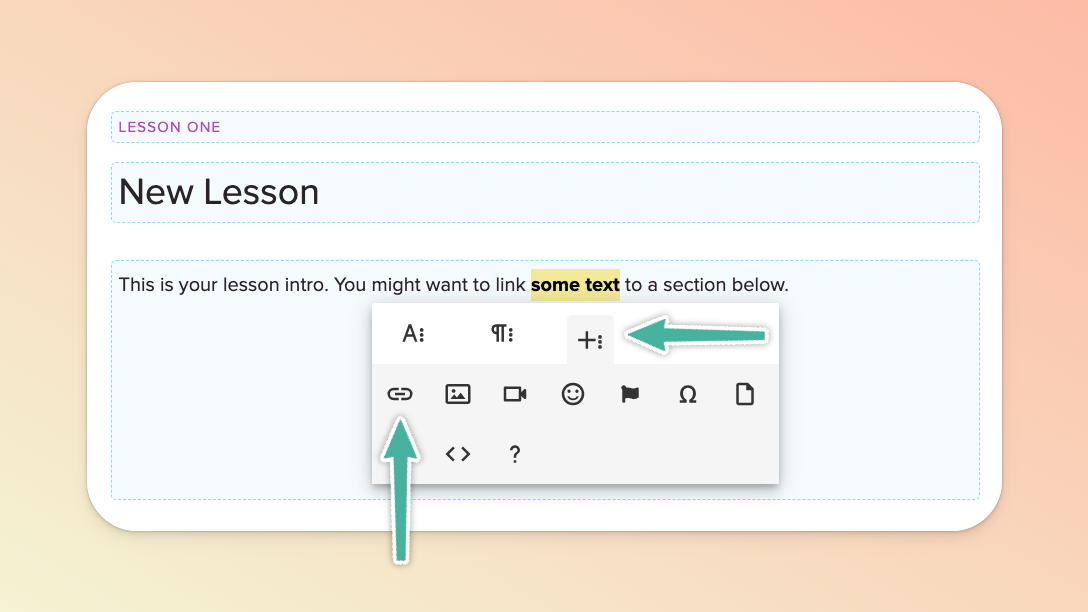
Return to the content block in which you want to insert the link that will jump to another section. Select the text you want to hyperlink, click the (+) icon in the menu widget that appears, and then the link icon.
In the URL field provided, simply insert a hashtag followed by the label you decided on in the initial step e.g. #contact. Important: remove the option to open the page in a new tab.
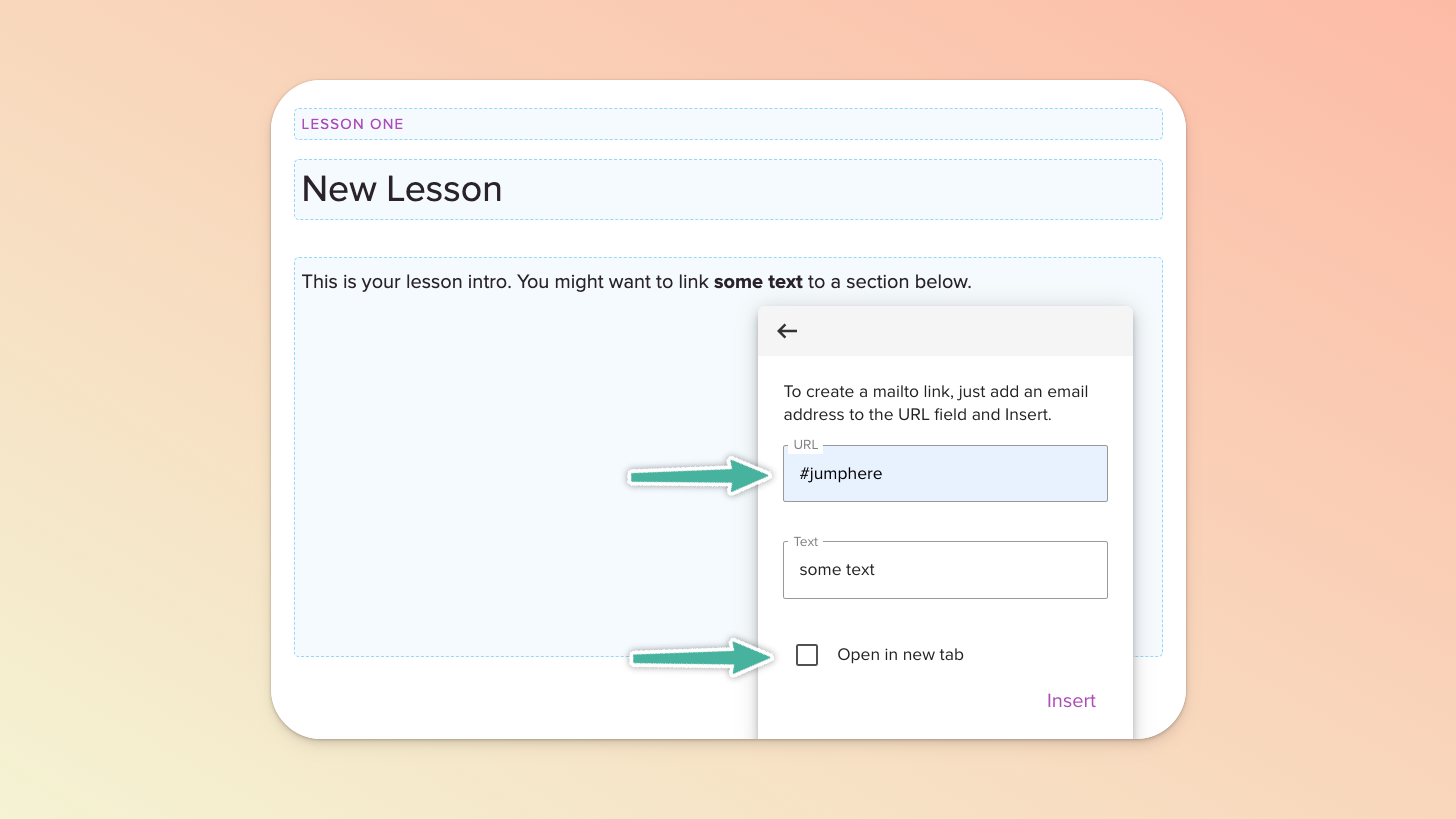
You’re all set! Preview your page to ensure everything is working as expected.
