Teachery admittedly doesn’t have a community feature that can match up to Facebook Groups, Slack, etc. Our main priority is to provide you with a simple, easy, seamless framework for delivering courses or digital downloads. That said, we are considering something for the longer term. 😉
In the meantime, we do allow you to connect a Disqus account or embed other third-party tools that will enable commenting within lessons.
Regardless of which tool you use, you have the ability to enable/disable the comment area within each lesson of your course, giving you more flexibility and limiting comments to only the lessons you choose.
We enable you to easily connect your (free or paid) Disqus and Teachery accounts. You'll just need to grab your Disqus shortname and pop it into Teachery.

It’s come to our attention that the free Disqus plan is now ad-supported; which means ads may appear in your comment areas. 😞 If you’re seeking an alternative free tool, below we list several other tools you can experiment with.
Watch this video on how to sign up for a free Disqus account and grab your Disqus shortname.

Here’s the written version of what you can watch in the video above:
In Teachery, edit any course you’ve already created.
In the left sidebar, click a lesson in which you’d like to enable commenting.
Click the Add Comments button at the bottom of the lesson.
Teachery will prompt you to add your Disqus shortname.
IF you already know your shortname, pop it in and hit Save.
IF you don’t recall your shortname, go back to Disqus, and click the Site Admin button in the top right of the navigation bar. On the next page, open the Your Sites dropdown in the top left of the navigation bar. There you will spot your shortname(s) or be able to create an all-new one.
You’re all set!
No worries! While editing your course click the Course Settings options from the left sidebar and then click Manage Options. Scroll down and you'll find the "Enable Comments" field to edit your Disqus Shortname.
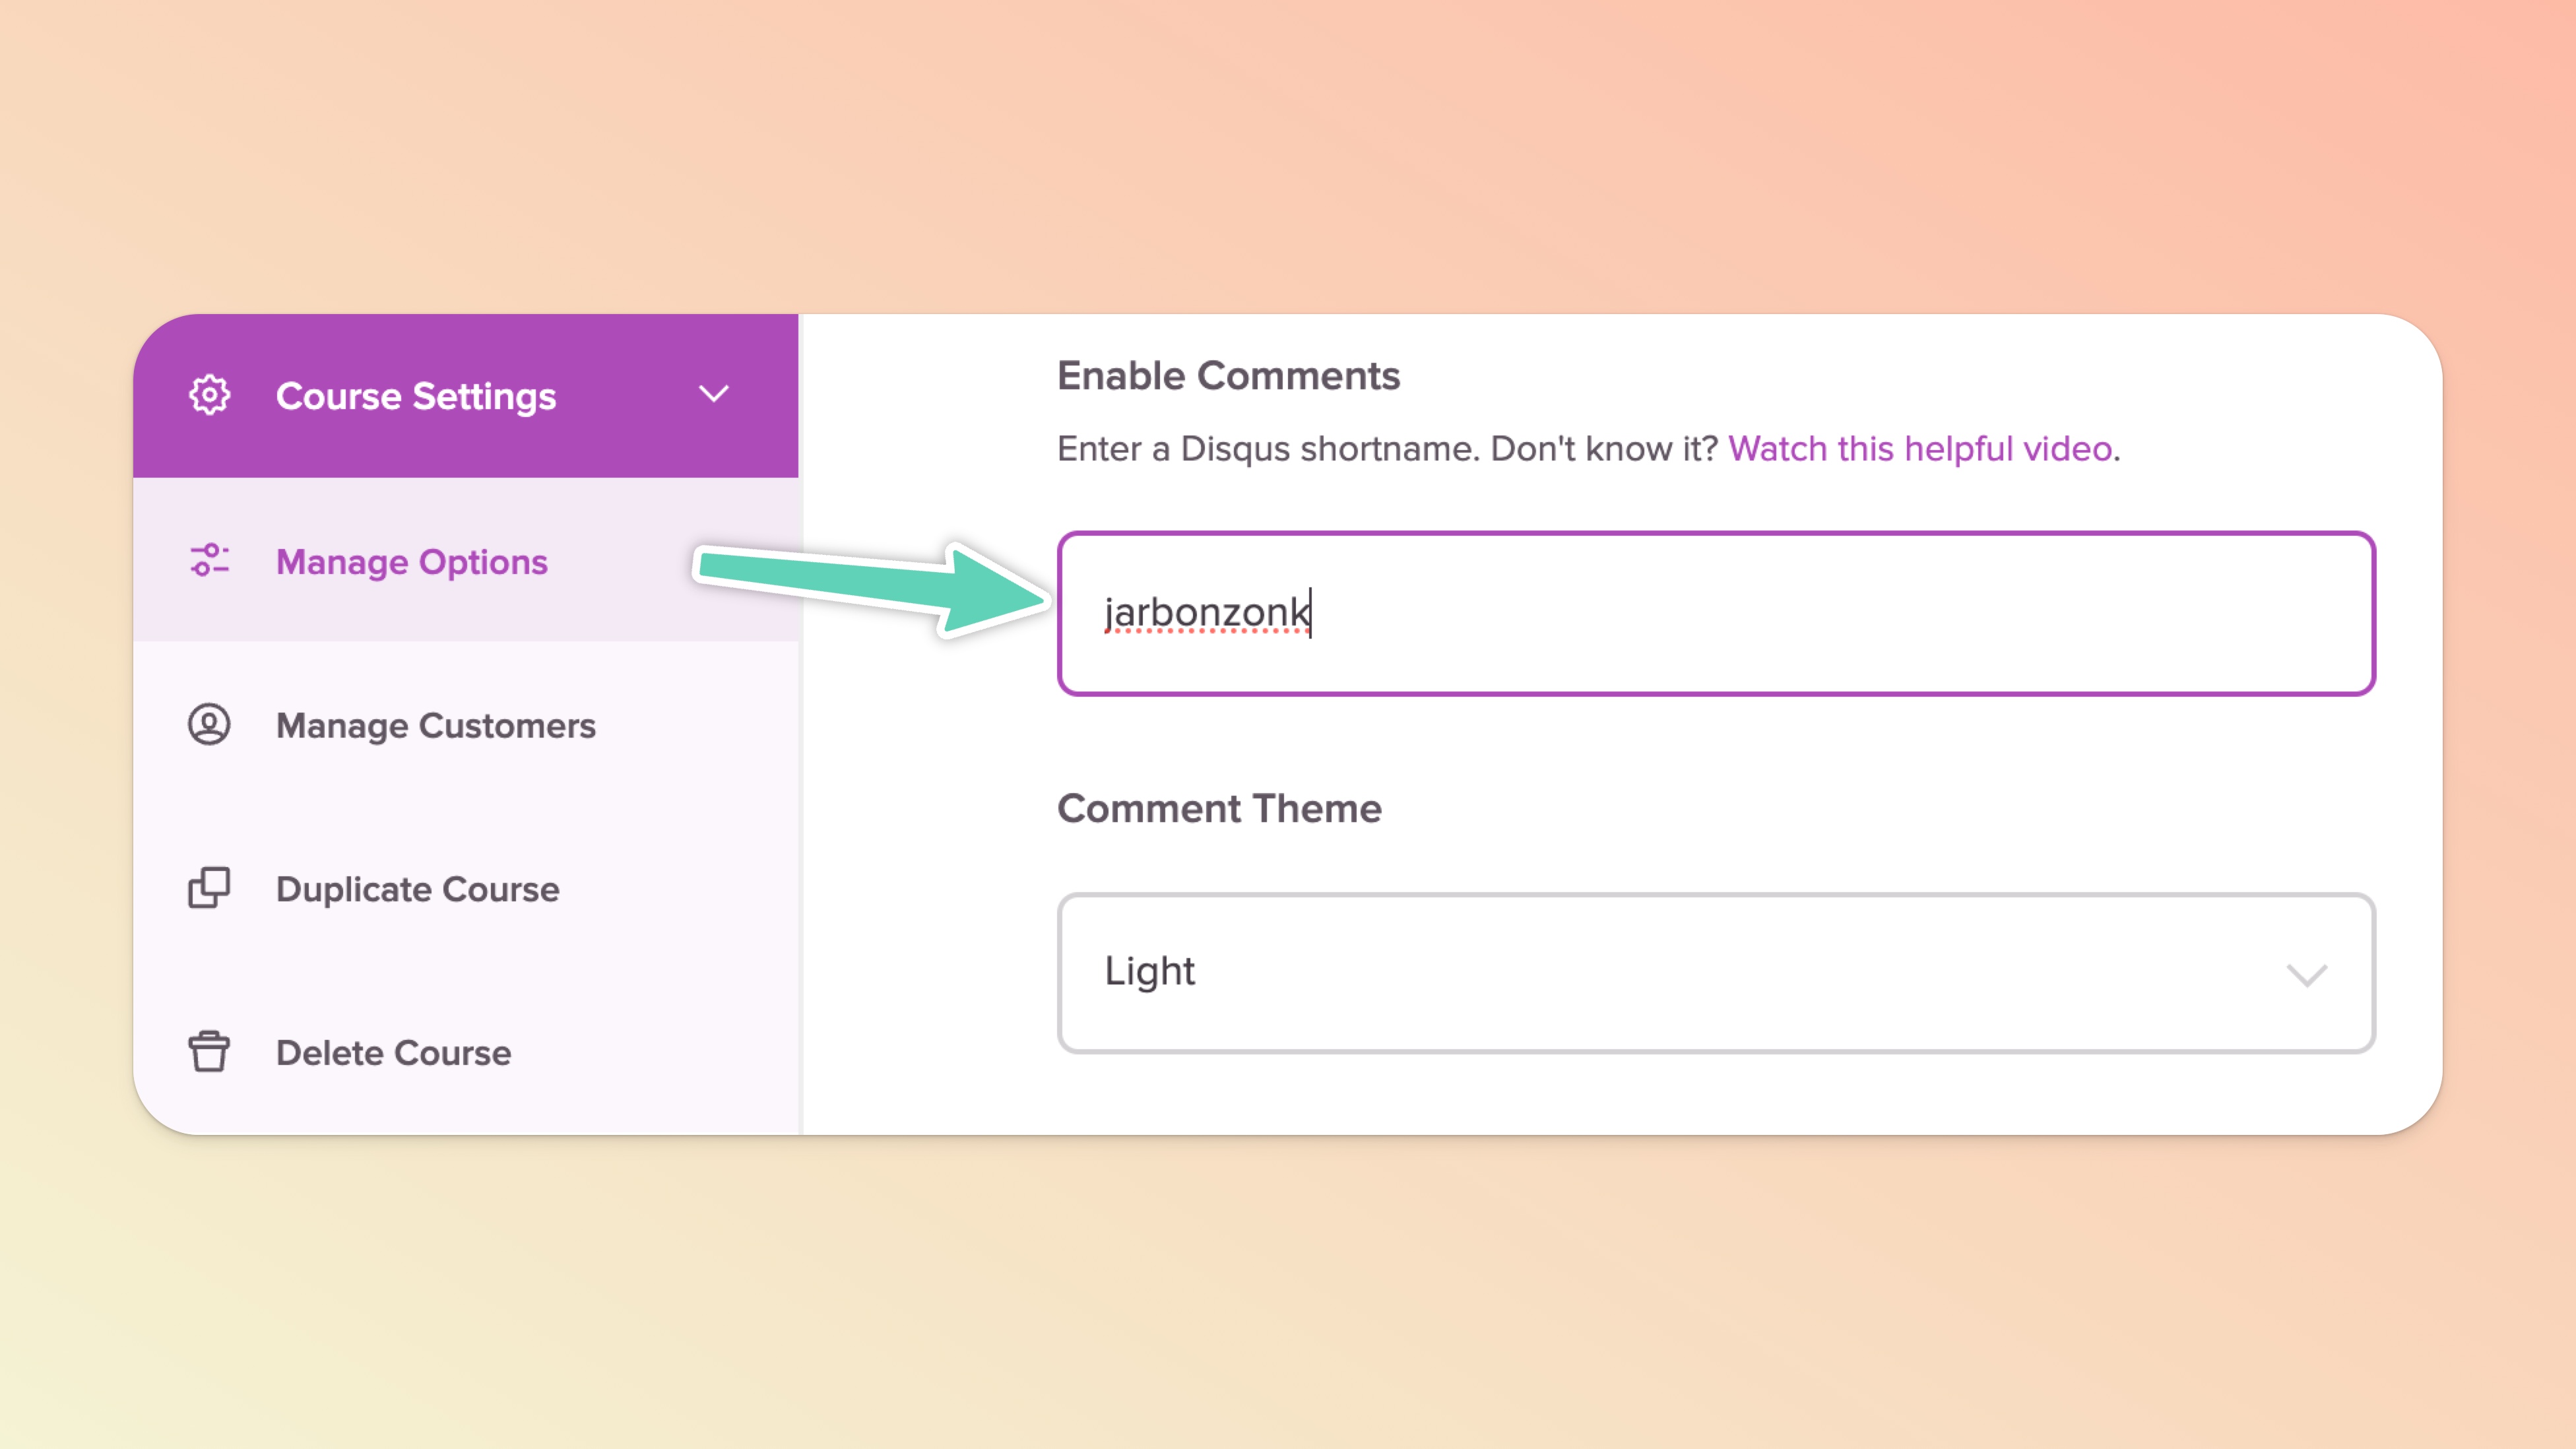
Make sure to scroll to the bottom of the Manage Options page and hit the Save Options button and you'll be all set 🎉 .
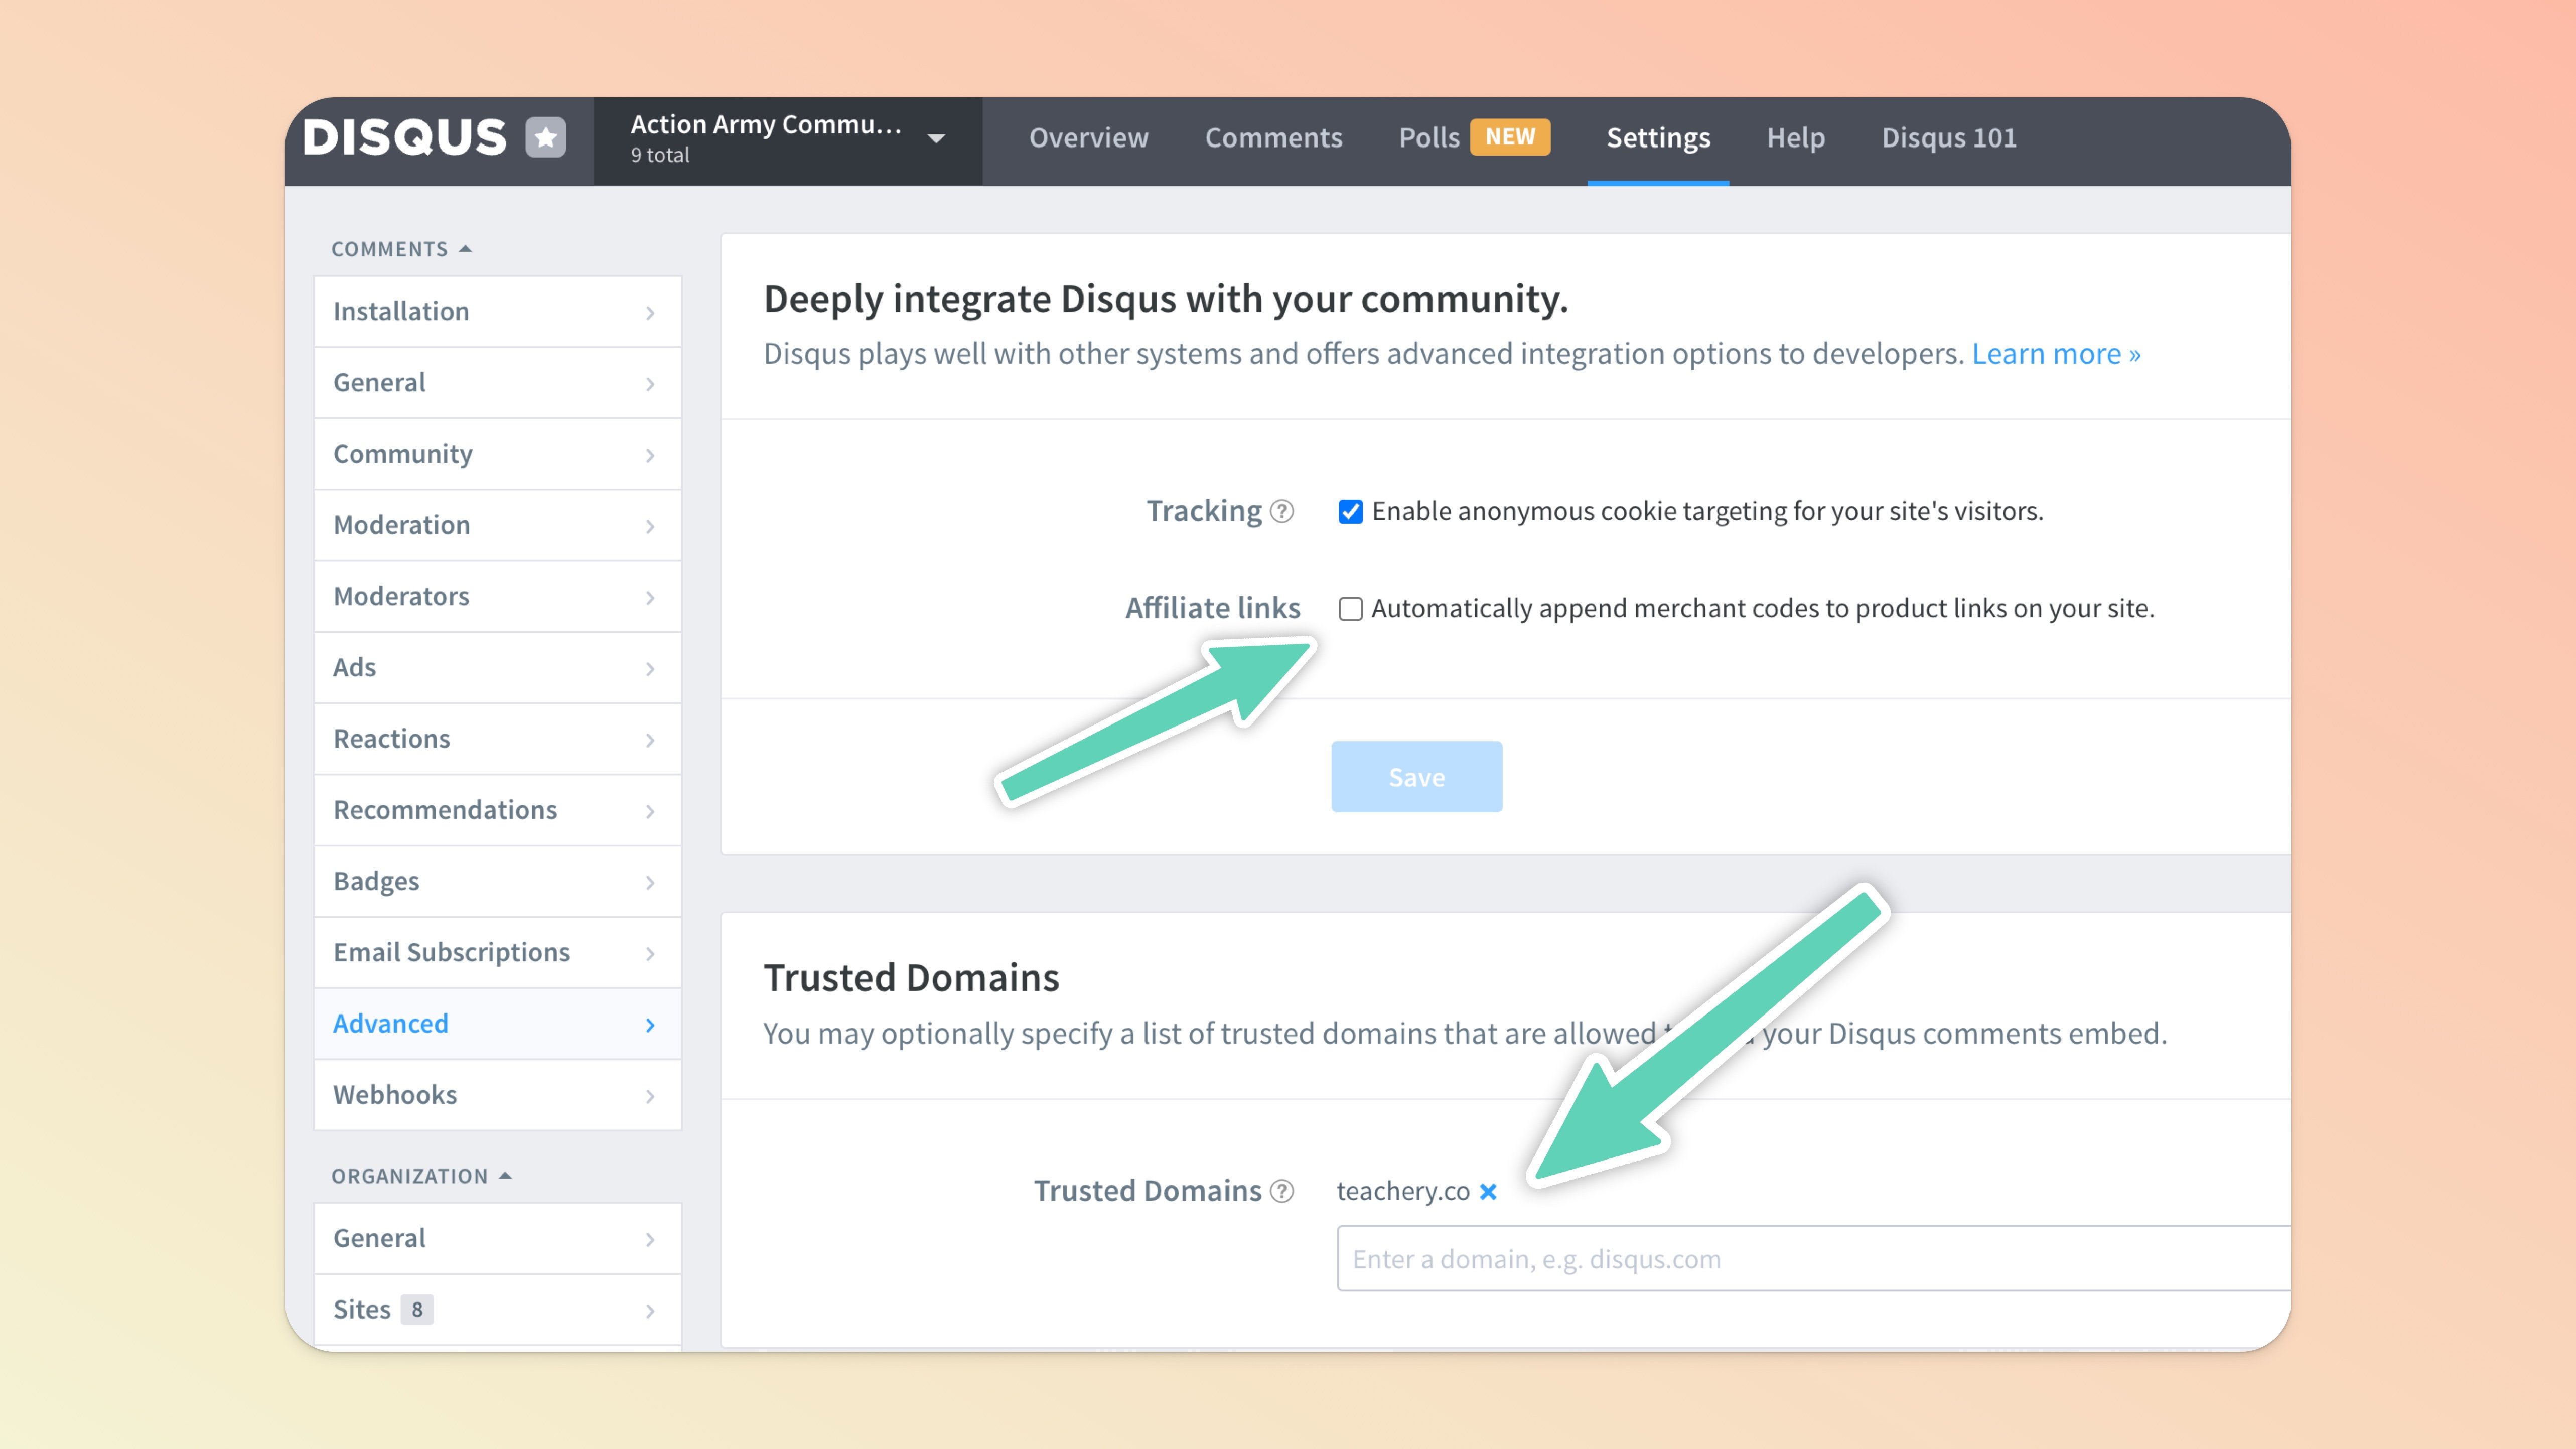
There have been a few isolated issues where random links are being added to comments and this is easy to fix. Here are the steps to take:
In Disqus go to Admin > Settings > Advanced
Affiliate Links > UNCHECK this setting if it is checked
Trusted Domains > Add teachery.co and any custom domain(s) you're using for your course(s)
We used to recommend Commentbox.io as a free alternative to Disqus but we can no longer suggest it as the tool is no longer supported. 😞
Webynize and Common Ninja are straightforward tools that offer embeddable widgets. Again, they offer free accounts but with limits (Webynize appears to currently offer the best value).
Create an account with your chosen third-party tool and complete their simple setup walkthrough.
Create your comment widget and copy the iframe embed code provided.
Back in Teachery, click Add a Content Block at the bottom of your course lesson and select the Add Embed Code option.
Paste the copied embed code into the content block, and save.
You’re all set! Preview your lesson page to ensure the widget appears and works.
💬 Is there a specific commenting or community tool that you have your eye on or that’s worked well for you in the past? Let us know via the support chat!