Adding a custom font in Teachery only requires a few simple steps.
We have a dedicated area to add any Google font to your Teachery course.

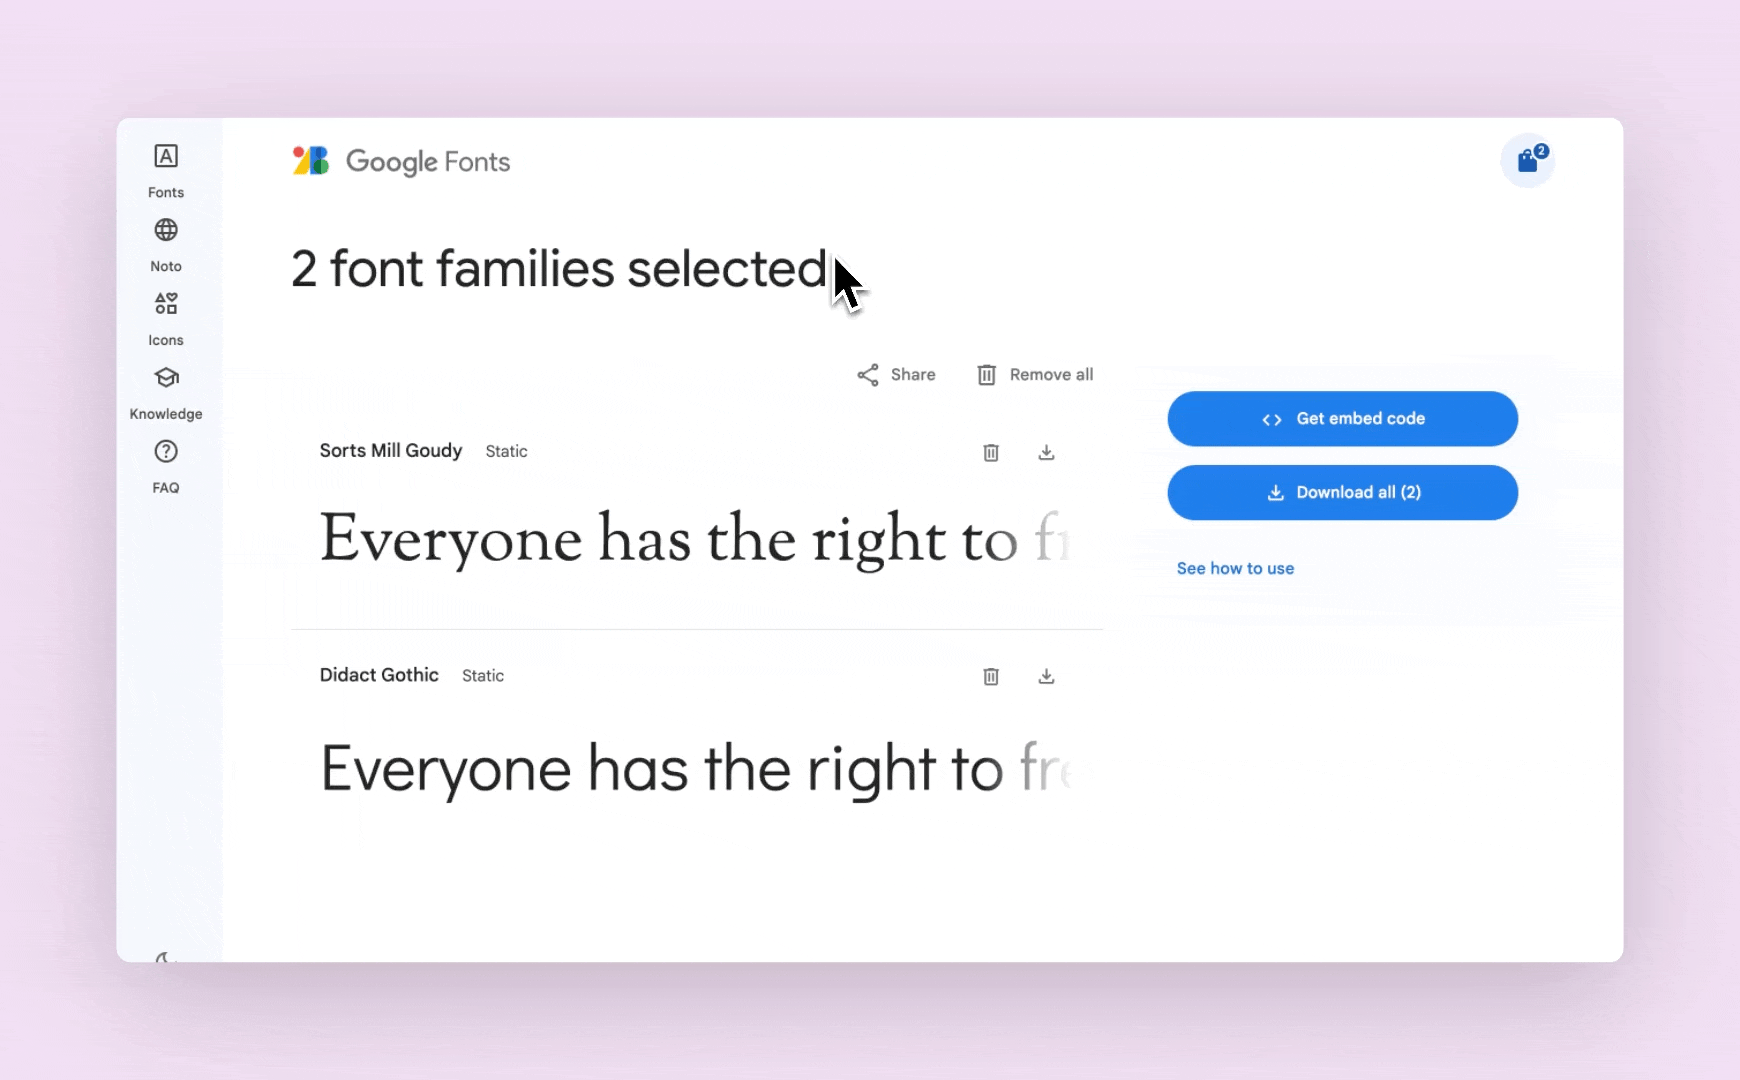
While viewing your selected Google font (or multiple selected fonts):
Click the Get embed code button
Then make sure you're on the Web view
And finally click Copy code
Click into your course in Teachery and in the left sidebar scroll down to Course Settings > Manage Options. Scroll down to the Add Custom Font Code and paste your <link> code from Google.
What you paste should look like this:
<link rel="preconnect" href="https://fonts.gstatic.com">
<link href="https://fonts.googleapis.com/css2?family=Oi&display=swap" rel="stylesheet">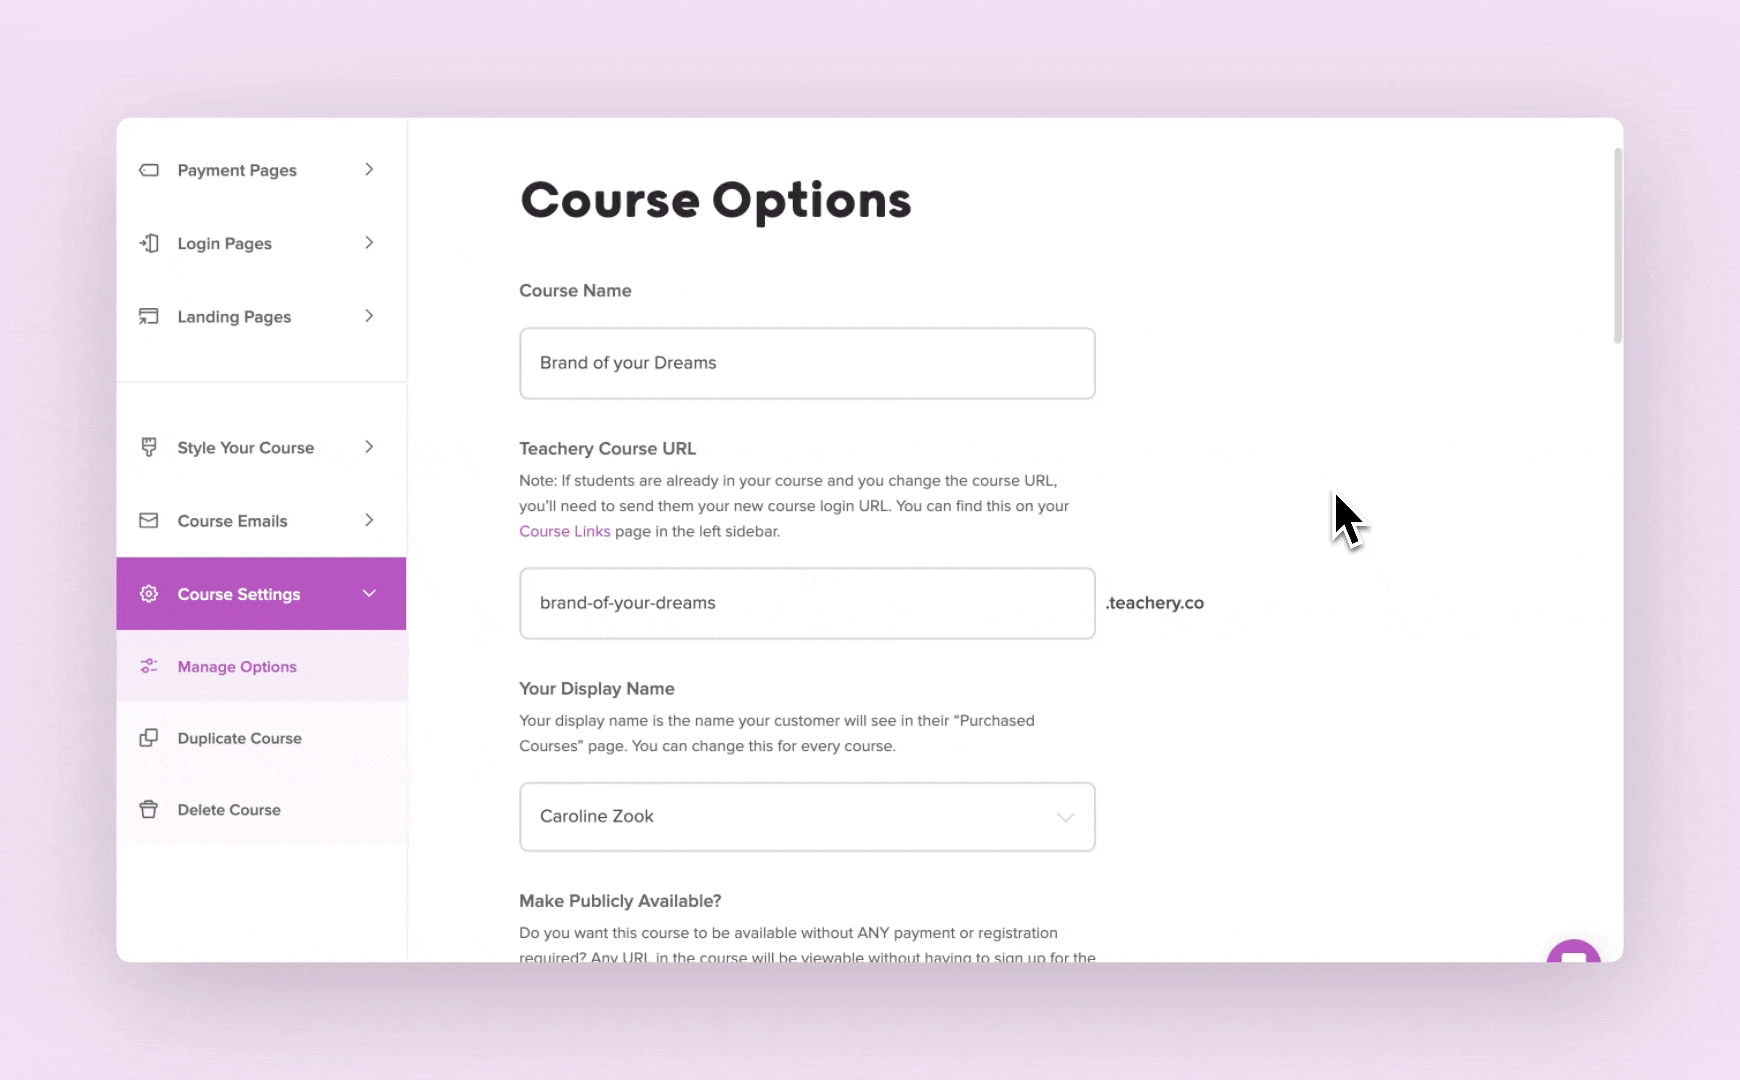
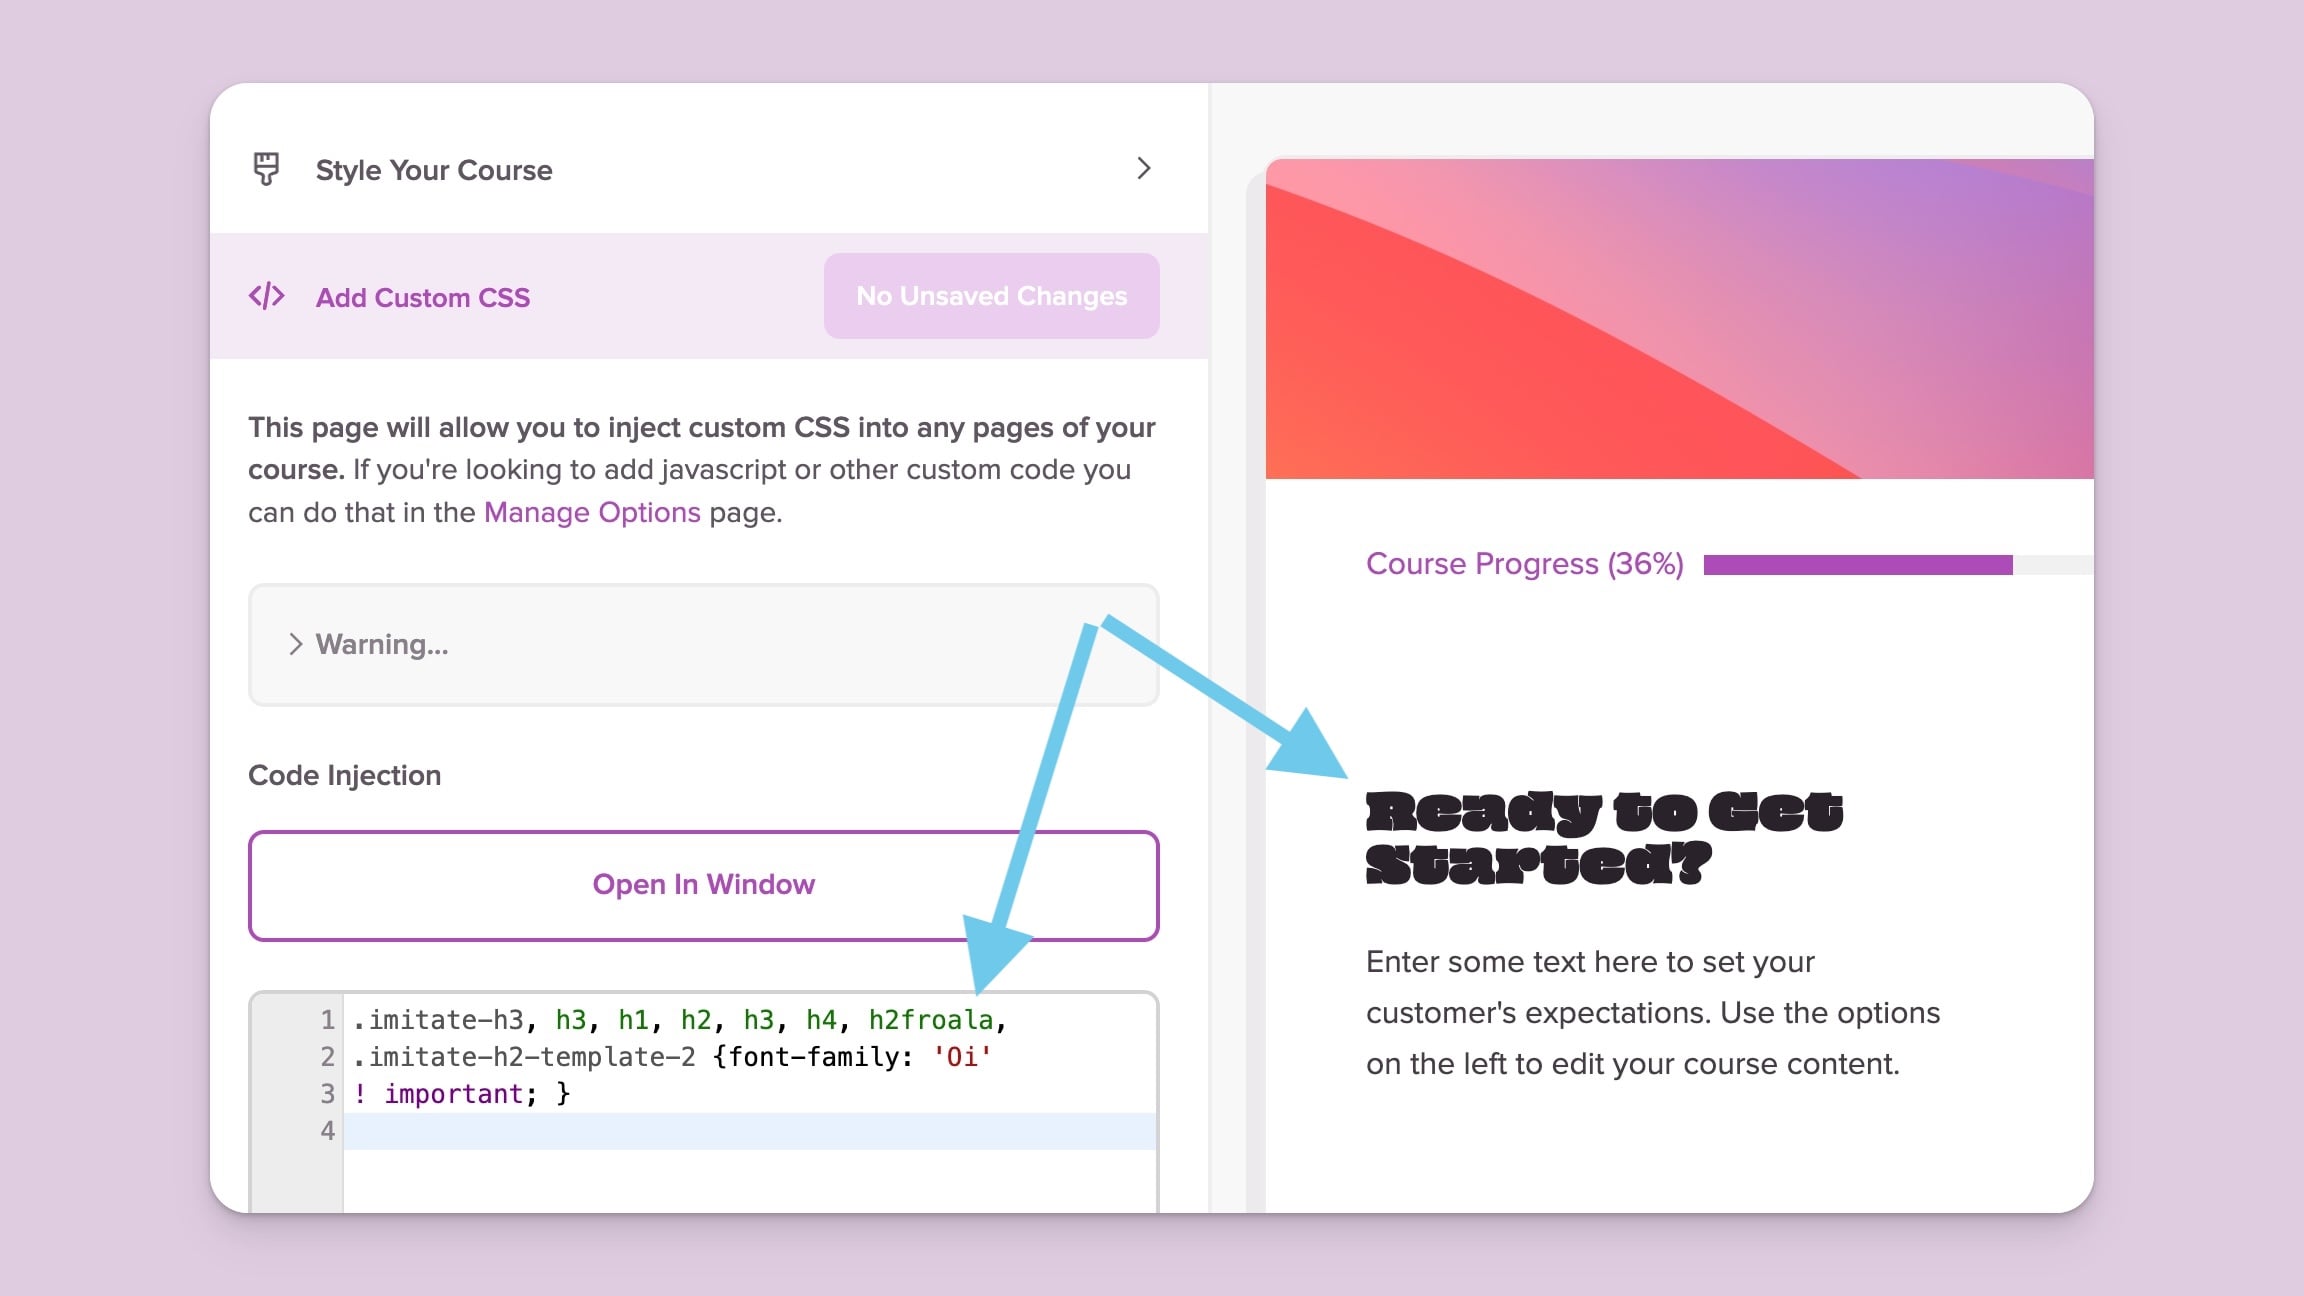
Once you've saved the Manage Options page, click into the Style Your Course > Add Custom CSS area of the sidebar.
To apply your Google font to the body copy, here's the CSS (replace "MyAwesomeWebFont"):
*, body {font-family: "MyAwesomeWebFont", sans-serif;font-weight:400;font-style: normal;letter-spacing: -.3px;}To apply your Google font to all of the Headings (H1, H2, H3, H4), here is the snippet of CSS to use (replace "MyAwesomeWebFont"):
.imitate-h3, h3, h1, h2, h3, h4, h2froala, .imitate-h2-template-2 {font-family: "MyAwesomeWebFont" !important; }
And that'll do it! You've successfully added any Google font to your course.
Let's say you've discovered an amazing font and purchased a license for it. You should've received a ZIP file that included a few different font formats you can use.

This is a simple little trick to let Teachery manage the custom font file, so you don't have to upload it to your own website.
In any lesson or payment page of a course in your Teachery account:
Click into an editable text area
Type any word or phrase (example: custom font file)
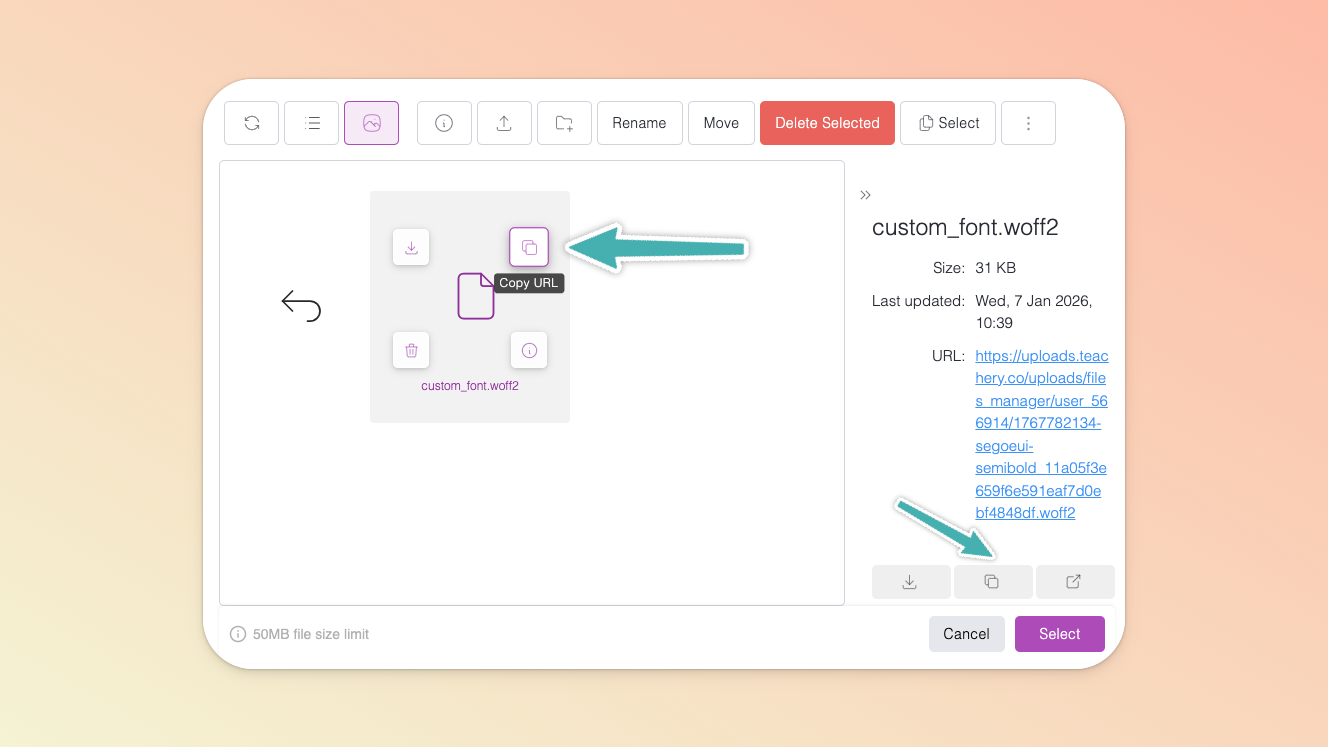
Highlight the word or phrase you inserted, click the ( + ) button in the widget that pops up and then click the upload file icon to open the file manager
Import your font file and, once uploaded, select the file and click the copy URL icon (or the copy URL icon found in the file’s info panel on the right) - you will need this URL for the next step
You can now close the file manager and delete that original word or phrase you’d inserted in your text area (it’s no longer needed)
Now, head to the Style Your Course > Add Custom CSS area of your course and paste the following code at the top of your Custom CSS area:
@font-face {
font-family: 'MyAwesomeWebFont';
src: url('https://example.com/webfont.woff') format('woff'),
url('https://example.com/webfont.ttf') format('truetype');
}
Replace 'MyAwesomeWebFont' with the name of your font
Replace the src urls with the links you copied from uploading your custom font to your course content block
Click the button that says Apply Changes AND Publish Changes to save your CSS

While still in the Add Custom CSS area...
To apply your Google font to the body copy, here's the CSS (replace "MyAwesomeWebFont"):
*, body {font-family: "MyAwesomeWebFont", sans-serif;font-weight:400;font-style: normal;letter-spacing: -.3px;}To apply your Google font to all of the Headings (H1, H2, H3, H4), here is the snippet of CSS to use (replace "MyAwesomeWebFont"):
.imitate-h3, h3, h1, h2, h3, h4, h2froala, .imitate-h2-template-2 {font-family: "MyAwesomeWebFont" !important; }
There you have it! If you have any questions or run into any trouble adding custom fonts to your course, feel free to reach out to us via the support chat 💬 icon.
