Looking to give access to your course for a limited amount of time? This feature is for you!
Here’s how it works:
Set the Course Expiration Date in your course
A customer signs up for free or purchases your course
Their access to the course will expire at the time you specified

Our Course Expiration Date (or Course End Date) feature can be set up in multiple ways across multiple courses.
We'll share some pro tips with you, especially how to use Course Expiration Date to create an evergreen sales funnel for your course 🙌.
Setting up a course expiration/duration will only apply to customers who have purchased your course AFTER you’ve set and saved this setting. Each time you change the course expiration or duration, it only applies to new customers added after that change.

If your course expiration date has passed and you want to extend it (whether you use the Based on a date you set or Based on customer’s purchase date setting) or even if you decide to disable the course expiration setting altogether, the same rule still applies: those users with expired access will still not have/regain access.
For any existing users with an expiration date, you will need to edit/remove their course expiration dates directly in each user’s individual profile or remove all users’ expiration dates in bulk. To do it at an individual level, please see this help doc and to remove expiration dates for all users in bulk, continue here.
To remove all existing users’s expiration dates:
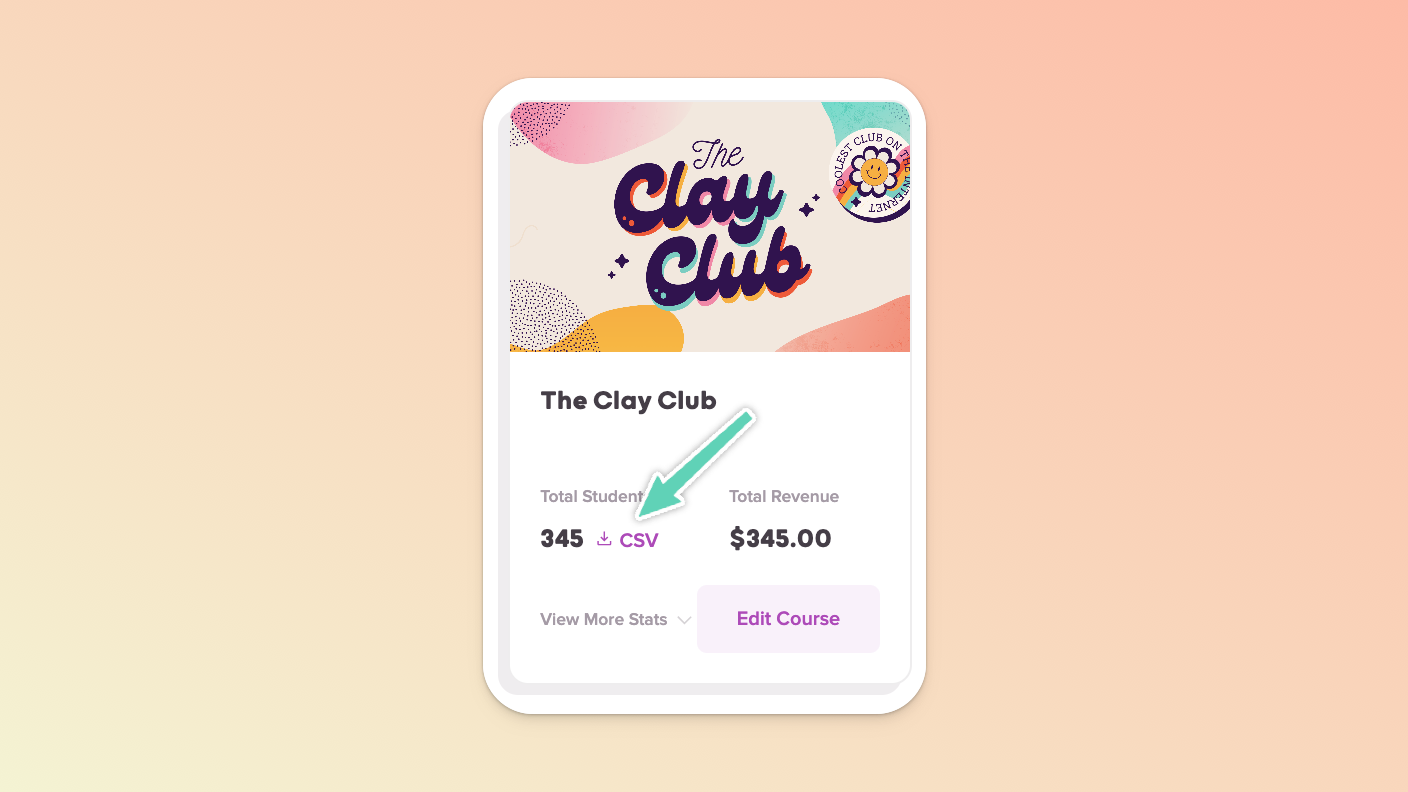
We recommend first downloading a list of customer data as it stands now, in case you ever need to refer back to a user’s original expiration date. You can do this from your Teach page by selecting the CSV link for the relevant course.
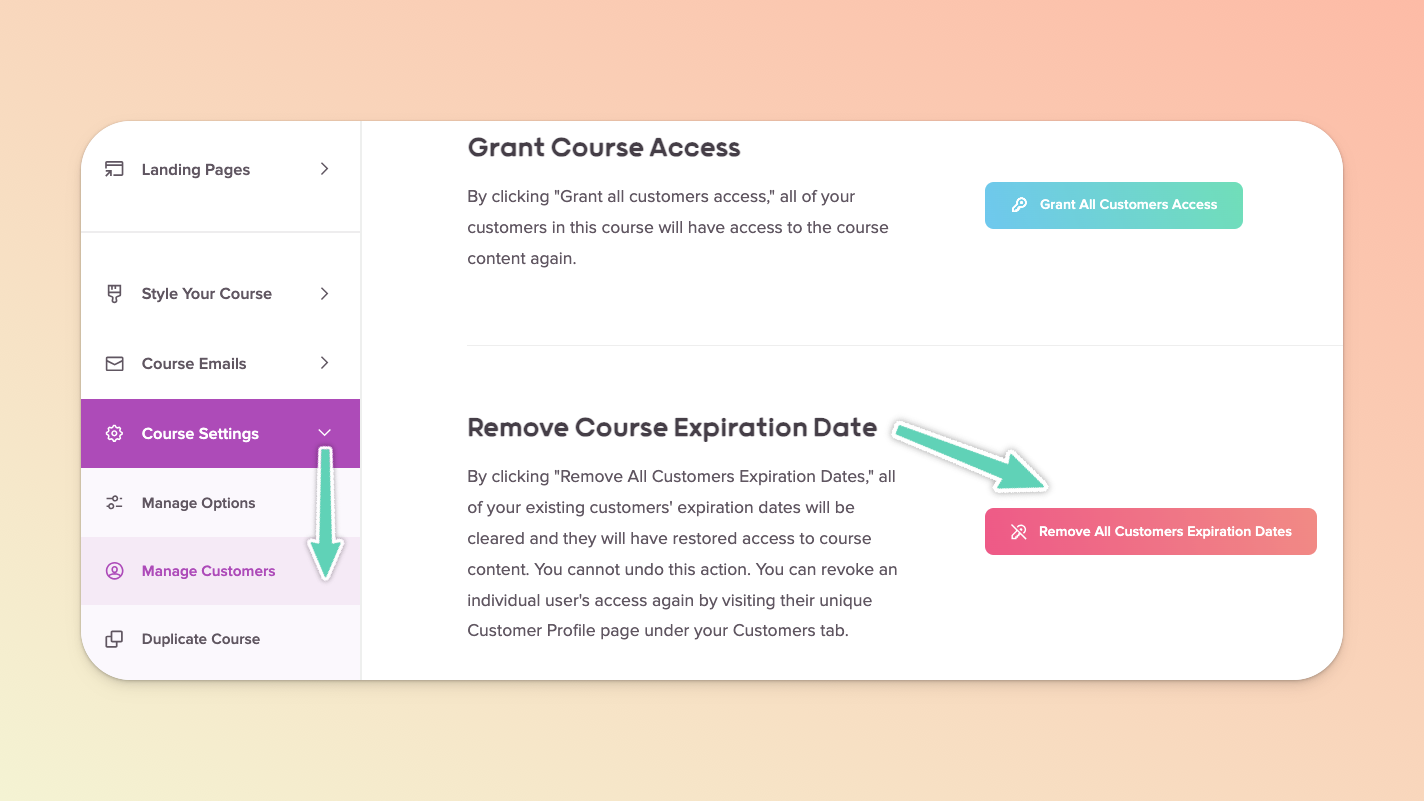
Open the relevant course and navigate to the Course Settings > Manage Customers option via the left sidebar.
On this page, click the button to remove all users’ expiration dates.

This video will walk you through all the features of our Course Expiration Date feature. If you don't want to watch the video, you can scroll down this help doc to see each step written out.
Here's what the Course Expiration Date looks like in a fictional course where you can see the countdown timer bar at the bottom:
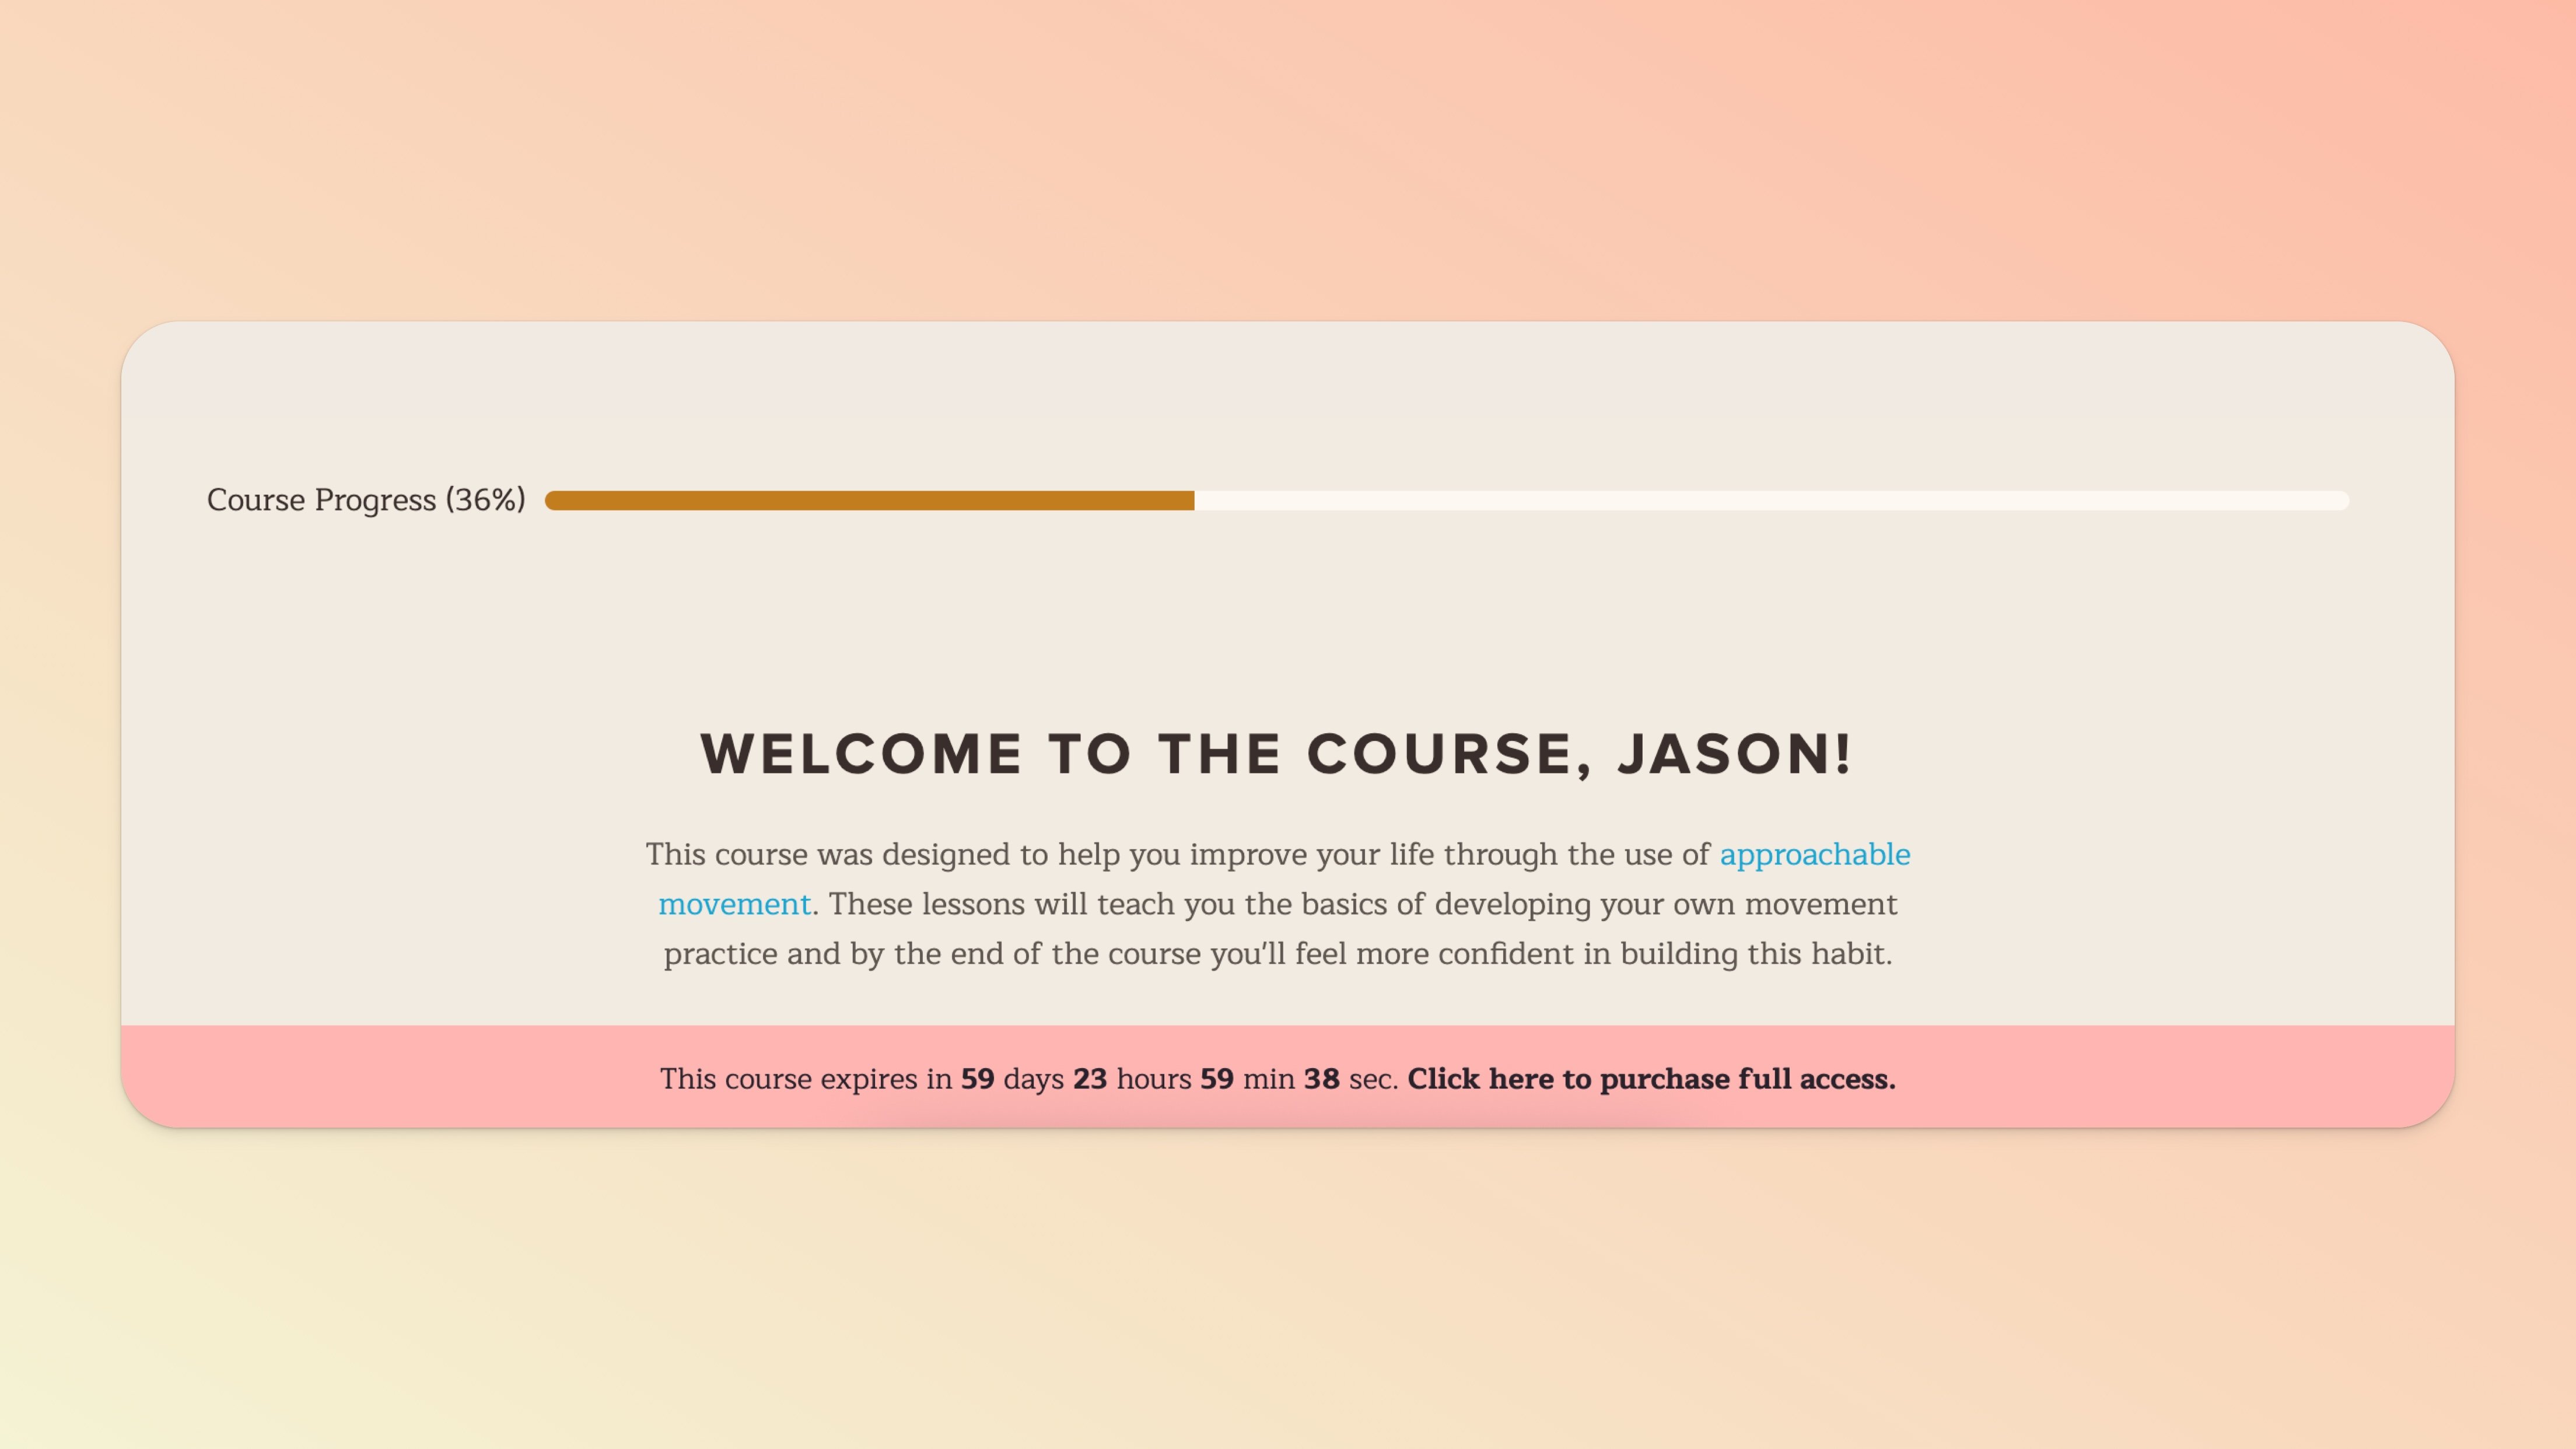
The Course Expiration Date countdown timer bar is responsive to all browser/mobile device sizes and actively counts down while your student is viewing the course. You can customize the colors and text, which we'll talk more about in a moment.
Here are the steps to add an expiration date to your course:
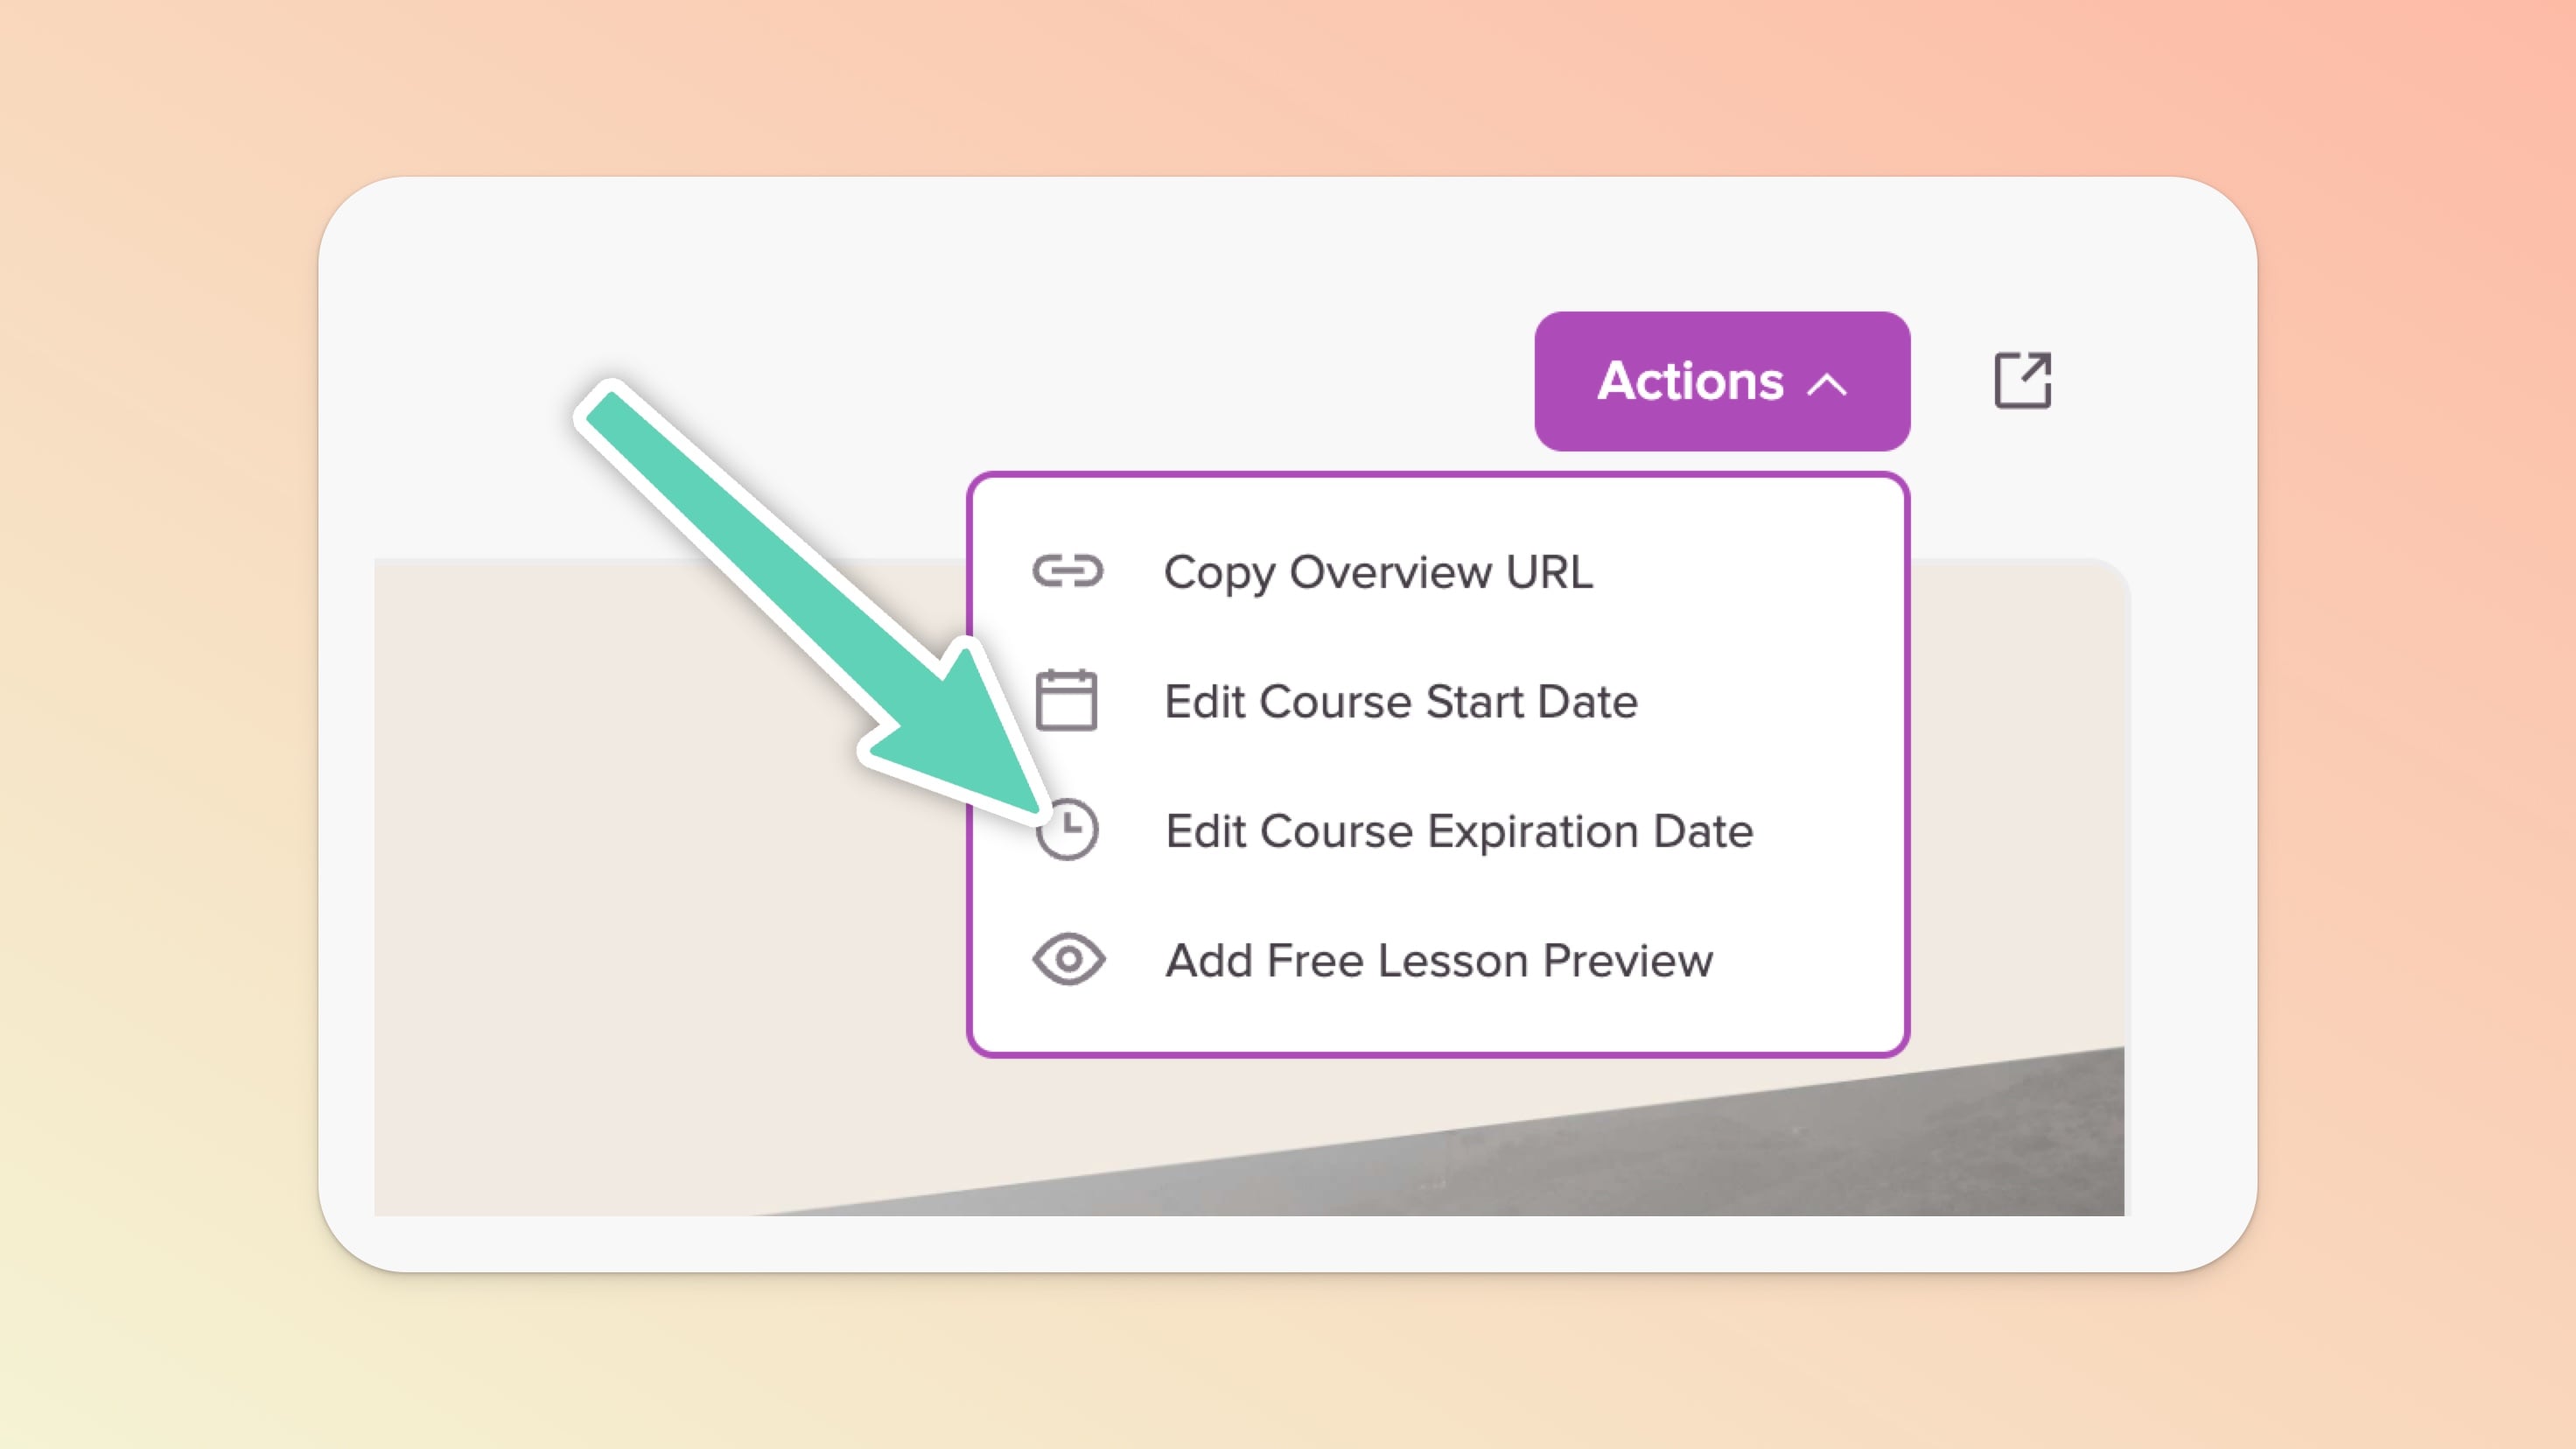
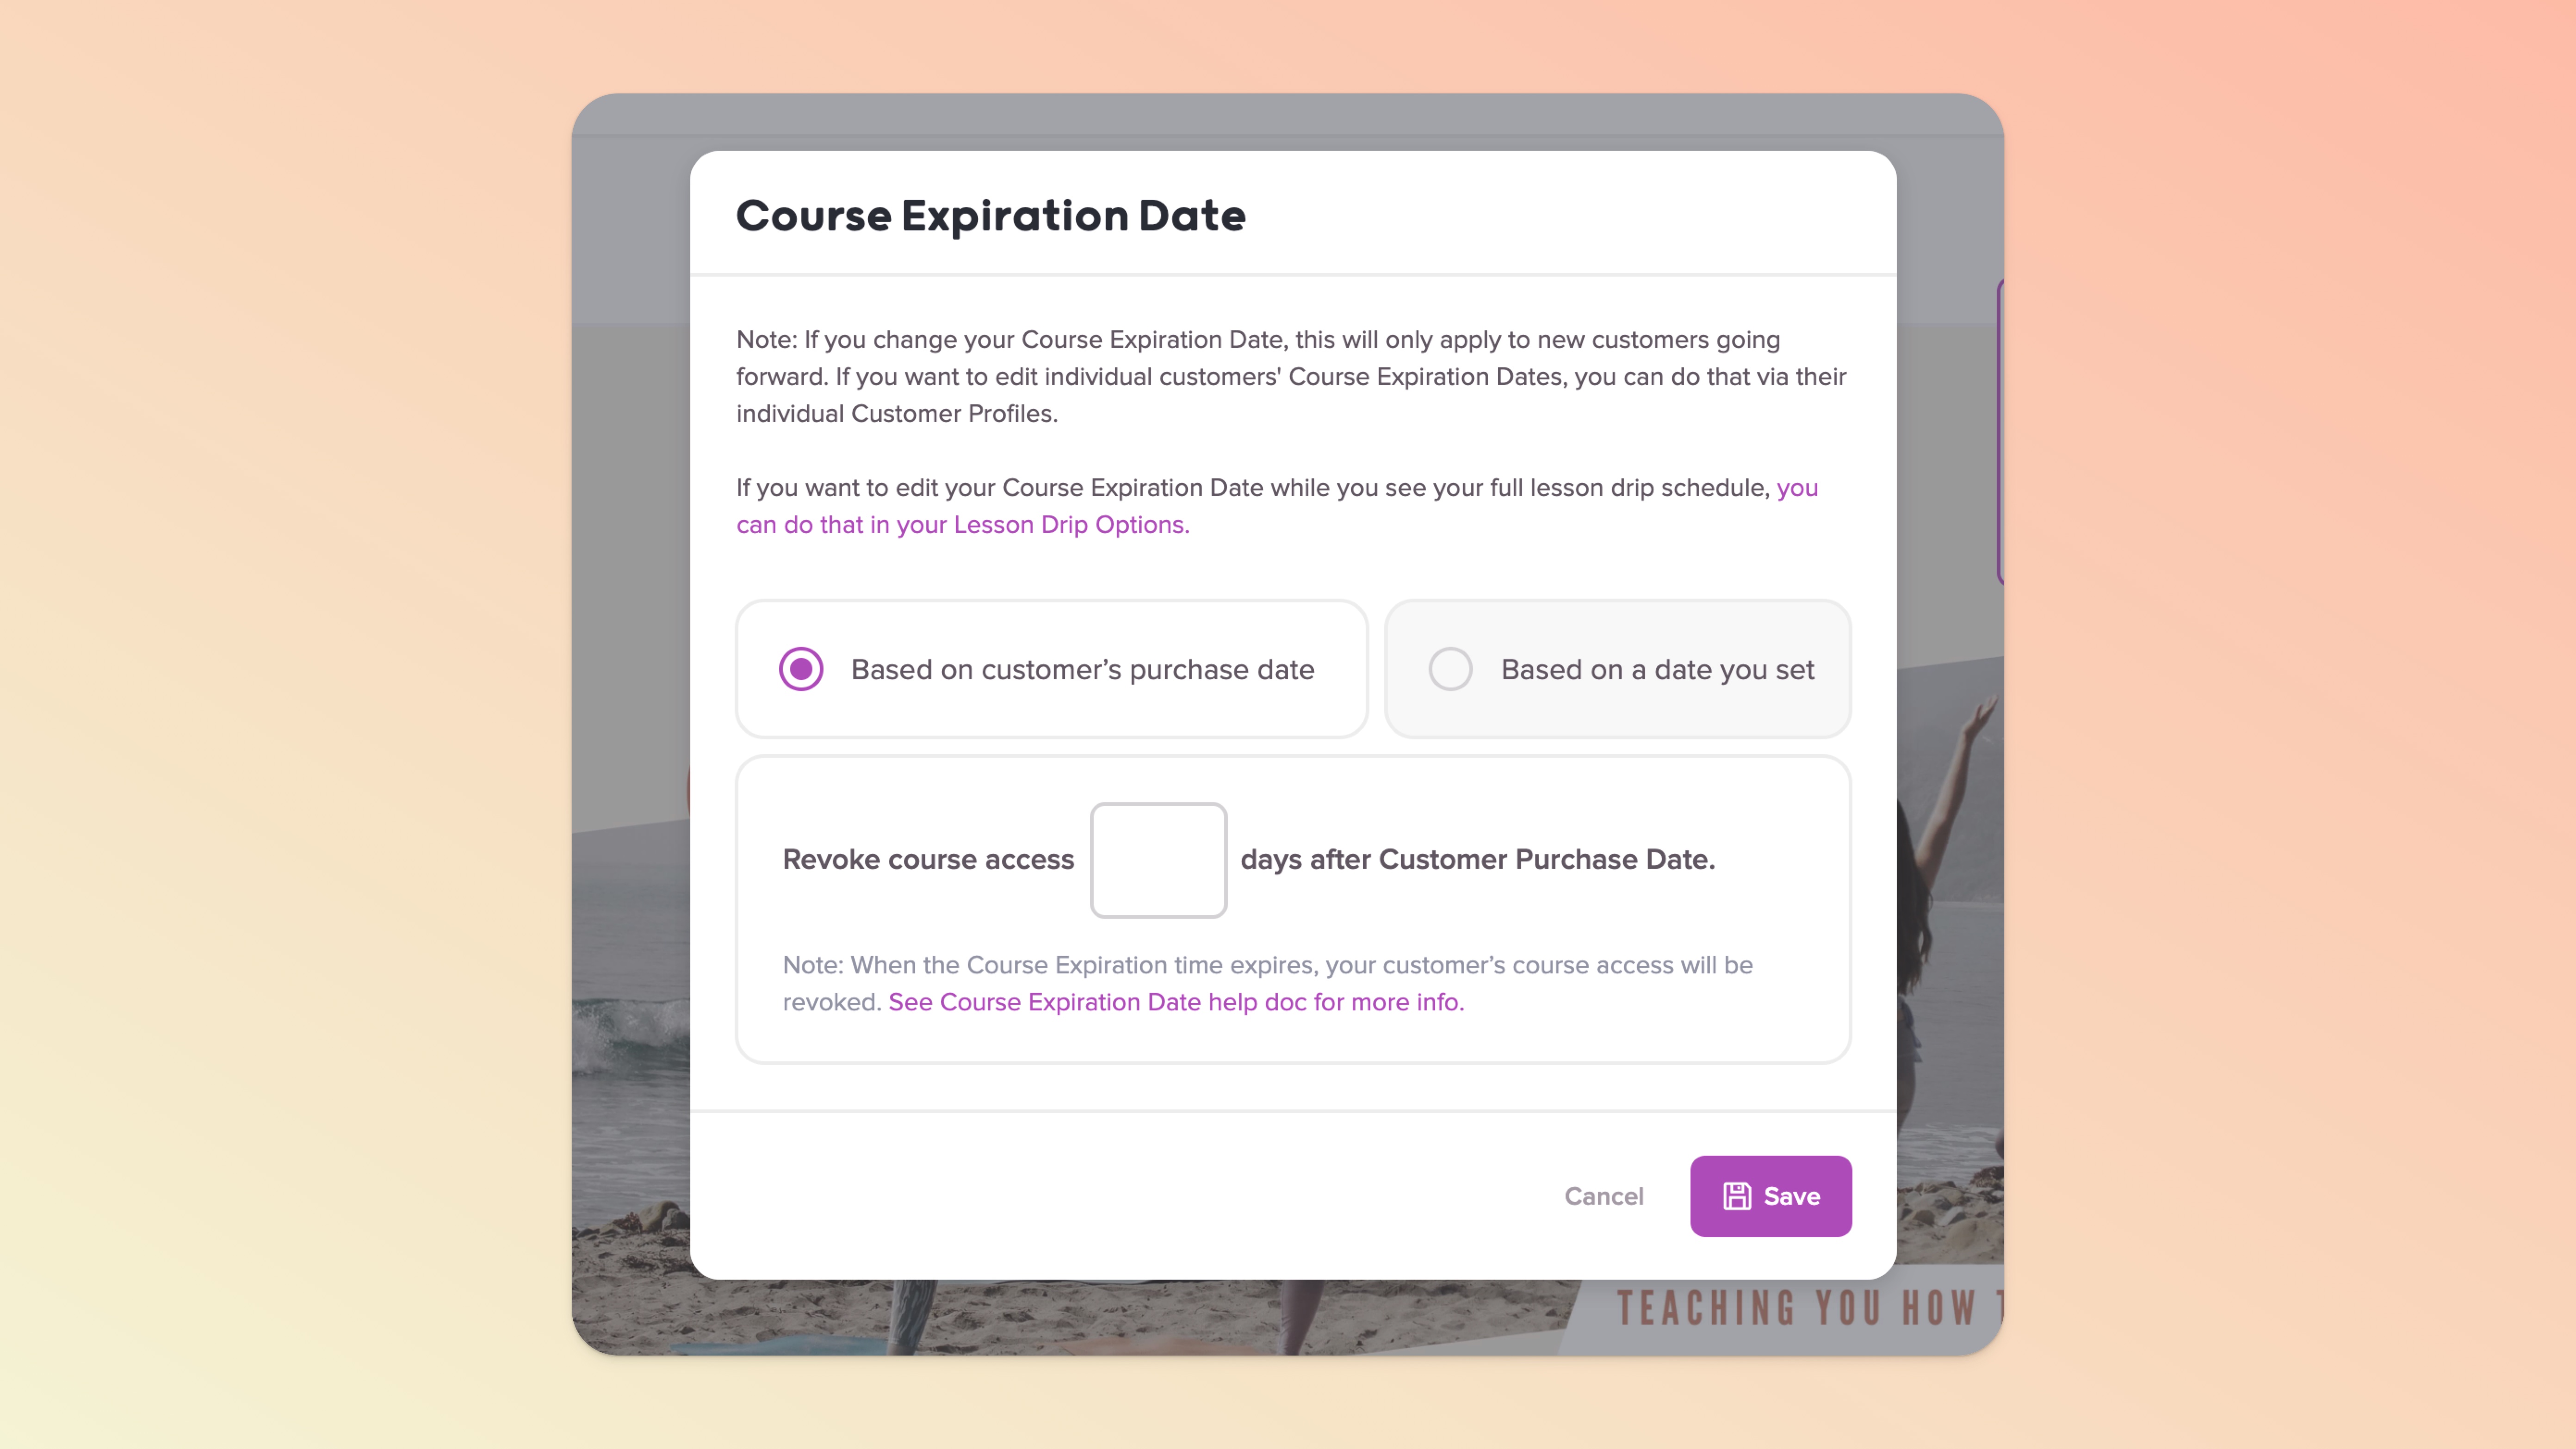
To access the Course Expiration Date feature you'll want to click in to edit your course and then in the Course Pages section go to the Overview page of your course. From there, click the purple Actions button in the top right and look for the Edit Course Expiration Date option.
This option is perfect for you if you want your course expiration date to be based on when a student signs up for, purchases, or is manually added to your course.
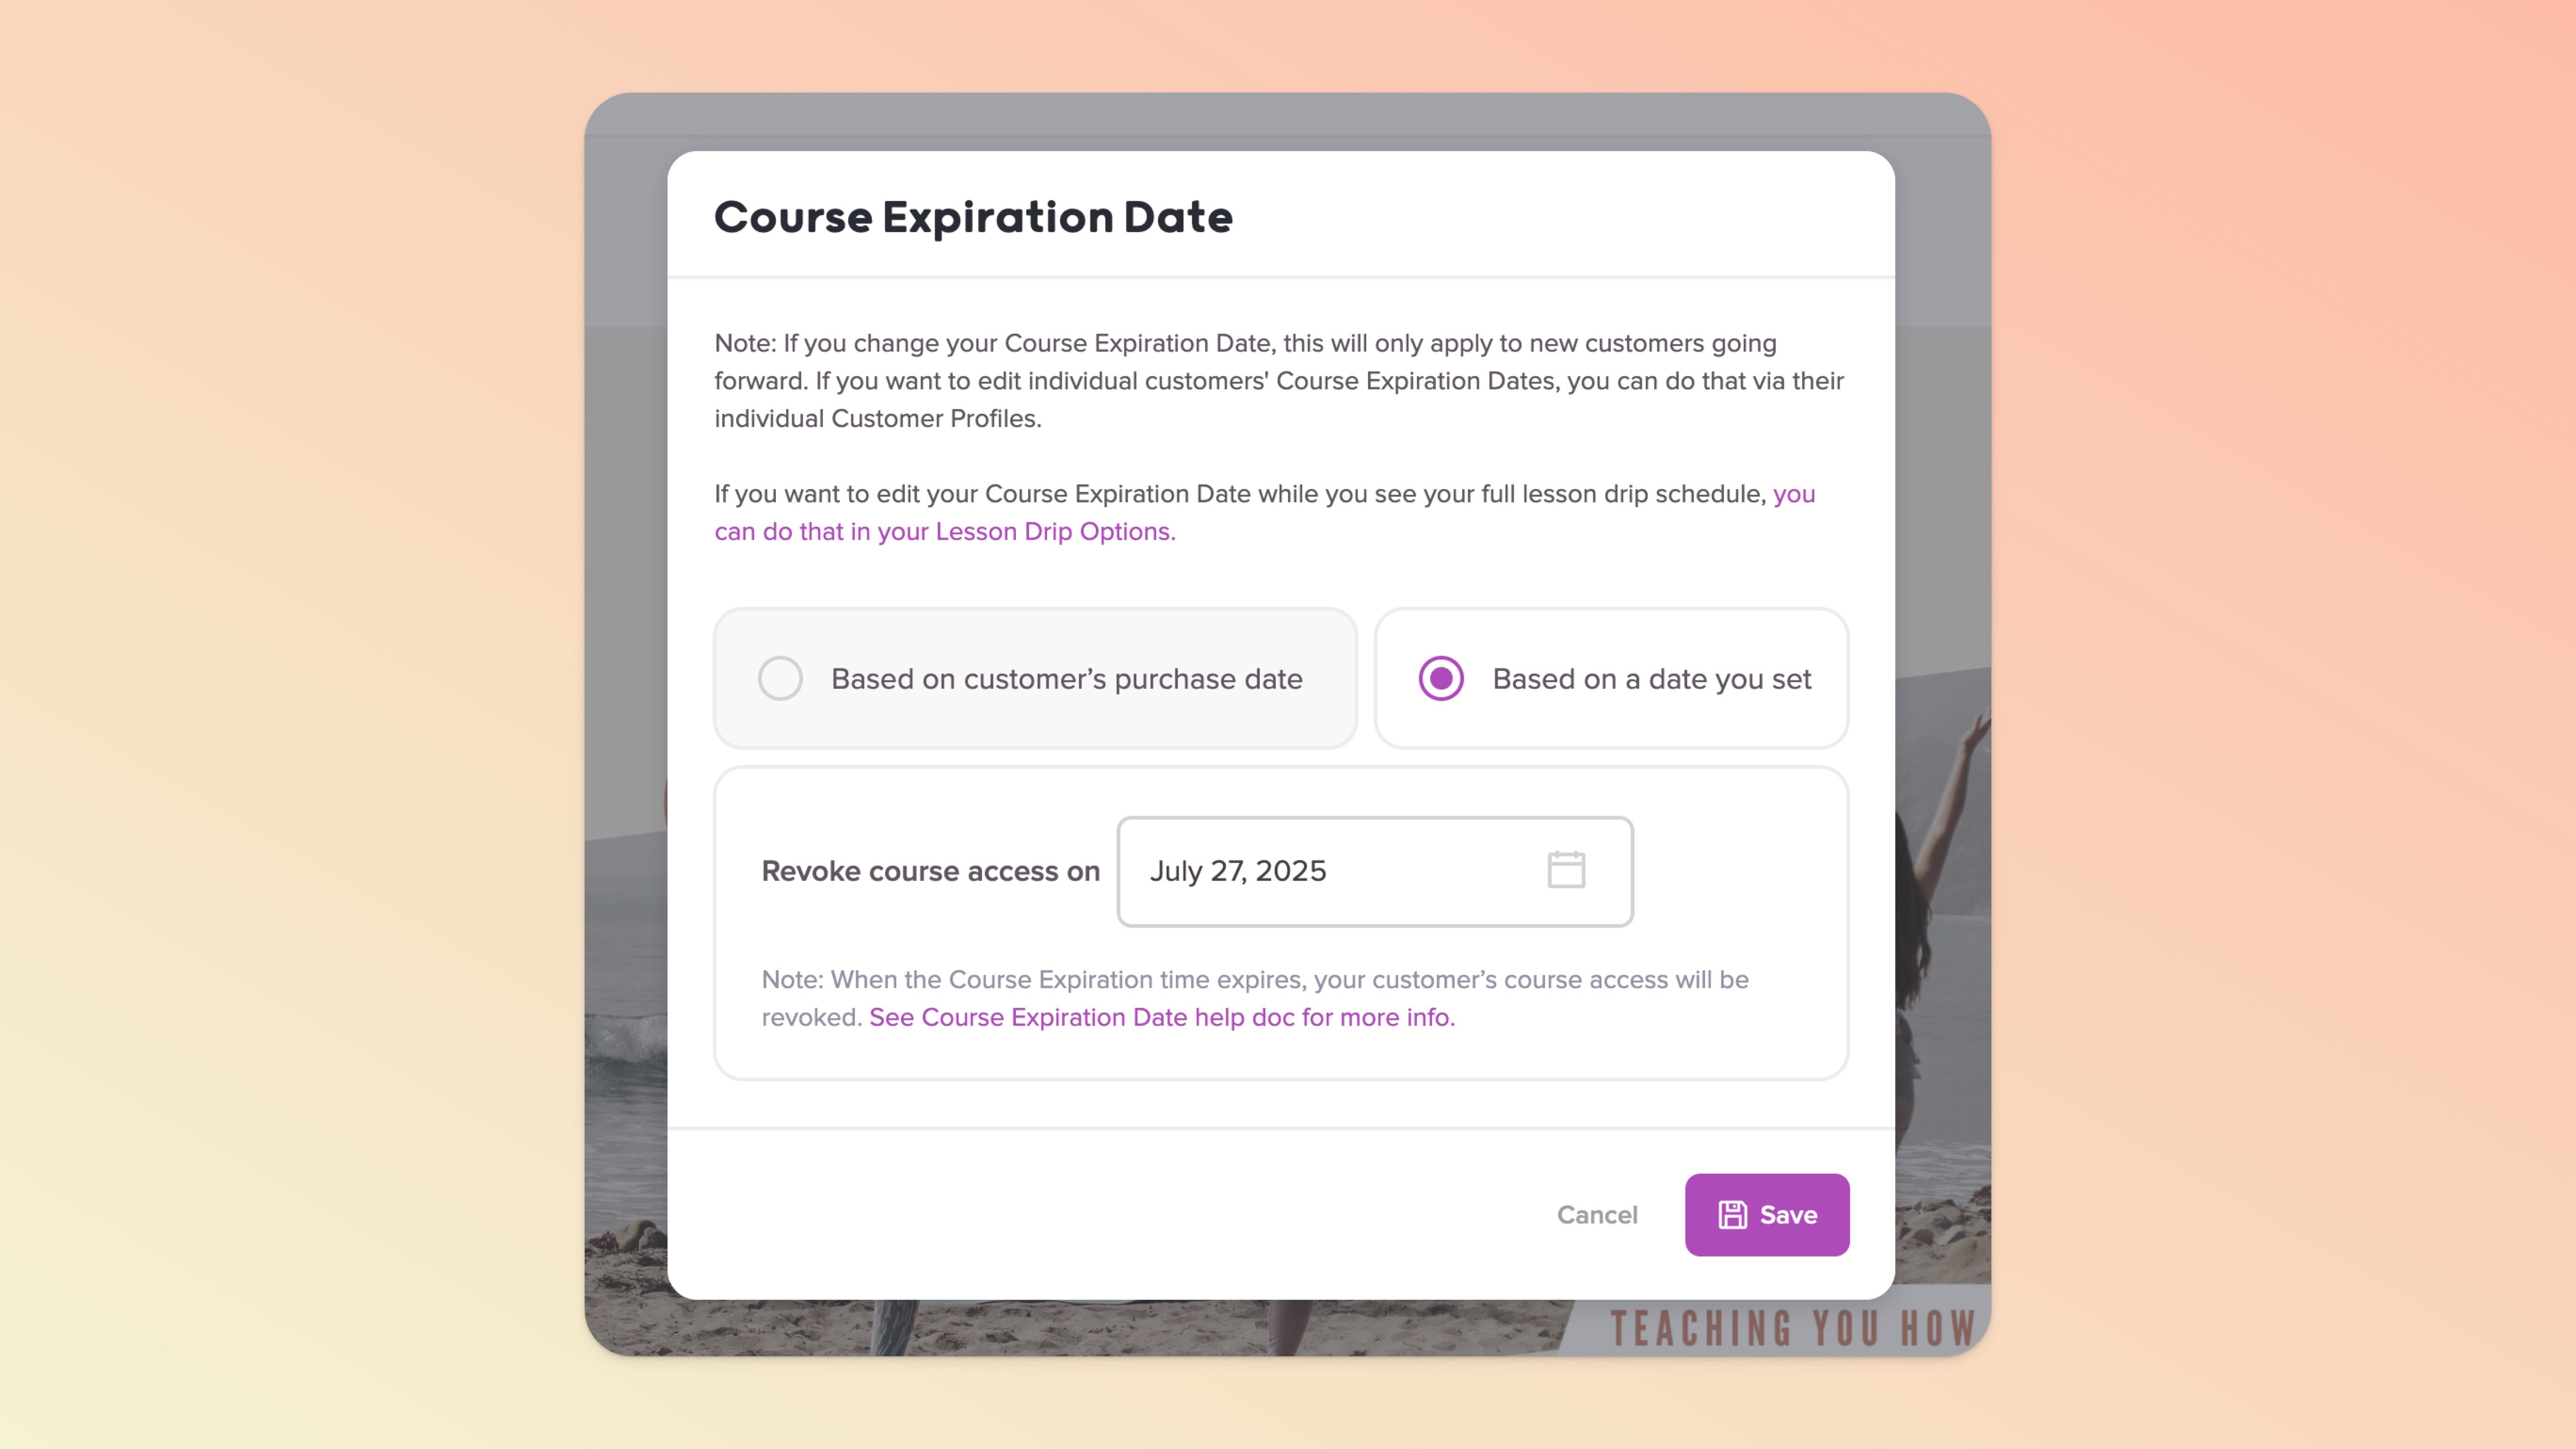
This option is the right choice if you want your course expiration date to be a specific date in the future that you set.
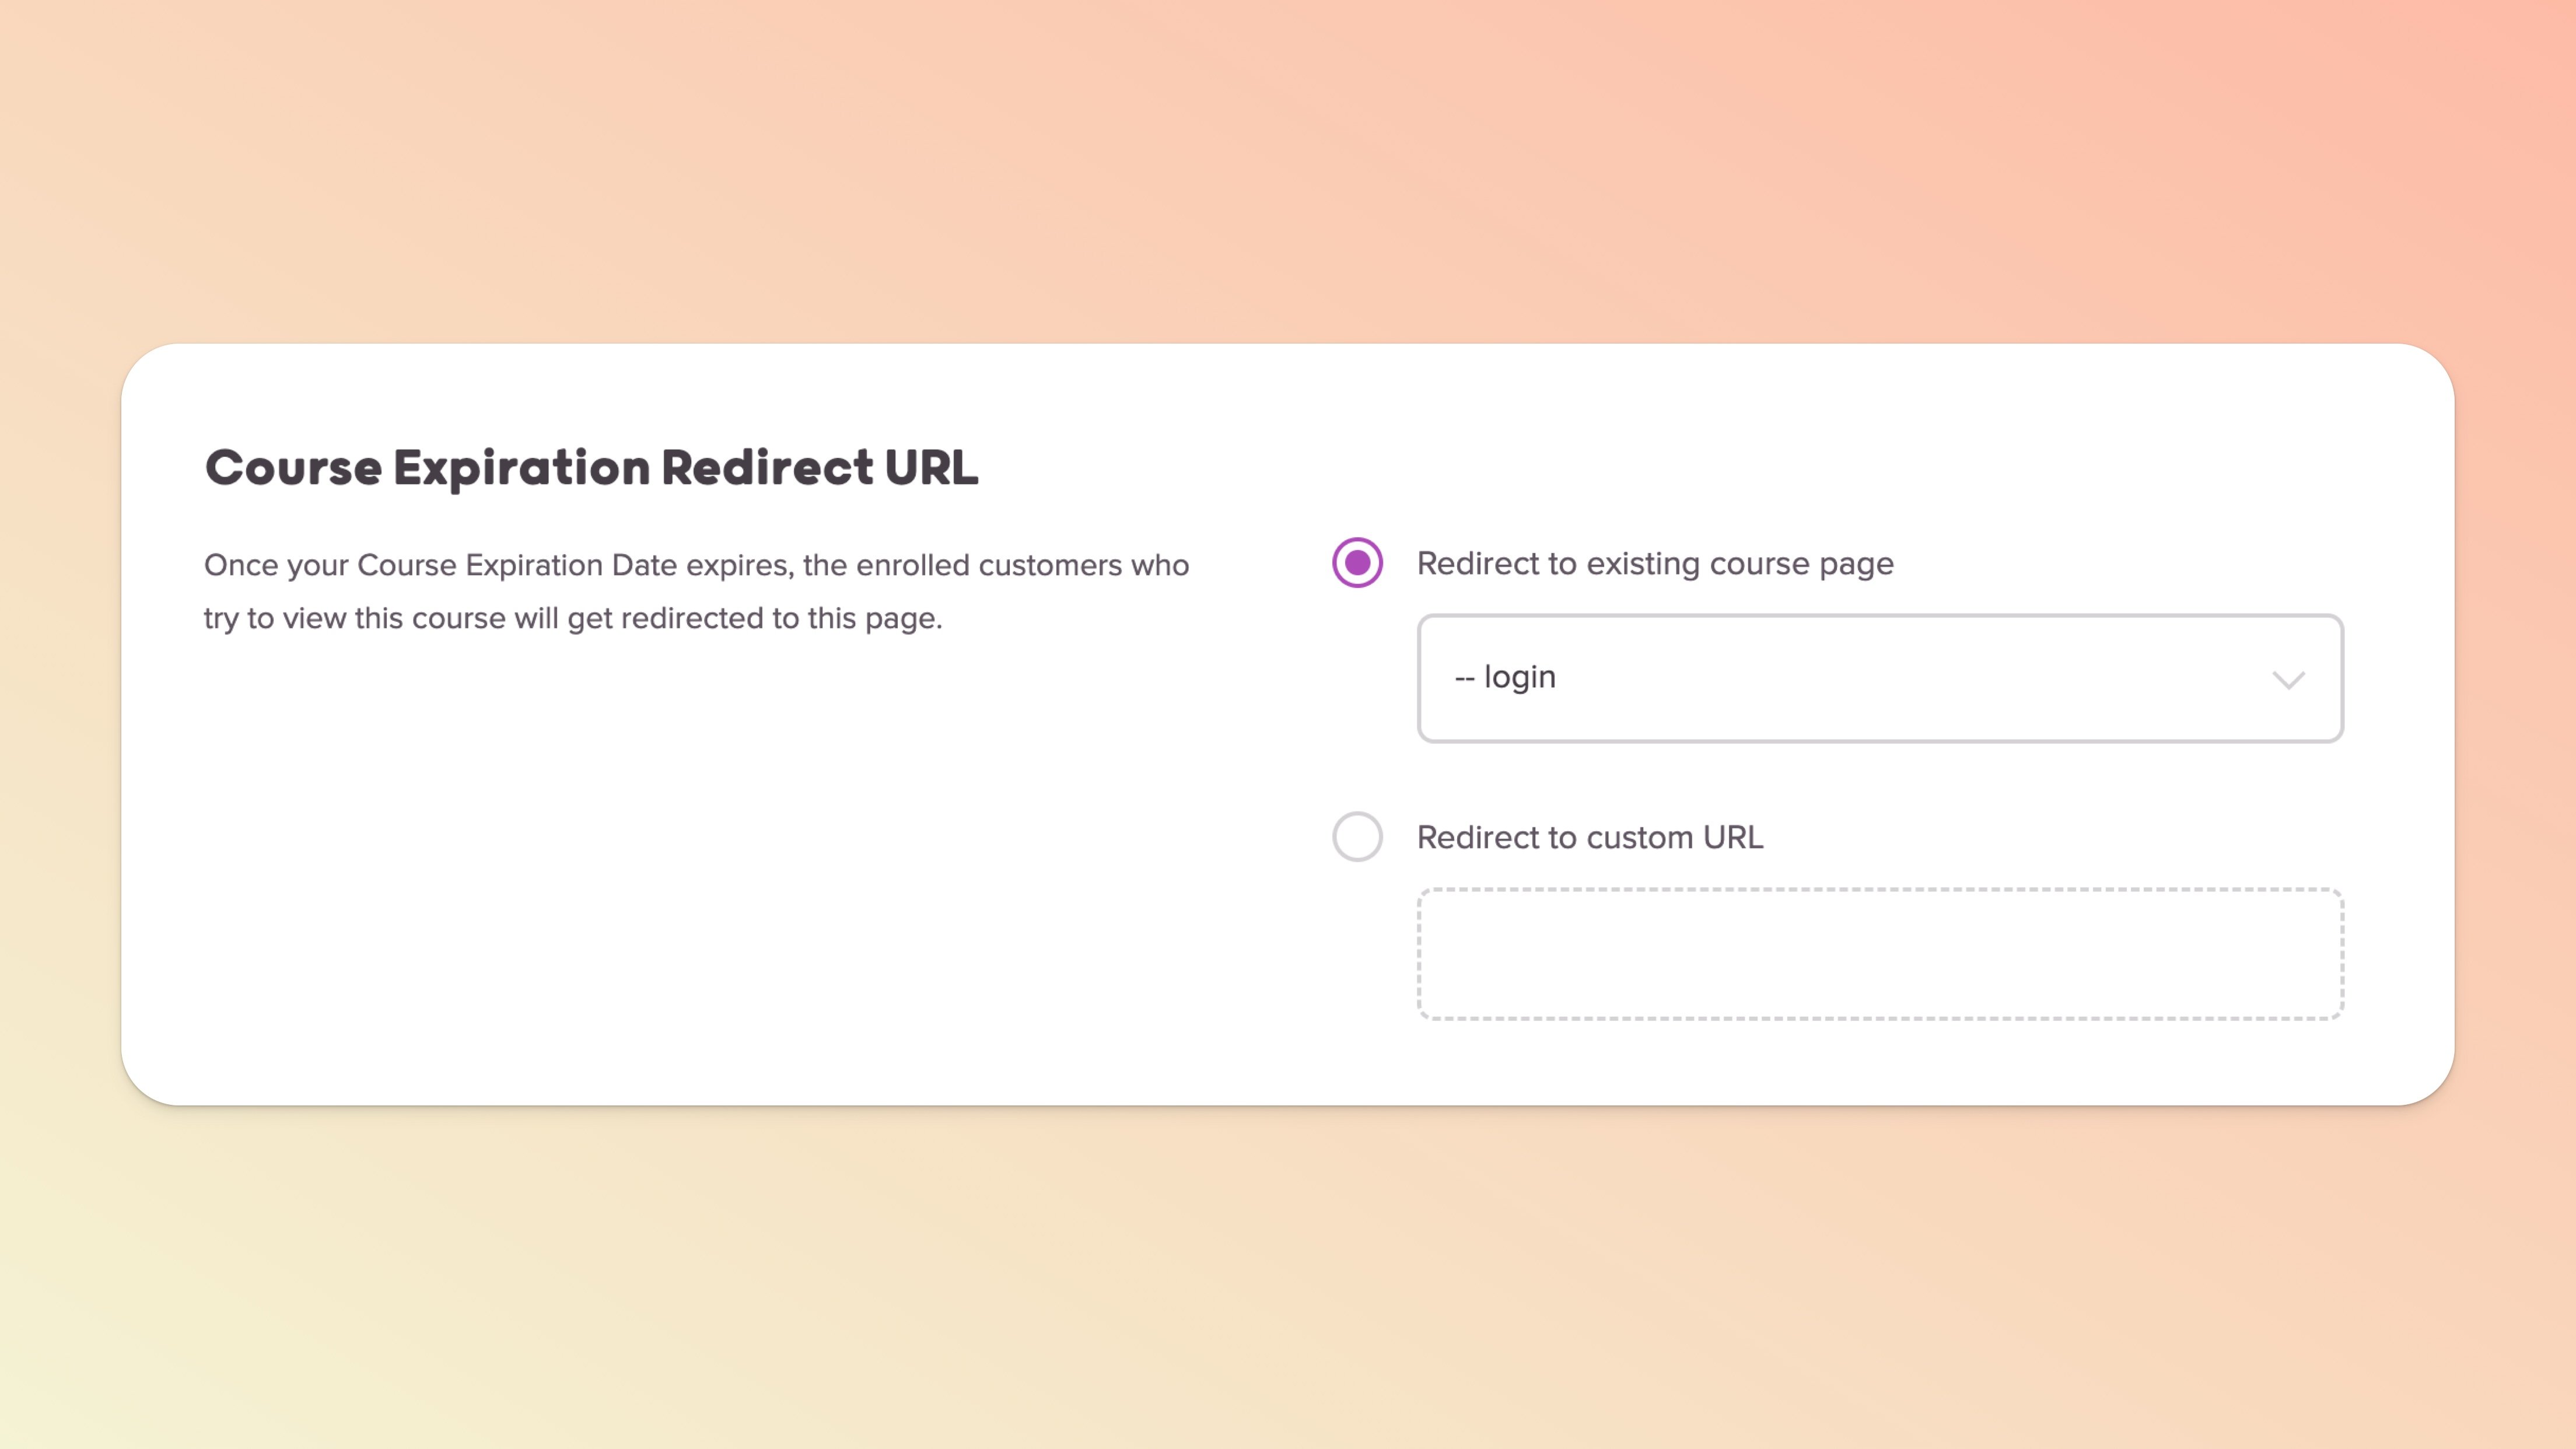
Once you choose Option 1 or 2 for your Course Expiration Date you'll want to set the redirect URL/page for the course.
This redirect will dictate where your student goes AFTER the course expiration date expires.
The Course Expiration Date redirect can be set to a page in your Teachery course OR any URL you want to use (another Teachery course Payment Page or any URL your heart desires!)
👉👉 This redirect will happen in two ways:
If a student is actively viewing* your course as the Course Expiration Date countdown timer counts all the way down to 00s, the page will automatically redirect.
If the Course Expiration Date timer has expired and a student tries to access any URL in the course, they will be redirected to the redirect URL you set.
Note: Setting the redirect URL will save automatically for you, there's no save button to click.
Once you've set your Course Expiration Date option (1 or 2), then added your Redirect Page/URL, it's now time to customize the countdown timer bar!
You can find the customization settings by clicking the "Lesson Drip Options" text link in the Course Expiration Date modal OR by clicking "Lesson Drip Options" in the left sidebar of the course editor.
Scroll down Lesson Drip Options to find the Course Expiration Date settings. If you click the "Customize" button in the Expiration Timer Bar section, you'll be taken to the Style Editor.
In the Style Editor >> Course Expiration Bar section, you customize the following:
You can set the timer bar background-color
You can set the timer bar text color
You can edit the text of the timer bar
You can add link text to the second sentence that can go to a Teachery Payment Page or any URL you specify (great for trying to sell your full course!)
You can highlight the link text and change the text color of the link text
Note #1 - The "X" Icon: If a student clicks the "X" icon on the timer bar, it will hide the timer bar on all pages of your course for 24 hours.
Note #2 - Timer Bar Font: The font is inherited by the course font you set on the Overview page of your course (Change Course Font button). You can also highlight the text when on the Customize Expiration Bar page and change the font that way as well.
Note #3 - Custom CSS: Feel free to add your own CSS to customize the timer bar to your liking. One simple example, you could use custom CSS to increase the font size on the timer bar from font size 15px (default) to 18px (larger). Grab the CSS here:
<style>div.countdown.end-date {font-size: 18px !important;}</style>Add that CSS in Course Settings > Style Your Course > Add Custom CSS
🛑 Please proceed at your own risk when adding custom CSS and you can read our help doc Adding Custom CSS.
If you're using the Course Expiration Date to create a preview version of your course which will sell the full version of your course...
We HIGHLY recommend duplicating your course and using the Course Expiration Date on the duplicated version of your course. This will keep your data clean and separate for the free preview course and your full/paid course.
The steps to set this up are the following:
Go to Course Settings > Duplicate Course in the sidebar editor of your main course
Once duplicated, go to Course Settings > Manage Options and be sure to update your preview course's Course Name and Course URL (you may want to update the Course Emails as well to be more "preview friendly")
Head to your Course Pages of the duplicated course and delete the lessons you won't want a student to have access to in the preview version of the course
ADD a new lesson that becomes a sales pitch for the full version of the course (grab a Payment Page link from your full course and make the link clear)
Set your Course Expiration Date in the preview course with the number of days you want someone to have access after "purchase" (or signup)
Set the Course Expiration Date redirect URL to the payment page for the full course (you want this payment page to be created in the FULL course itself)
Customize the Course Expiration Date timer bar to have text linking to your full course payment page URL
🚀 Last but not least, create a free payment page in your preview course that you share which gives people access to the preview course!
BONUS: Create an automated email sequence and sync it up to match the number of days of your course preview (if the Course Expiration Date is 5 days, you could send 1 email per day).
If you only want a student to have access to your course after purchasing for a certain amount of time, you can use Course Expiration Date for this too.
Unlike the Evergreen Sales Funnel, you may not need to duplicate your course for this option (unless you want to). You'd simply set your Course Expiration Date option to days after purchase OR to a date in the future and once the time expires, your student's access to your course expires and is revoked. Easy peasy!
You can always go into a specific student's Customer Profile from the Customers page and edit their Course Expiration Date to give them additional time in your course.
If you have any questions about using our Course Expiration Date feature or come up with a unique way to use it for your course, reach out to us!
