With Teachery, we've tried to create a simple course platform that takes the headache out of course creation.
That being said, simplicity can be limiting, which is why we allow for custom CSS in multiple areas of your online course(s).

When editing your course, look in the left sidebar and scroll to Style Your Course, click on it, and you'll see the Add Custom CSS page.
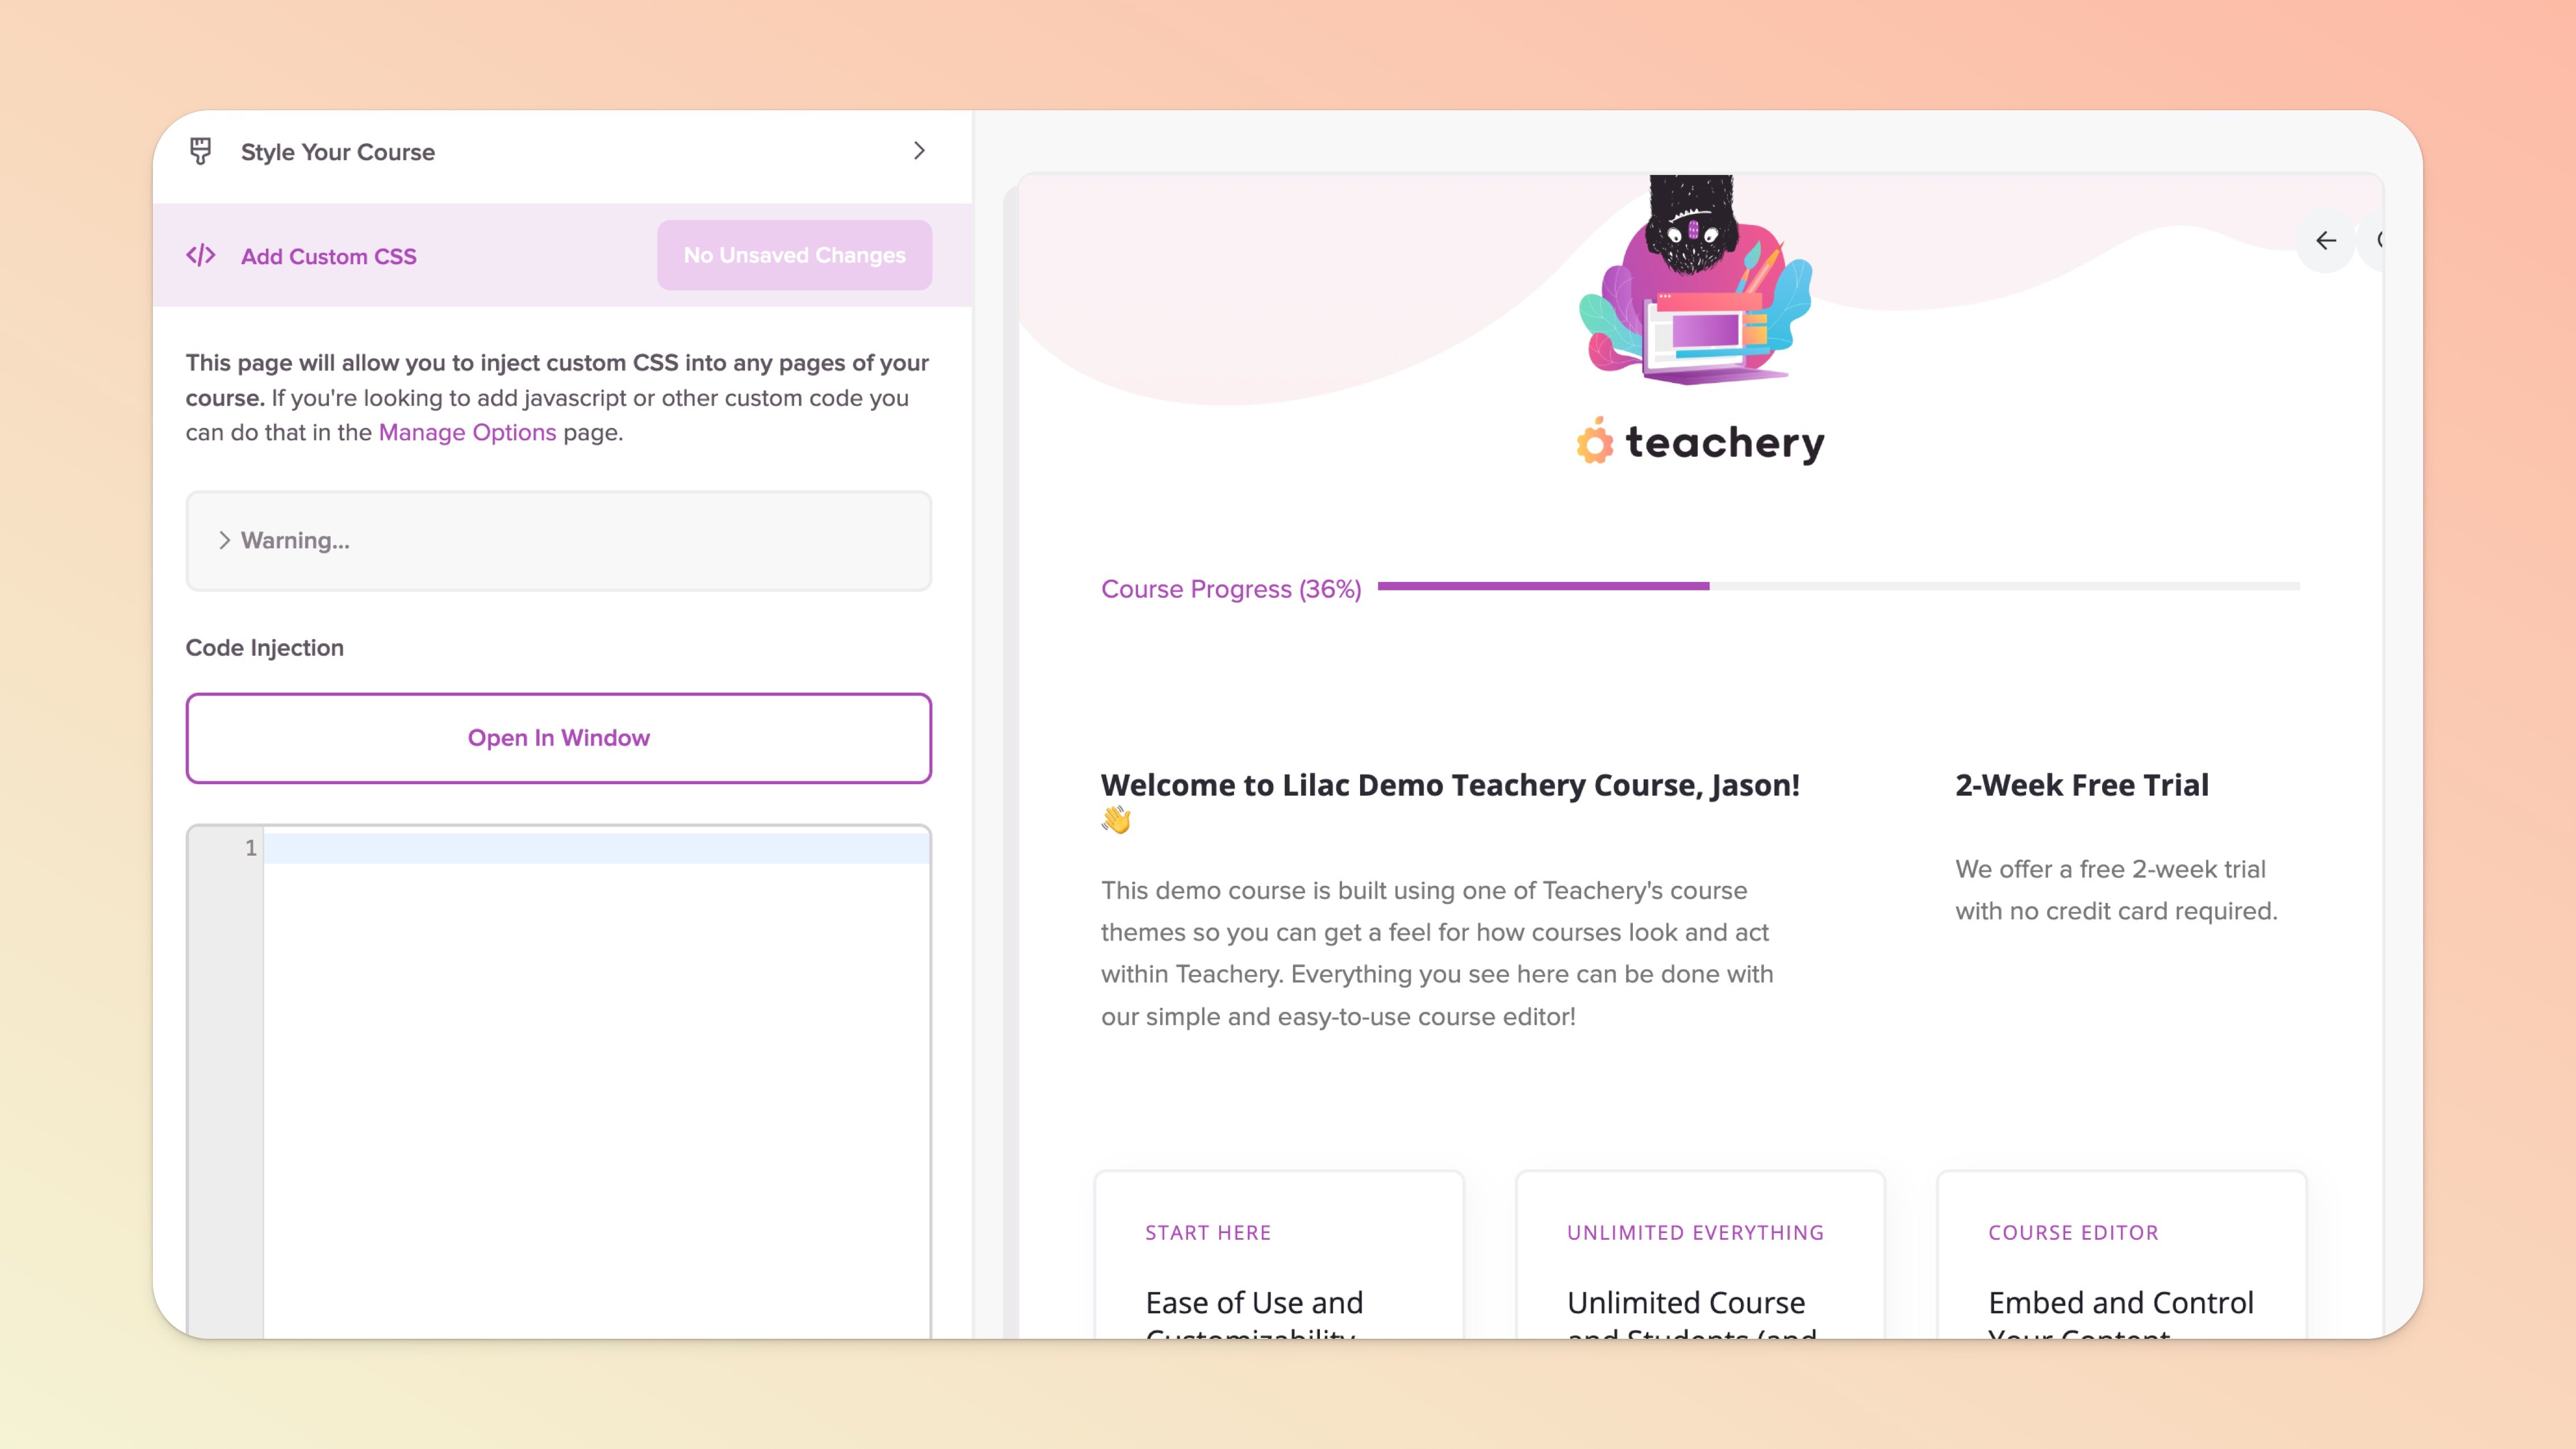
Boom! That's the place to add your CSS code. ✅
We've tried to make the process as intuitive as possible:
You'll add your CSS in the editor area (and it will validate on the fly!)
You can click the Apply Changes button to see your CSS on the page you're viewing
If you're happy, click Publish Changes button to set your CSS live in your course 🎉
Add this snippet of code (below) to the Add Custom CSS page to be able to update your course body font and headings all in one go:
p, ul, li, ol, .questions, .description, .module-meta,
.module-transcript, .get-started, .inner {
  font-size: 17px !important;
  line-height: 3rem !important;
  font-family: Roboto !important;
}

.imitate-h3, h3, h1, h2, h3, h4, h2froala, .imitate-h2-template-2 {
  font-family: 'Playfair Display' !important;
}
The first part of this custom CSS (p, ul, li, ol, .questions, .description, .module-meta, .module-transcript, .get-started, .inner) sets the:
Body font throughout the entire course (to 17px)
The font itself (to Roboto font, one of our supported custom Google fonts*)
Adjusts the line height to have more spacing (to 3rem)
The second part of this custom CSS (h1, h2, h3, h4) sets the:
Heading 1, Heading 2, Heading 3, and Heading 4 font (to Playfair Display font)
Adjusts the line height to have more spacing (to 150%)
*You can see our list of supported Google fonts by going to the Overview lesson of your course, clicking the Actions Menu (purple button top right), then clicking "Change Course Font." We recommend choosing the body font from the Change Course Font dropdown menu to match the custom CSS body font.
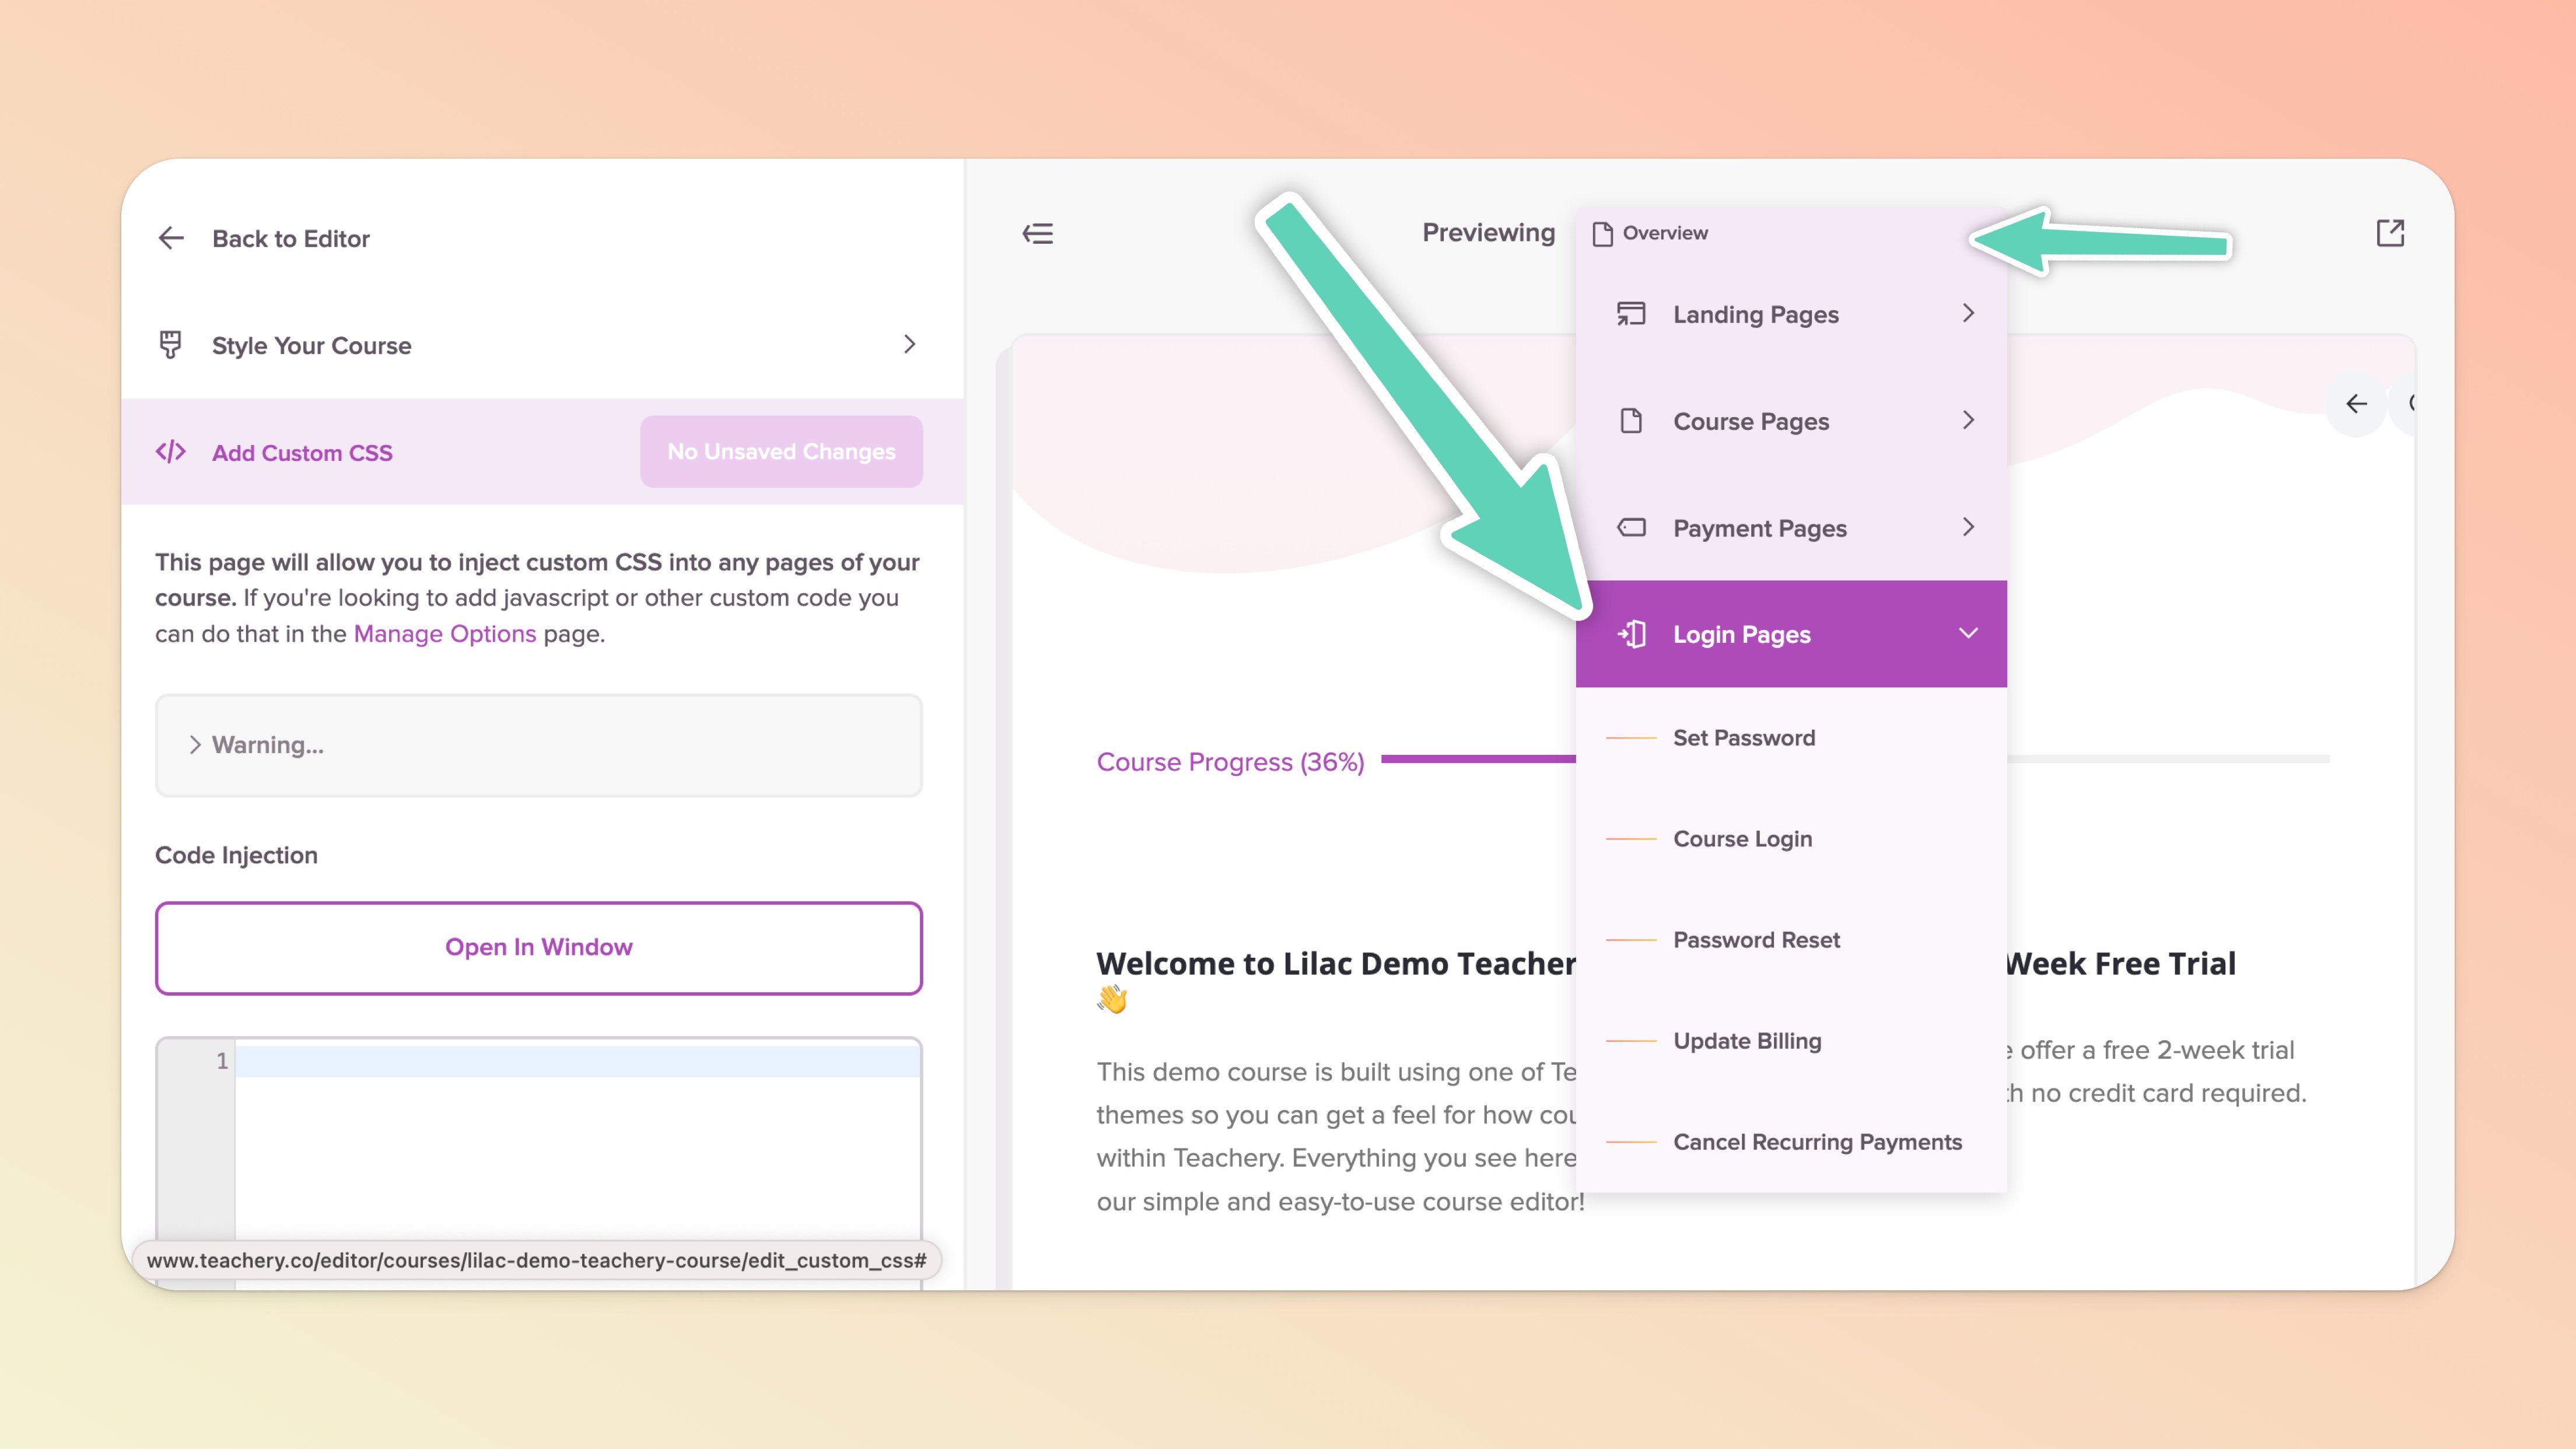
The Course Login and Password Reset pages can be customized even further using our Add Custom CSS page. You'll find these pages listed in the dropdown menu at the top of the preview window while in the Add Custom CSS page of your course:
Here's the snippet of CSS to add:
.editor-button:first-child {background-color:#dea9a2 !important;}
.editor-button:first-child:hover {background-color:#4a252f !important;}
.editor-button.editor-button-clear {color:#4a252f !important;}
.editor-button.editor-button-clear:hover {color:#a3907c !important;}
Just update the colors in the CSS to match your branding and you're good to go! The buttons and text on these pages can now match your branding! 🙌
If you want to spice up your course design and add a background texture or image, you can absolutely make that happen! Here's the code example:
#course-background {
  background: url('http://image.jpg') no-repeat bottom center !important;
  background-size: contain !important;
}
📌 Don't forget to update the http://image.jpg to your own image name/URL!
💡 PRO-TIP: In any lesson in your course, upload an image via our image uploader, then right-click and Copy Image Address. You can then remove the image from your lesson and paste the image address into the CSS code!
This is a nice effect if you want your course to look like it has some visual depth. Here's the CSS you can use:
#lessons-page {
  margin-bottom:75px;
  box-shadow: 0px 20px 30px rgba(0,0,0,0.2)
}
You can thank fellow Teachery customer Jacob Wyatt for figuring this one out!
If you want your lesson content to be centered within the lesson without using the right-column Lesson Resources box:
/* Hides sidebar on front-facing course, but not inside editor */
#lessons-page aside:not(.fr-view) { display: none; }

/* Normalizes spacing of lesson canvas */
.template-2 article:not(.fr-view) { width:100%; margin: 50px 0px 50px 0px; }
You'll find a (sub)lessons ("More in this lesson") box under the Lesson Resources box in the right column of your course. If you do not wish to display this (sub)lessons box you can add this CSS:
#lessons-page #sublessons {
    display: none;
}
If you’re choosing not to hide the entire (sub)lessons ("More in this lesson") box from the right sidebar of every lesson but instead only want to hide the (sub)lesson preview images that may (depending on your chosen theme) be appearing in there, you can use this CSS:
#lessons-page #sublessons .toplist img {
    display: none;
}
Favicons are an often forgotten part of the website experience. By default, your course will inherit the Teachery favicon. To override this, you need one snippet of code added to your course’s settings.
Open the relevant course and expand Course Settings near the bottom of the left sidebar menu, then click Manage Options, and then find the Head Tag Code Injection field.
Be sure to first modify the sample code provided below and then pop it into that field.
<link
rel="icon"
type="image/png"
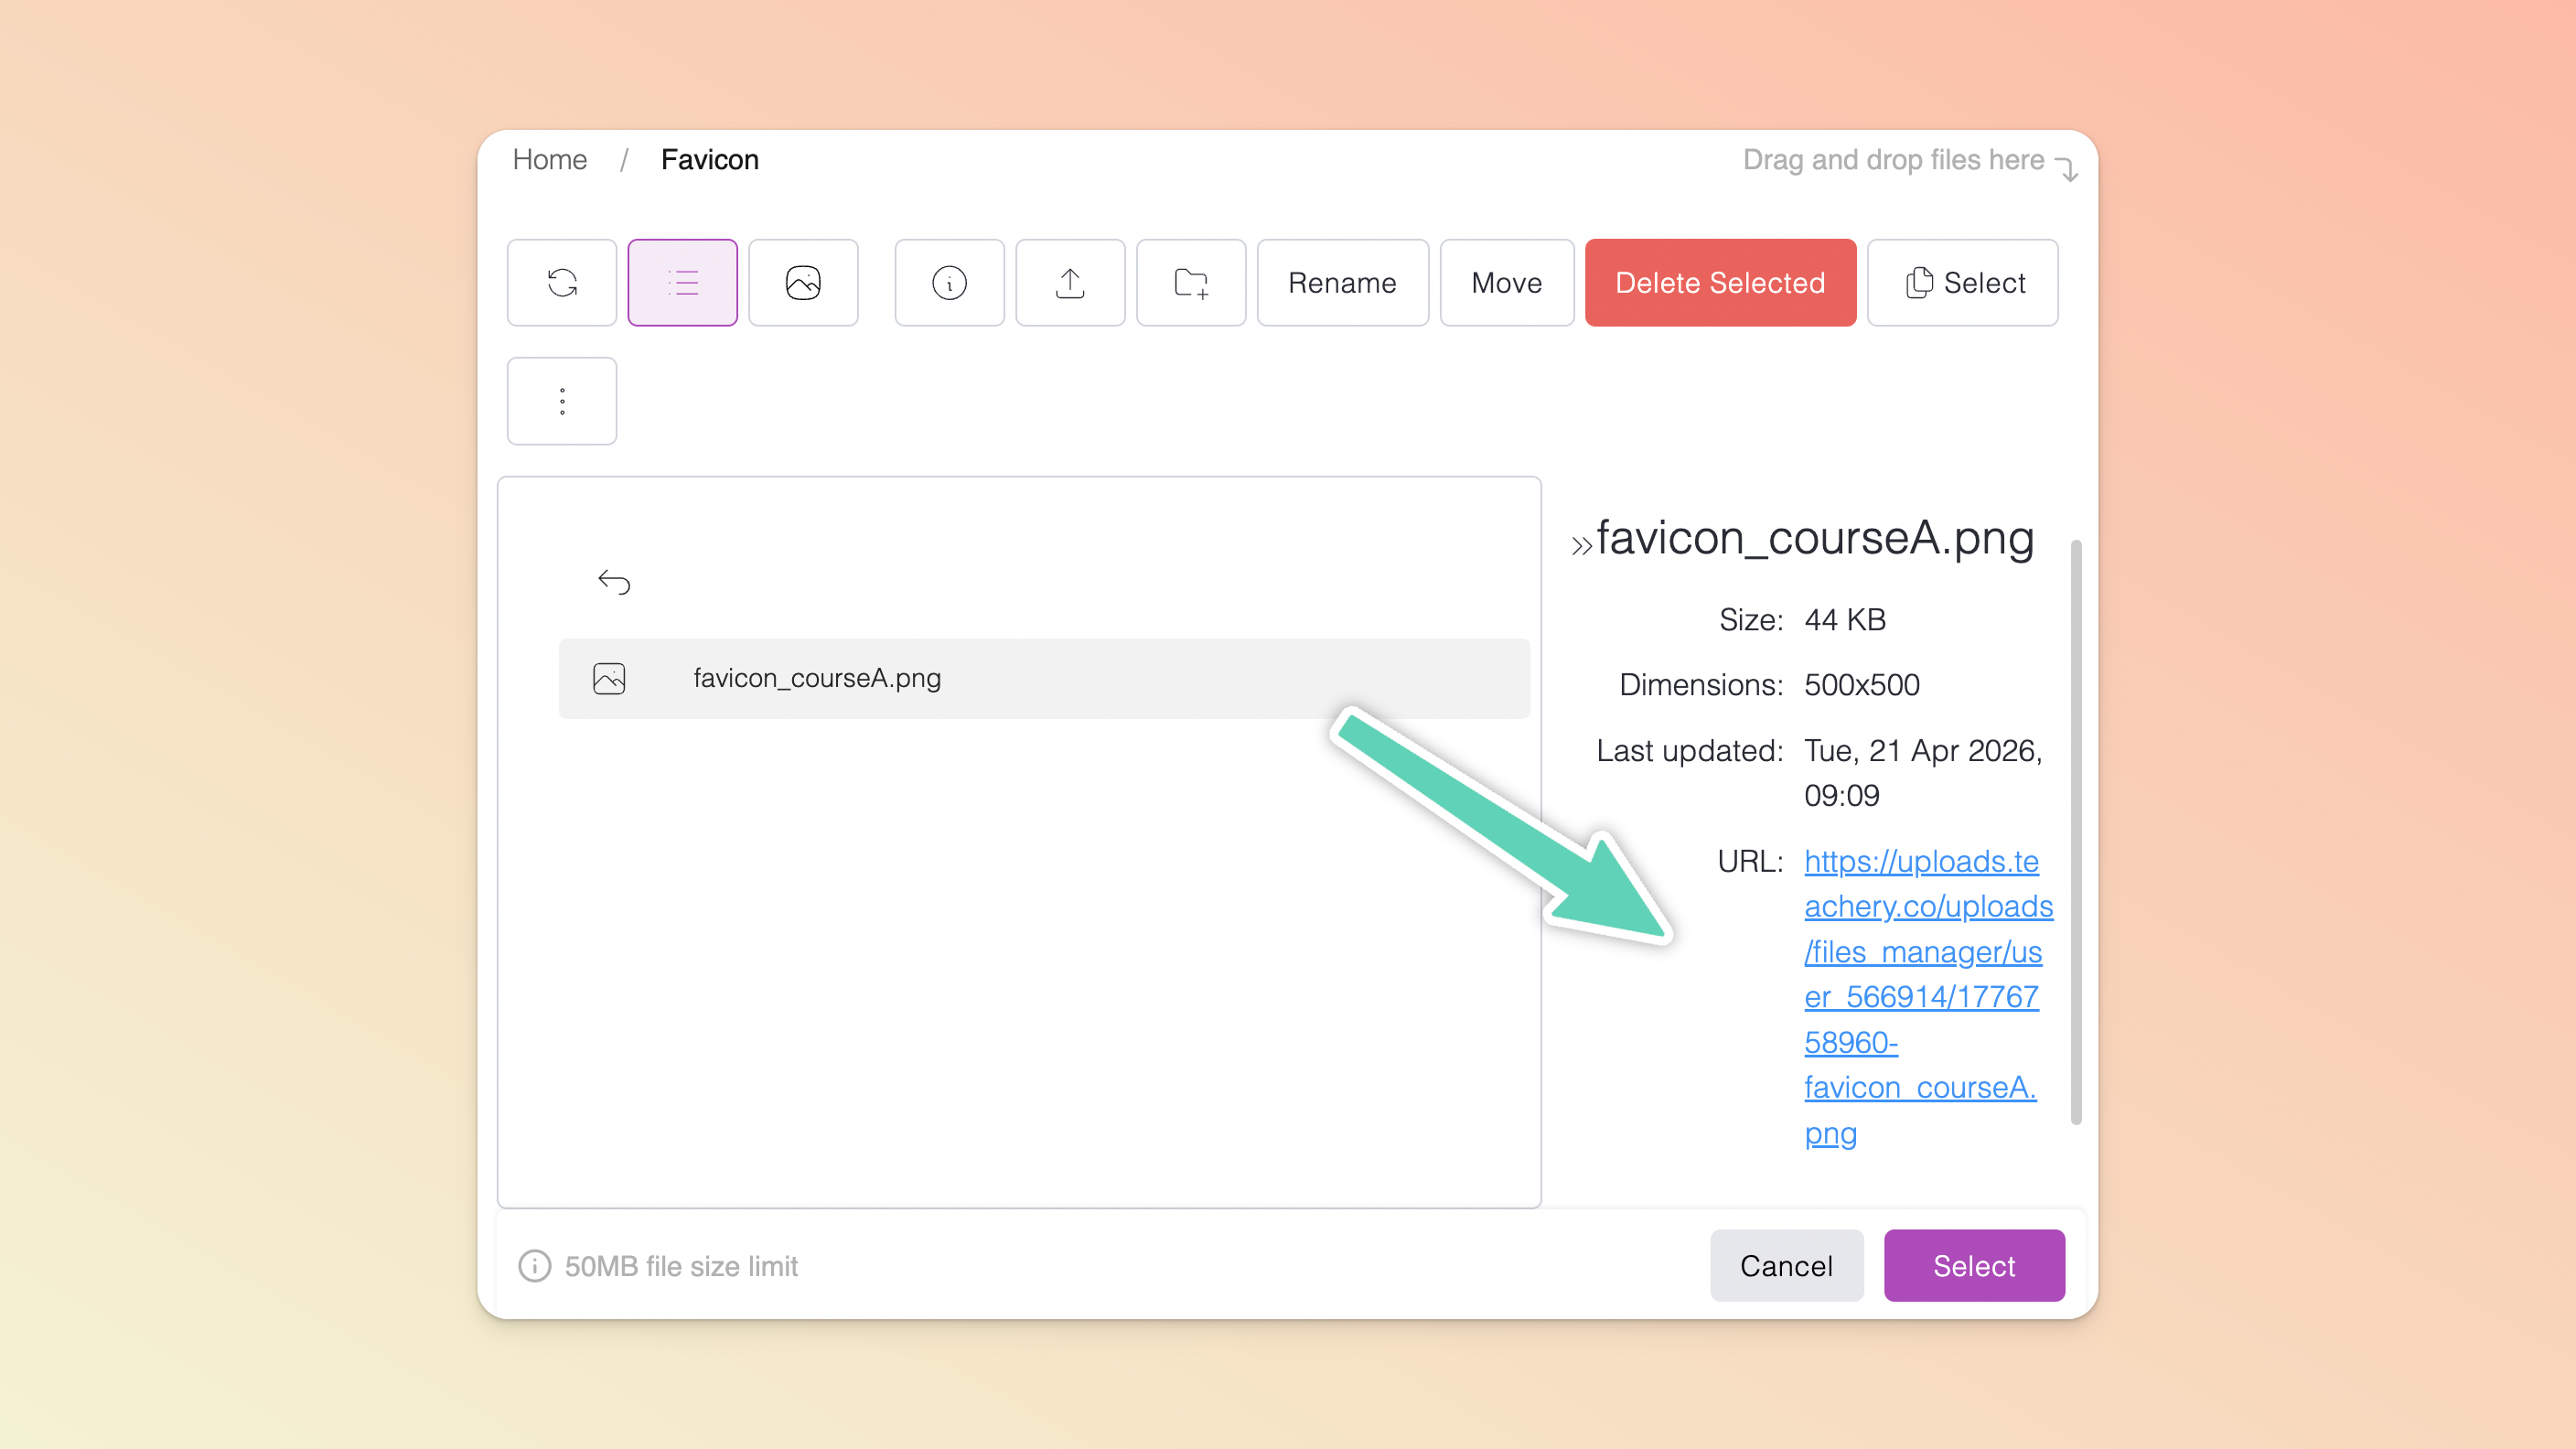
href="https://uploads.teachery.co/..../favicon_courseA.png">You'll want to make sure you update the image URL in the code snippet above. You can upload your favicon to Teachery using our file manager.
Simply go to any part of your course in which you can upload an image file, upload/import the file, copy its URL from within the file manager (click the file to open its information panel - pictured below), and then close the file manager. Then replace the sample URL provided in the code snippet above with your URL.
If you've never made a favicon before, you can use the free Favicon Generator to help you. If you need a place to upload your favicon so you can link to it, we recommend imgur.com for image storage.
Hope you enjoy all these CSS tricks! 😎
