There are three different ways you can add Google Fonts to your Course or Theme:
Set one of our 50+ pre-selected Google Fonts as your overall course font
Use our Global Font Palette (🅰 below) and add any Google Font to your course and apply different Google Fonts to your Body, Heading 1, H2, H3, etc font styles
Use our Add Custom CSS area (🅱 below) for maximum customization
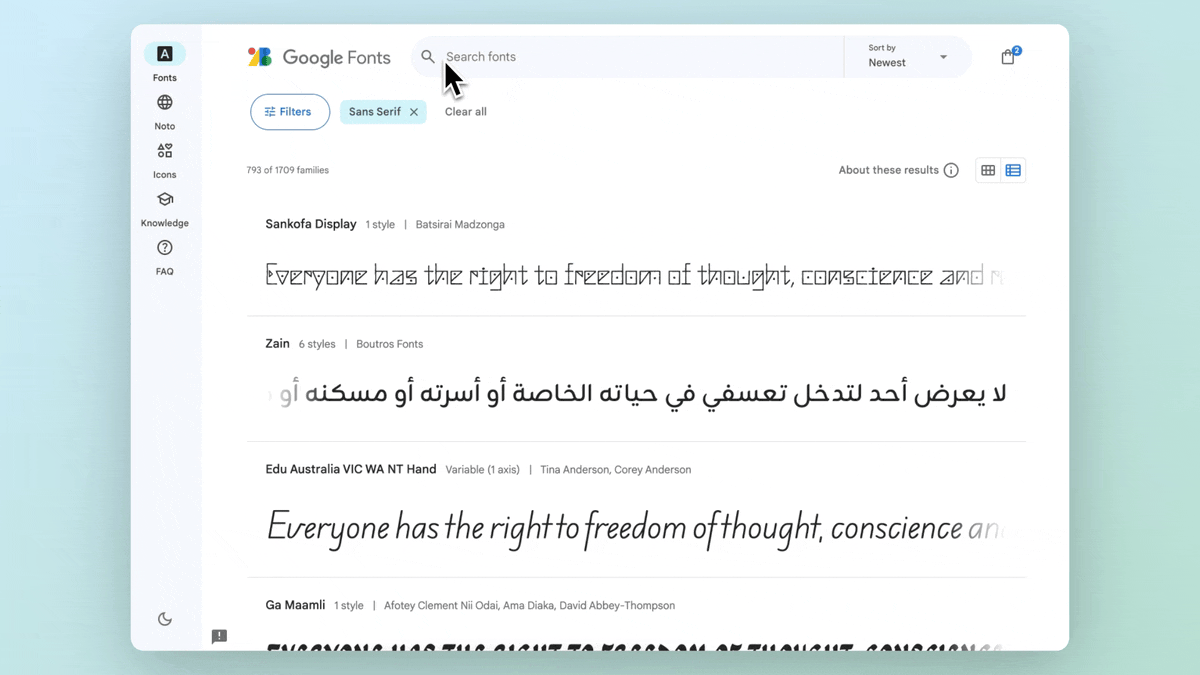
The first thing you'll want to do is head to Google Fonts and select your font(s).
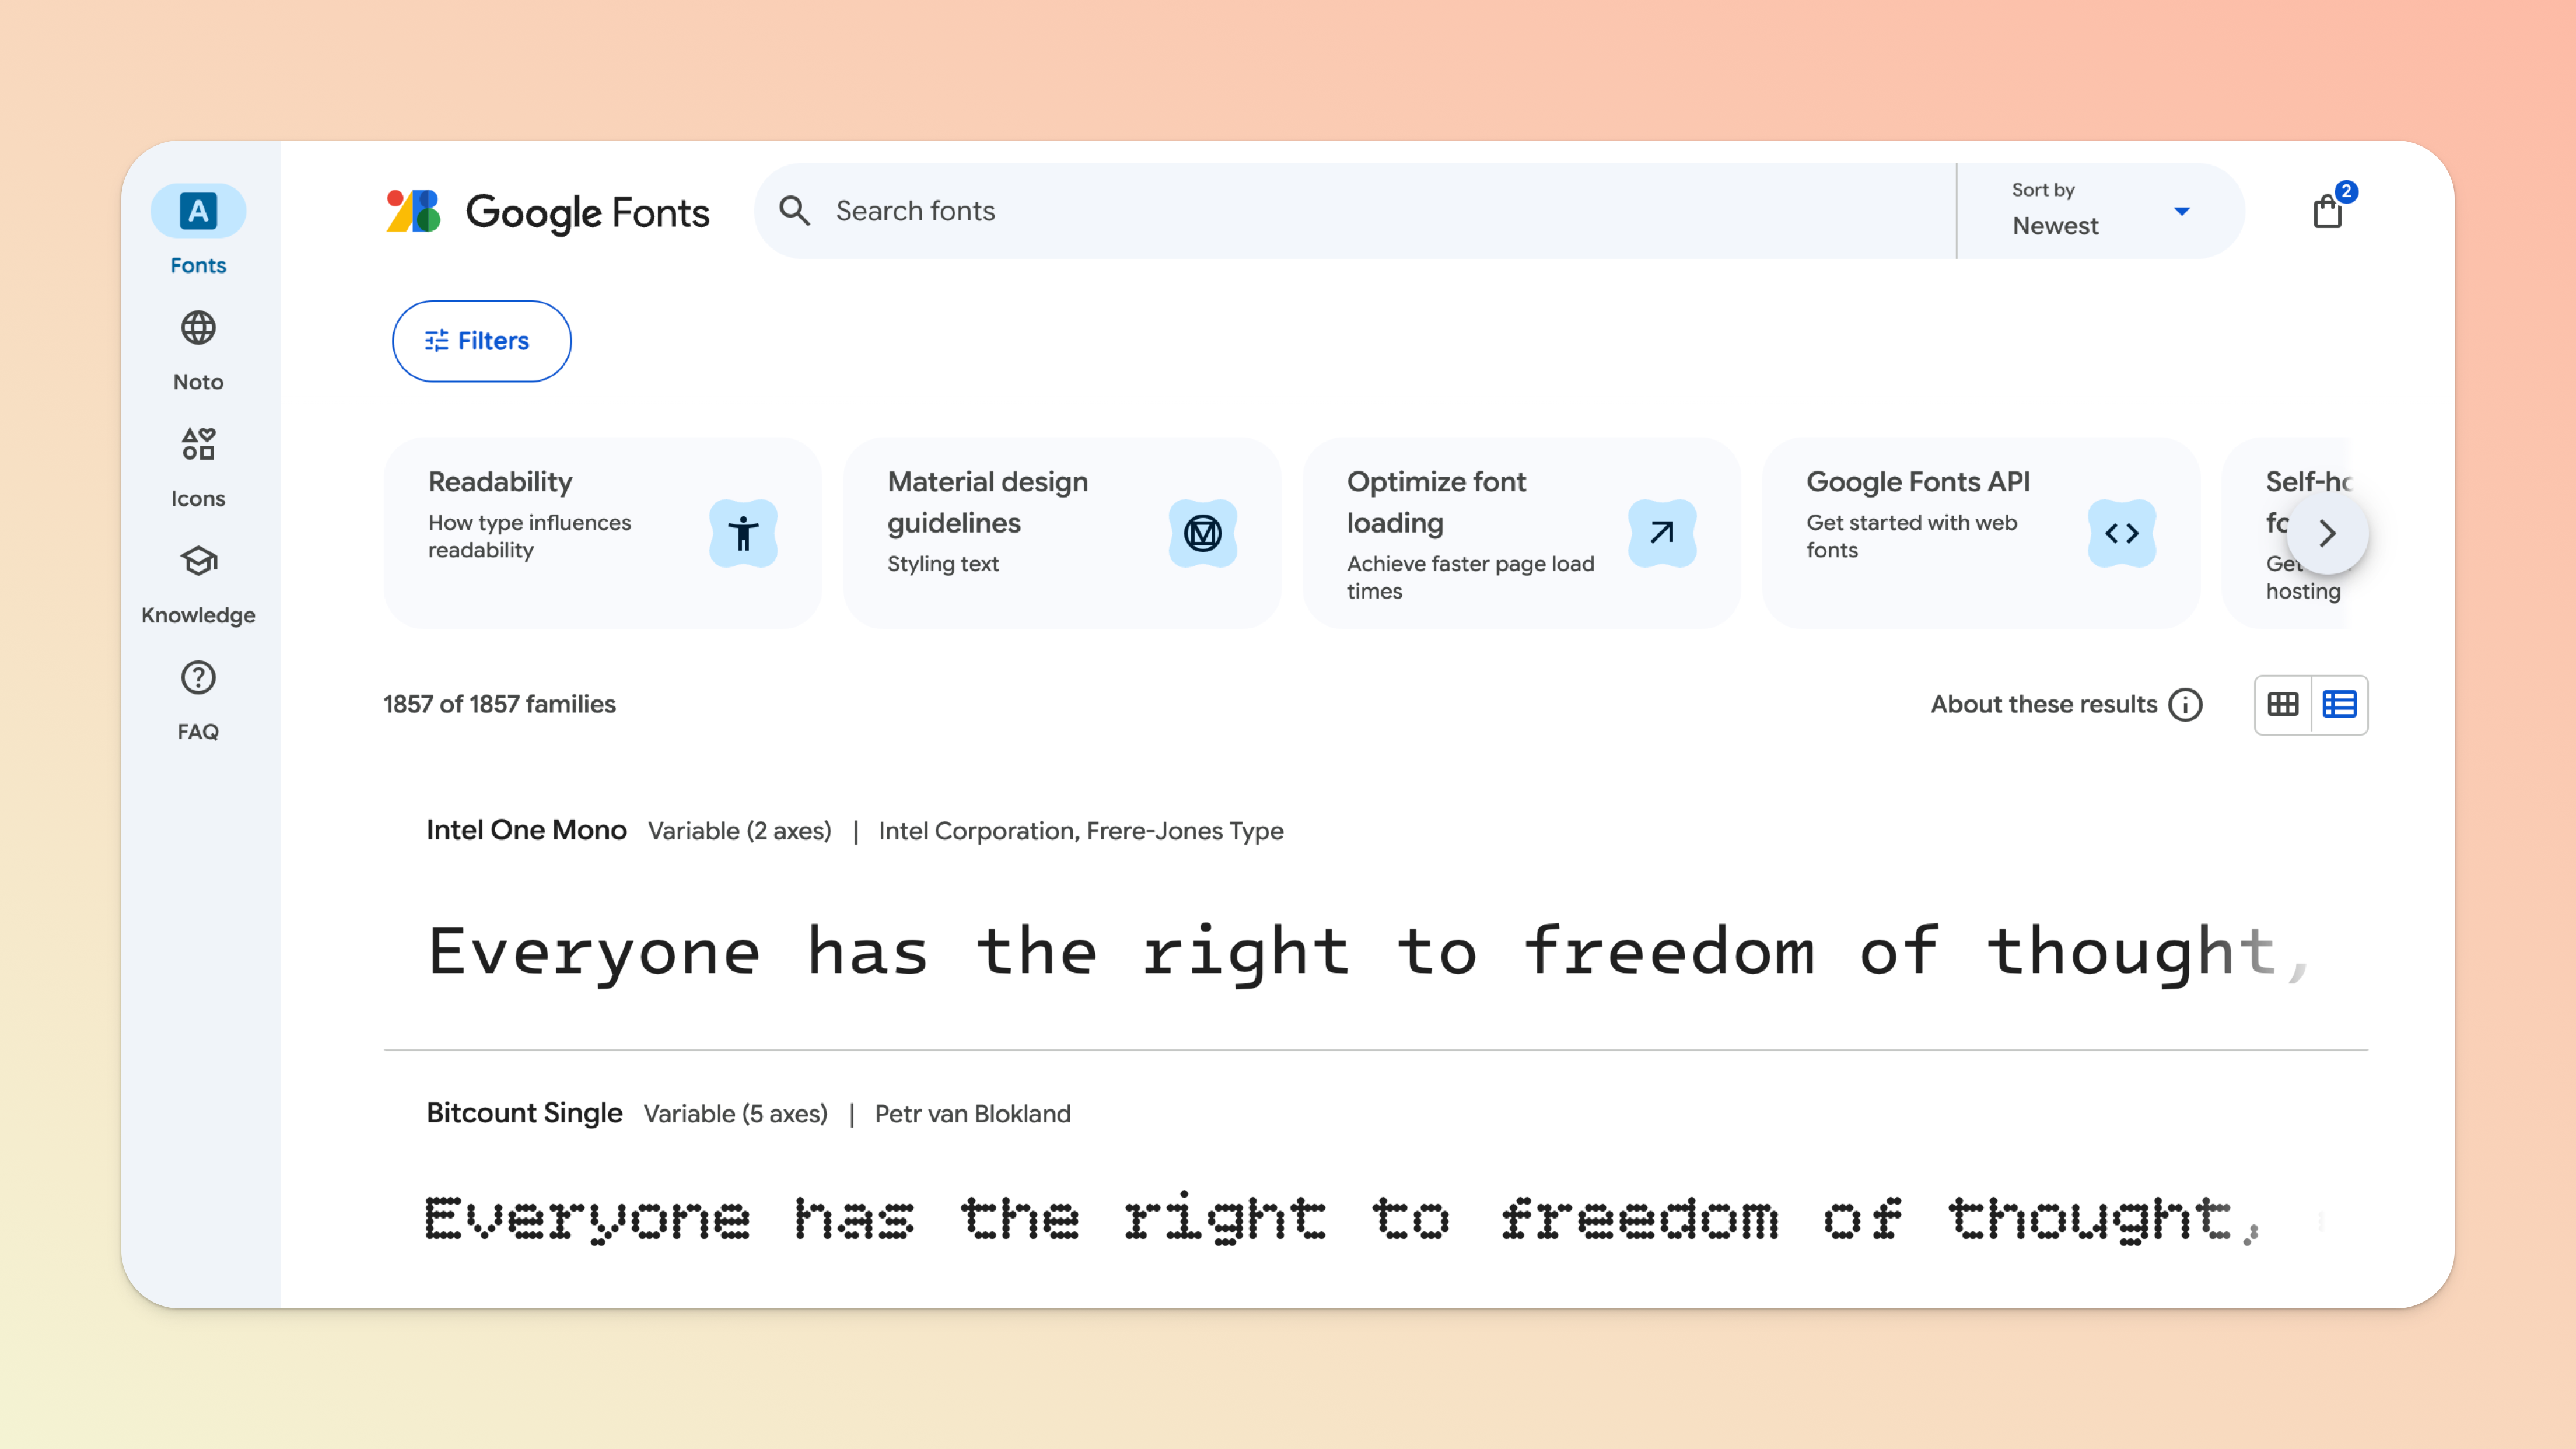
Once you have your font(s) selected, all you need to do is copy the <link> code by clicking the Get font > Get embed code buttons.

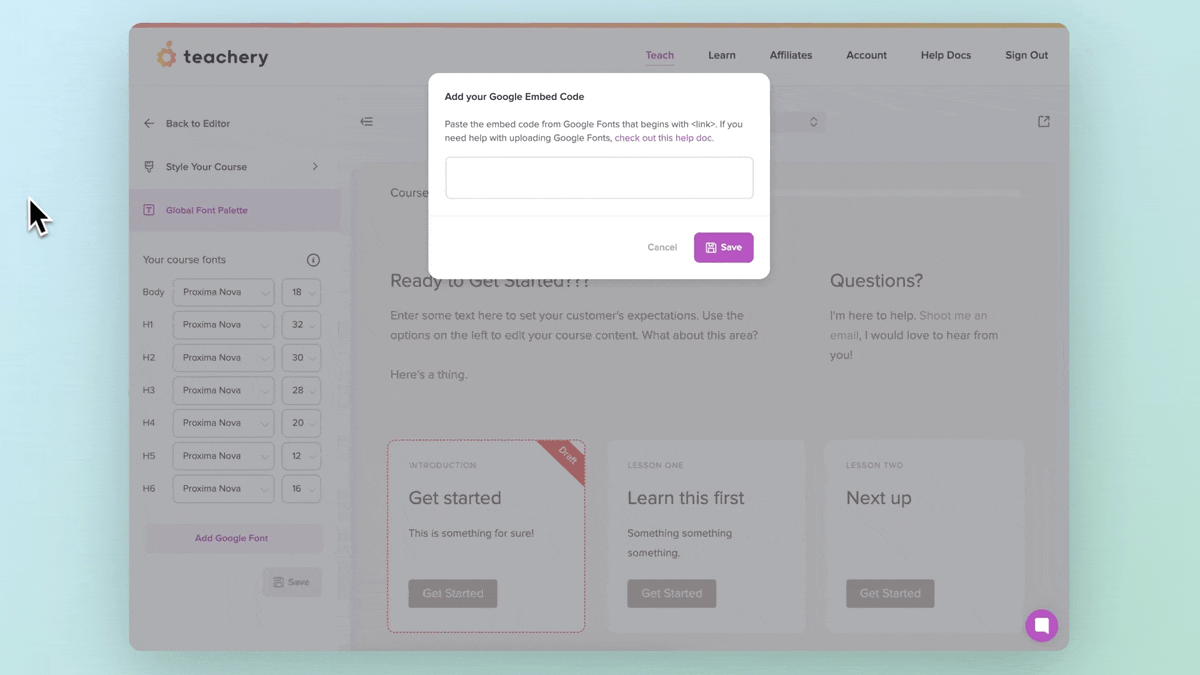
While editing any Course or Theme, click into the Style Your Course section of the left sidebar, then click Global Font Palette.
Click the Add Google Font button under the font styles and then paste the <link> code from Google. Hit the Save button and you'll now have a "Your fonts" section in the font dropdown menus.
Set your Body, H1, H2, etc fonts, sizes, and Save and you're all done! ✅

You may already have a font selected, but if not, just head to the Google Font library and poke around.

You're going to select the font and grab the link code which we'll add to your course in Step #3.
When you're on the font's page, click the "Select this Style" button in line with the font (if there are multiple font weights, you'll want to choose the one font weight you want.)
Then, click the "Selected Families" icon which is in the top right (the icon has 3 squares and a + sign).
Scroll down to the Use on the web section, make sure <link> is toggled, and then copy the lines of code.
Oi Google Font example link code:
<link rel="preconnect" href="https://fonts.gstatic.com">
<link href="https://fonts.googleapis.com/css2?family=Oi&display=swap" rel="stylesheet">
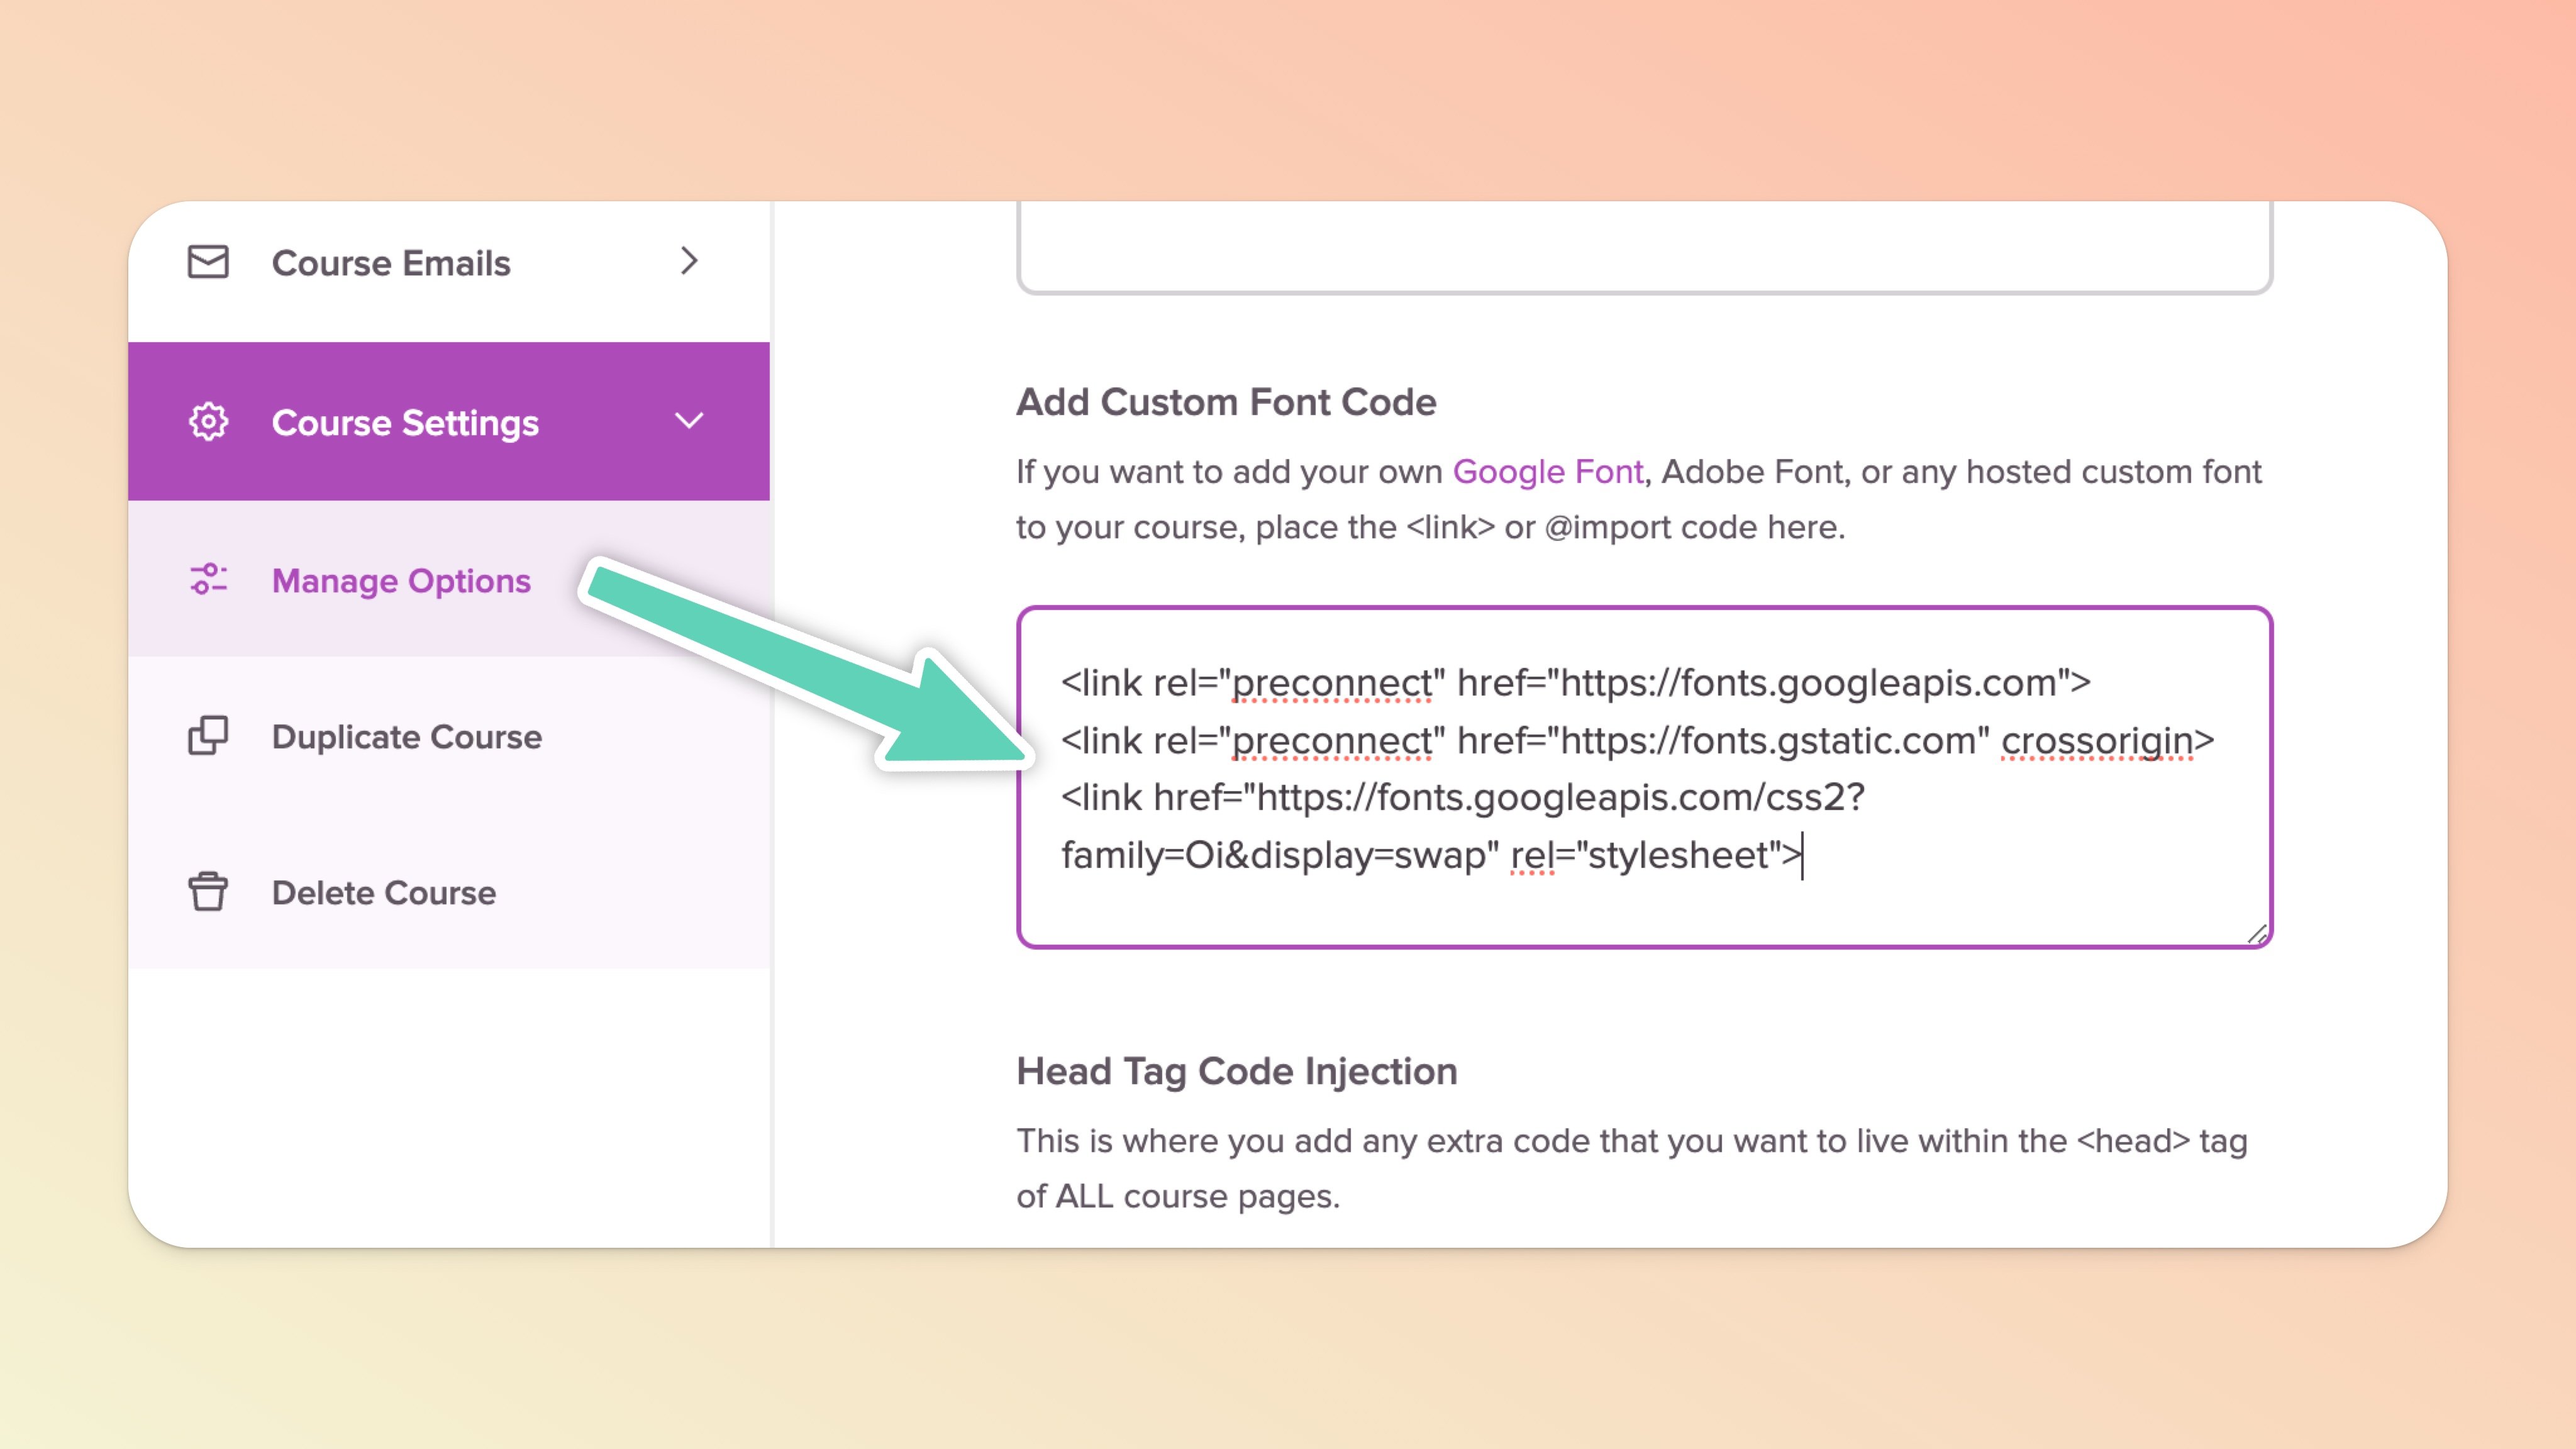
The code you just copied from Google Fonts we're now going to add to the Add Custom Font Script code area of your course's Manage Options page. Here's how to do that:
Click in to edit your course from the Courses page
In the left sidebar, scroll down to Course Settings, click to expand, and then click Manage Options
In the Manage Options page, scroll down to the "Add Custom Font Code" section and paste the Google Font code!
Make sure to click the Save Options button ✅
Writing any custom CSS can be really tricky, so we've tried to give you some sample CSS below that you can interchange easily!
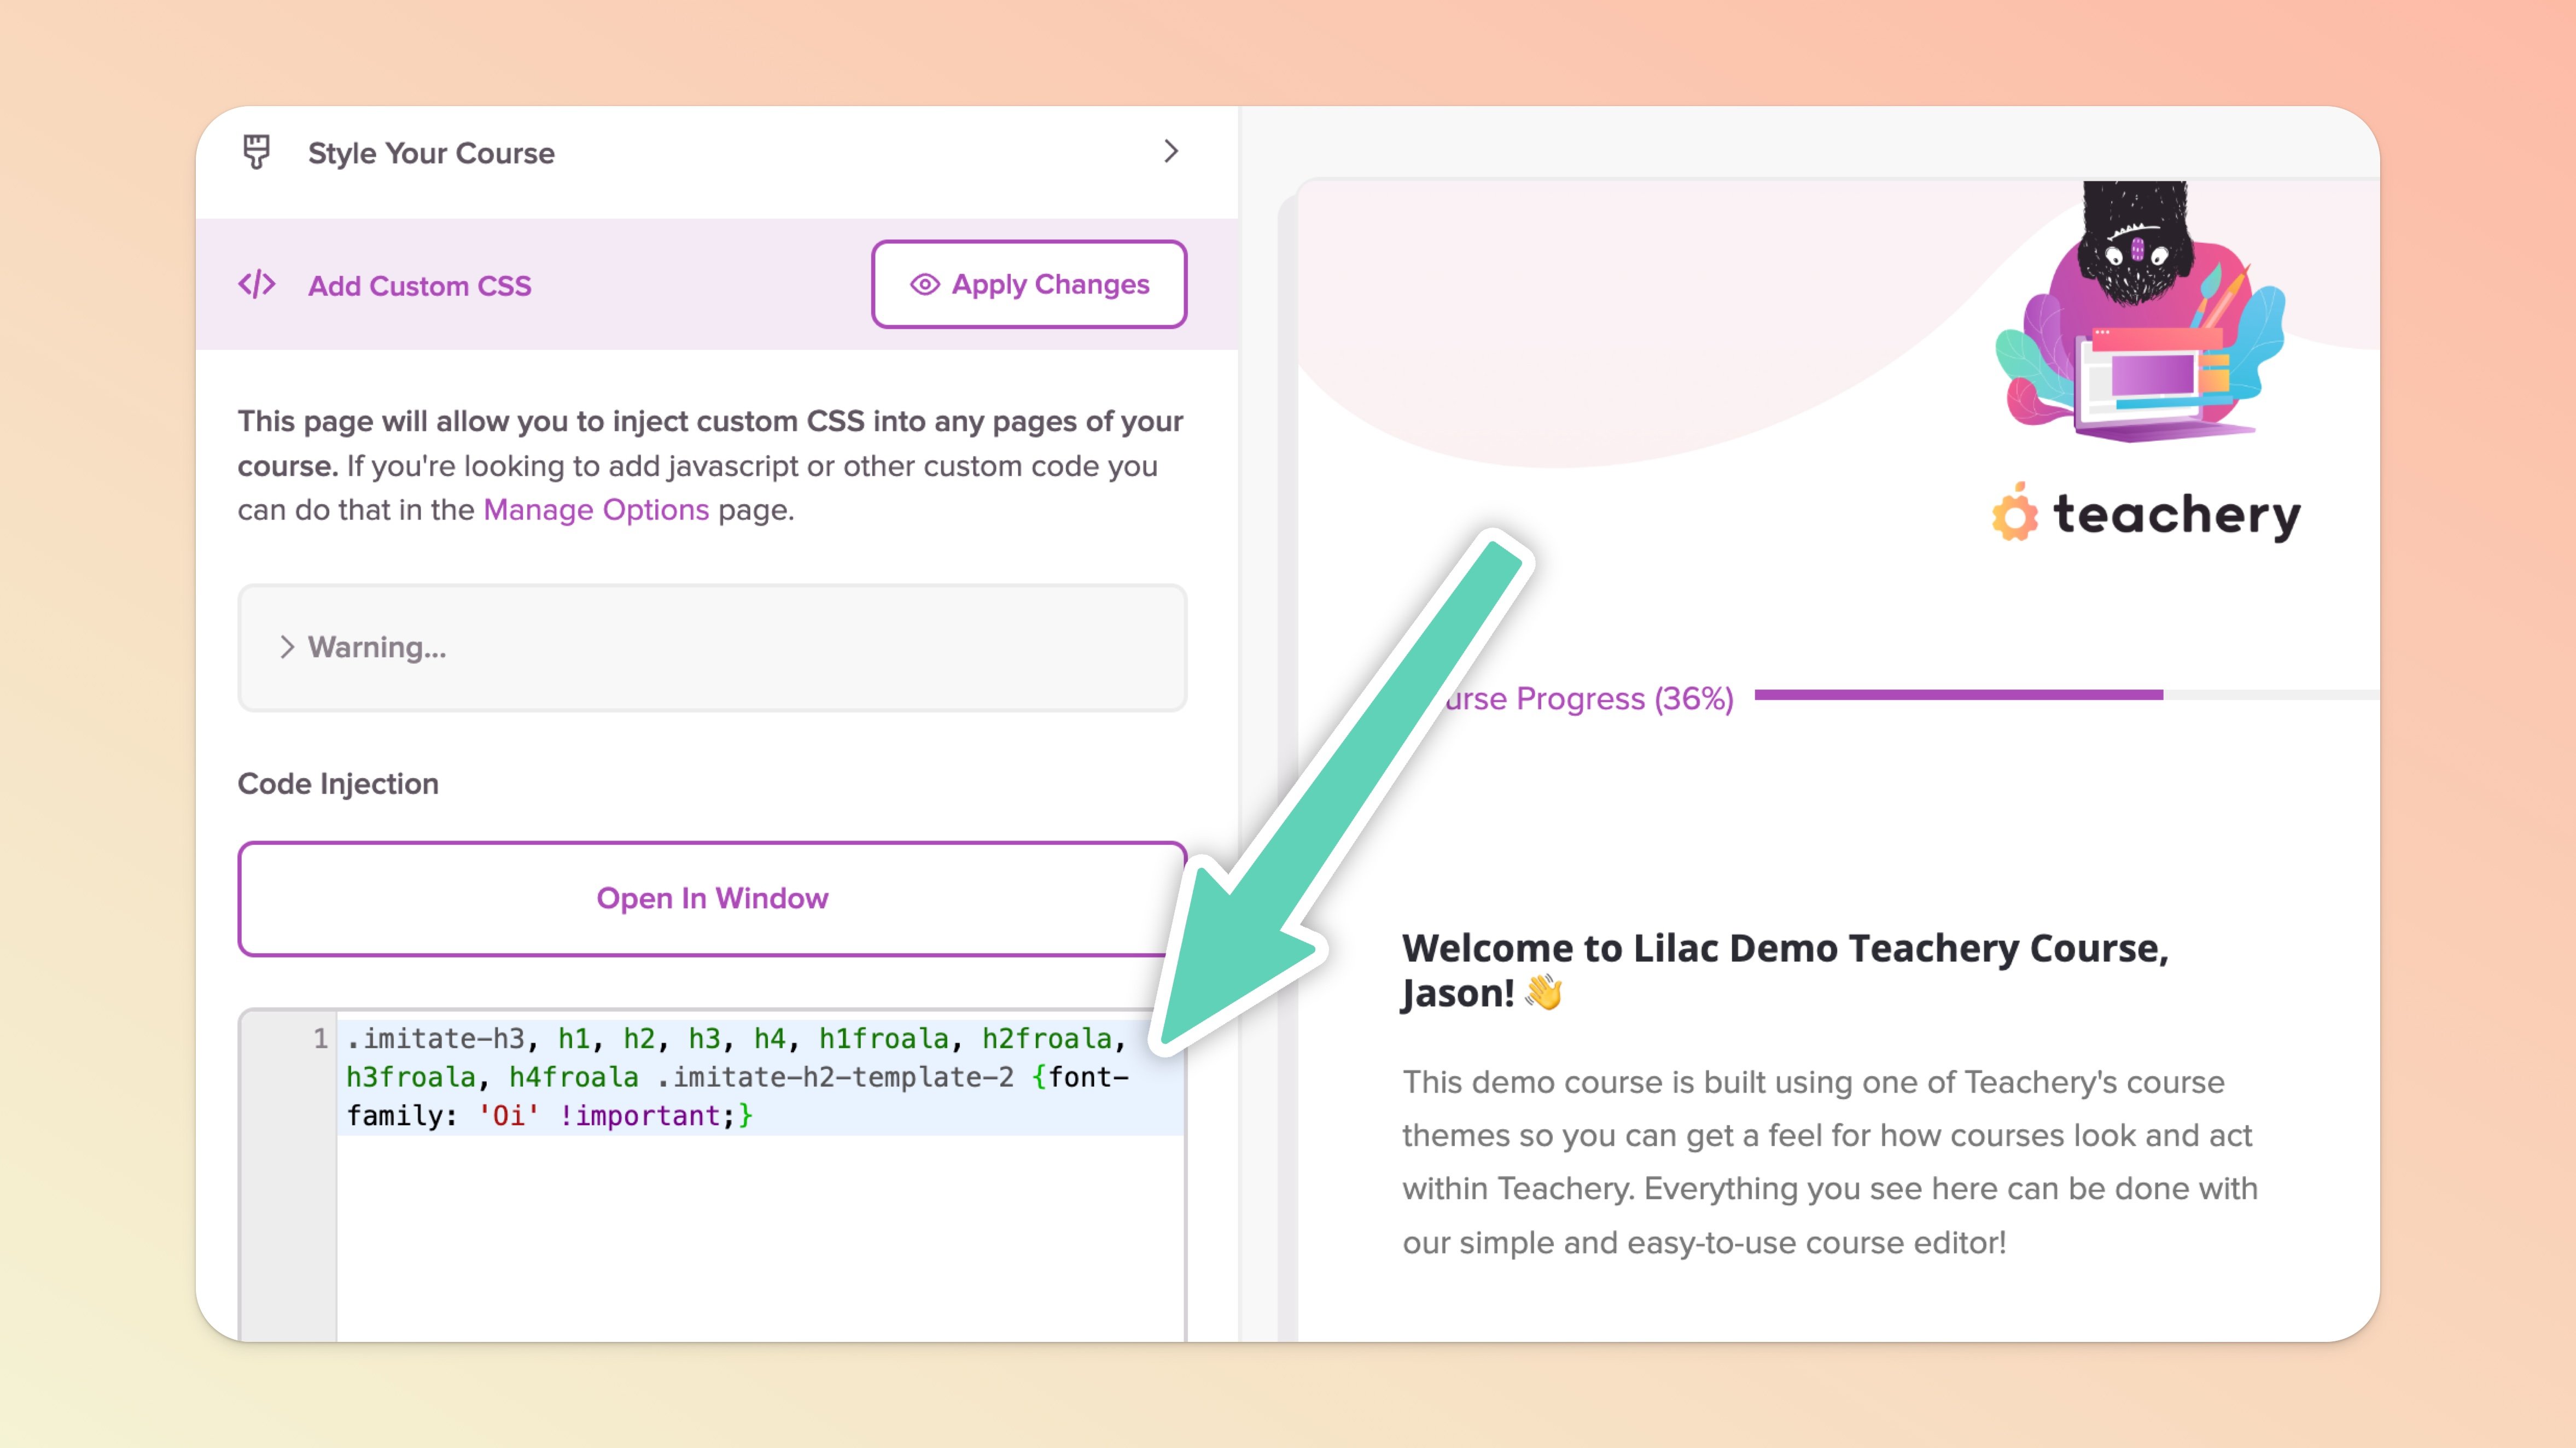
You're going to be using our simple CSS editor, which you can find in the Style Your Course section of the left sidebar editor. Once you expand the Style section click on the Add Custom CSS option. You are now in the CSS editor!
👉 For the headings (H1, H2, H3, and H4) of EITHER Teachery Course Template
If you're using the Sidebar or Default Course Template, this code will apply your Google Font to all the Headings through all pages of your course (Overview, Lessons, Landing, Payment, and Login Pages):
.imitate-h3, h1, h2, h3, h4, h1froala, h2froala, h3froala, h4froala .imitate-h2-template-2 {font-family: 'Oi' !important;}⬆️ In the code snippet above, you'll simply replace Oi with the name of your selected font. For example, if you are using the Google Font Fredoka, you'd have 'Fredoka' in your CSS instead of 'Oi'. Leave the !important part in the CSS code as that is needed to override Teachery's fonts.
Here's what your CSS should look like CSS editor:
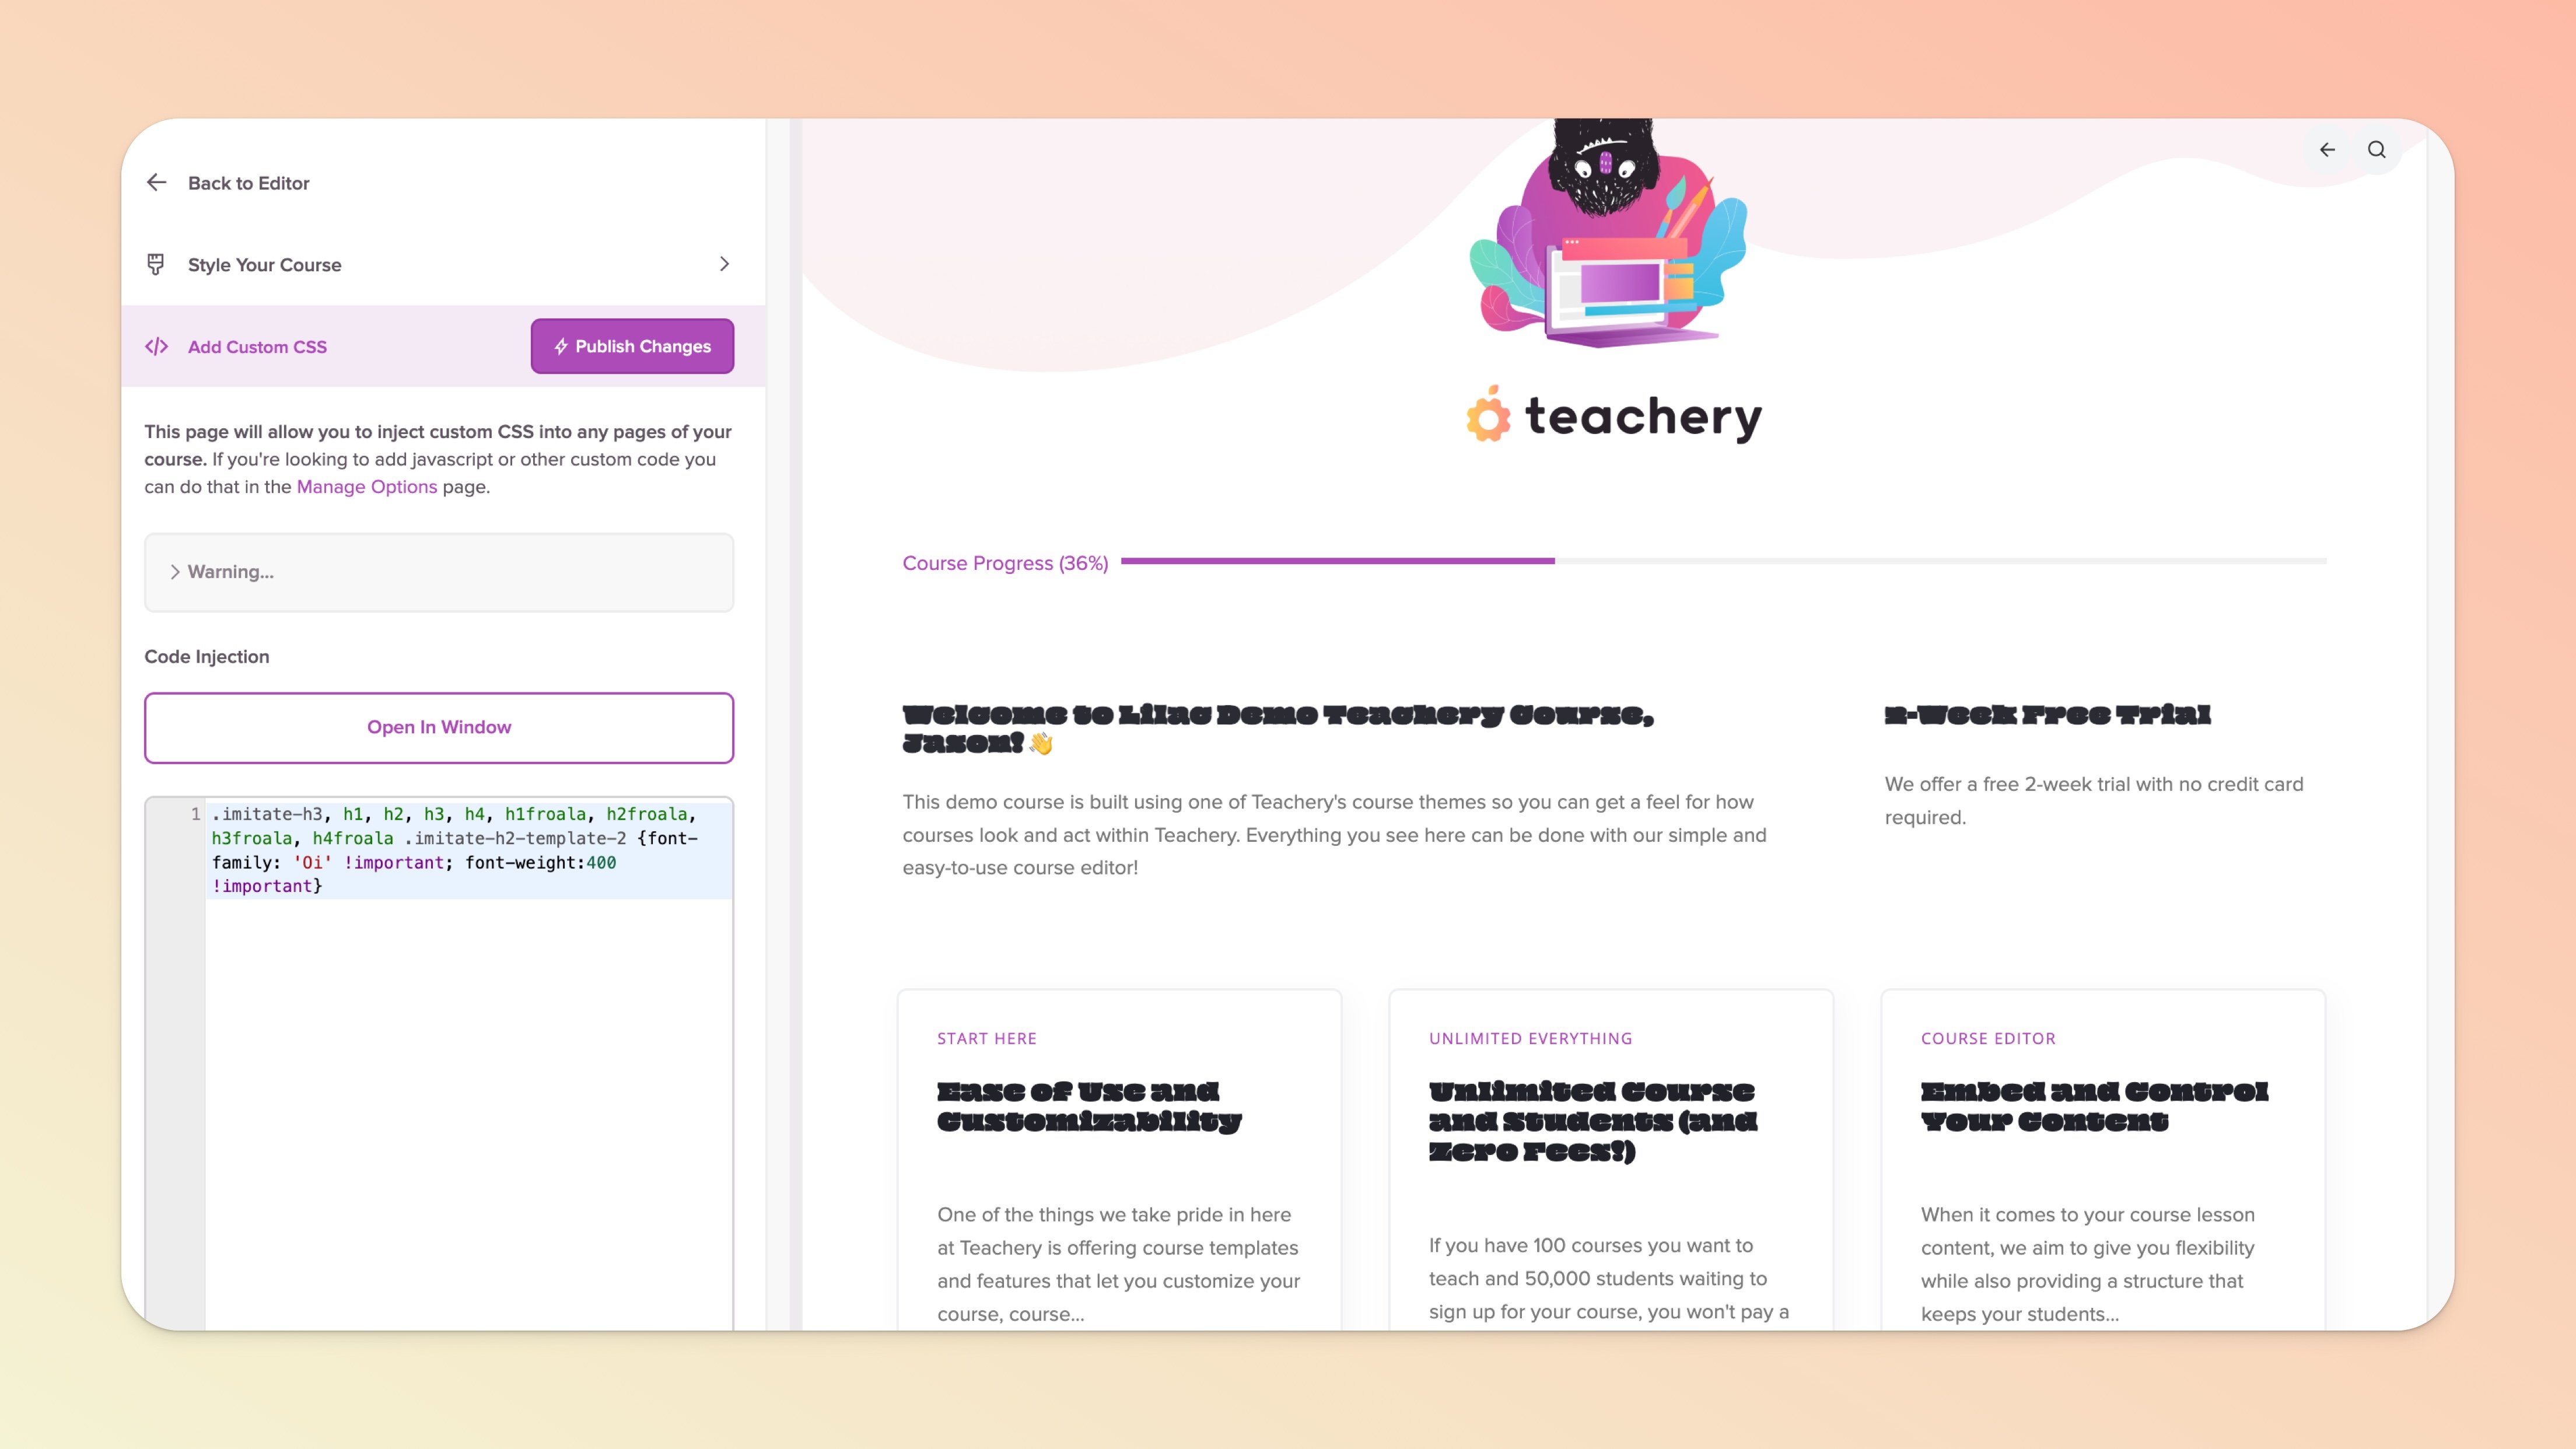
➡ Don't forget to click Apply Changes AND Publish Changes in the CSS editor!

For any OTHER areas of your course where you want to apply your Google Font, you'll need to use the browser Inspector and grab the CSS class(es) and add it to the CSS code.
Here's a video walking you through that process. In the example in the video, we walk you through adding a second Google Font for your Overview page buttons:
If you want the quick CSS to grab to update your Overview page buttons on the Default Course Template, here is that CSS (remember to change your font-family).
#lessons-page .lesson .button {font-family: 'Train One' !important;}
Hope this helps you customize your course to your liking! 👋
