Teachery is based in the USA and our default language is English. However, the way we've set up Teachery's course editor, we've tried to give you the flexibility to create your course in whatever your native language is.

The reason we don't use a language dropdown selector in our course editor like other course platforms is we've heard from users that those dropdown selectors can be VERY inaccurate.
This is why we simply give you open text areas through your course and course pages to be able to type in your language of choice.
If you want to "translate" your course or any content within your course into your language, simply type it in!
Here's an example pasting a phrase in Spanish into a text area of the Overview page in a course:
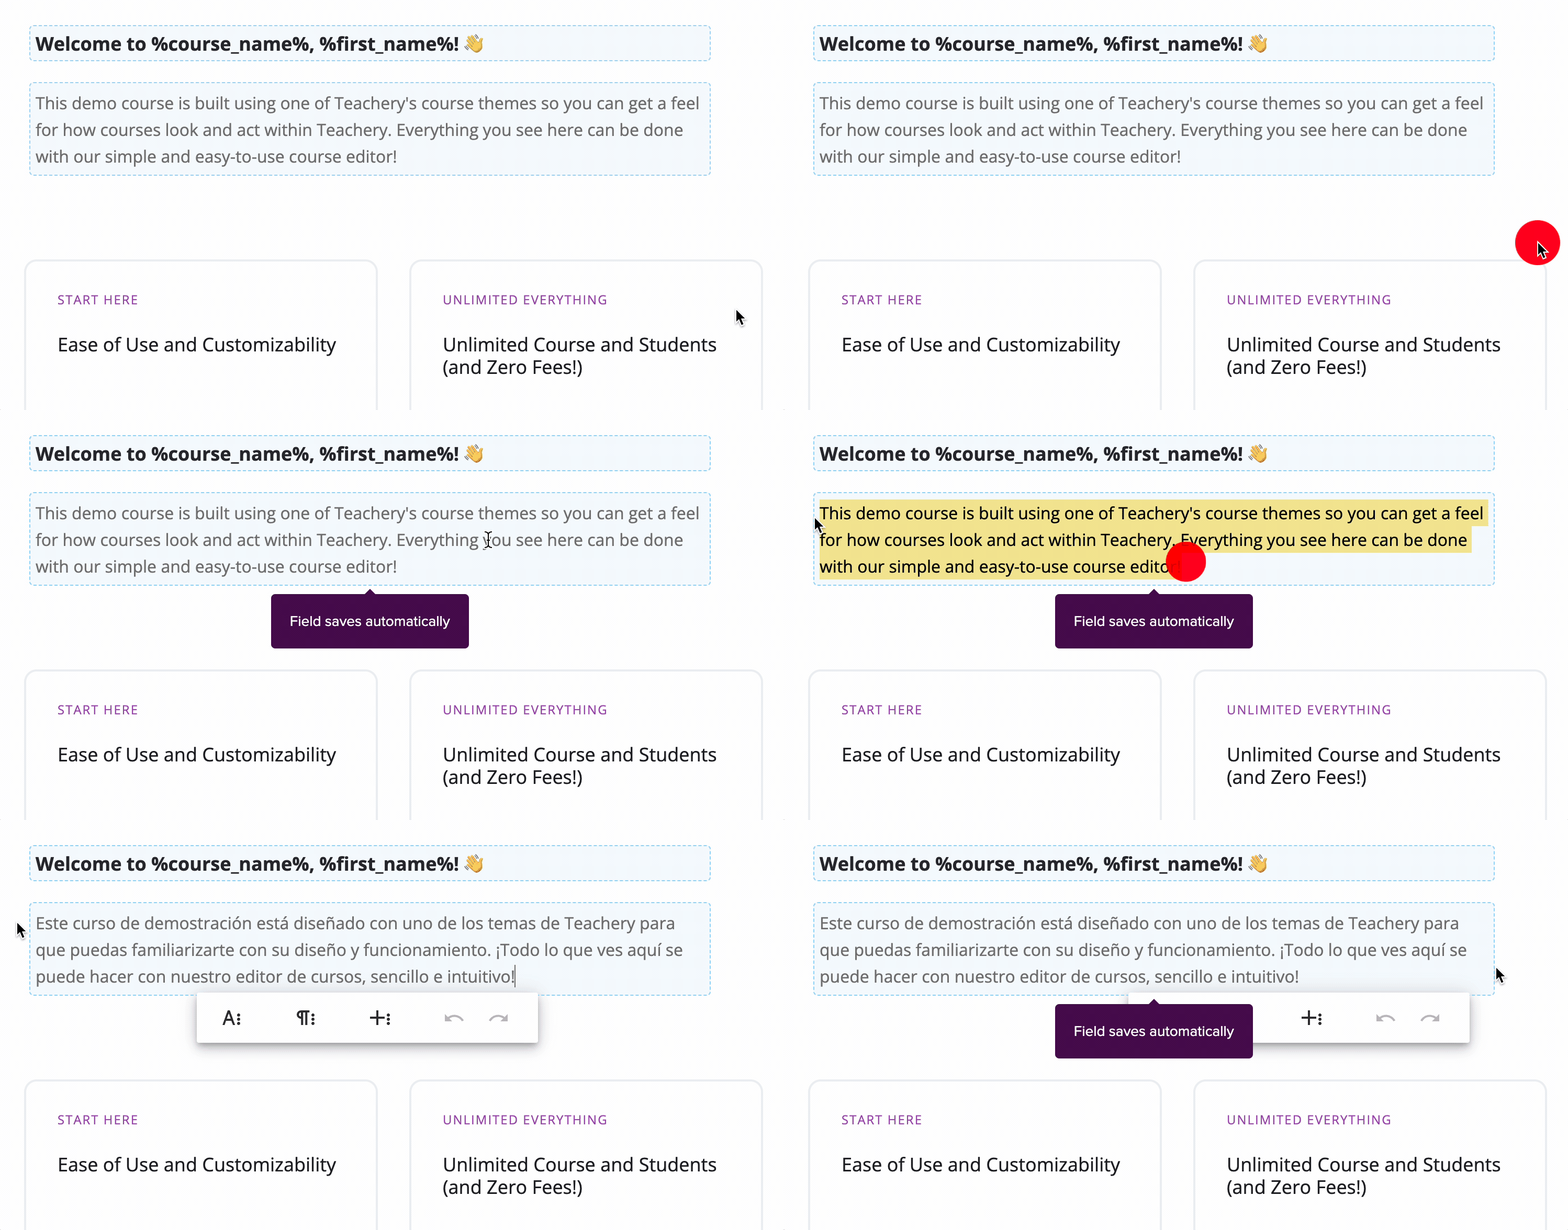
99% of Teachery can be customized in your language and we even provide additional pages that you can customize as well:
Login Page
Set Password Page
Password Reset Page
Billing Update Page
Cancel Recurring Payments Page
And more!
Note: There are a handful of alert bars and error messages that we do not allow you to customize at this time. We hope to offer these in the future but for now, they are few and far between and your customer only sees them when actions are taken (like confirming a password reset or saving an email change).
If you ARE looking for a tool you can add to your course that's 100% free and will offer your course content in multiple languages (that you choose), then G-Translate has you covered and it's very simple to set up.
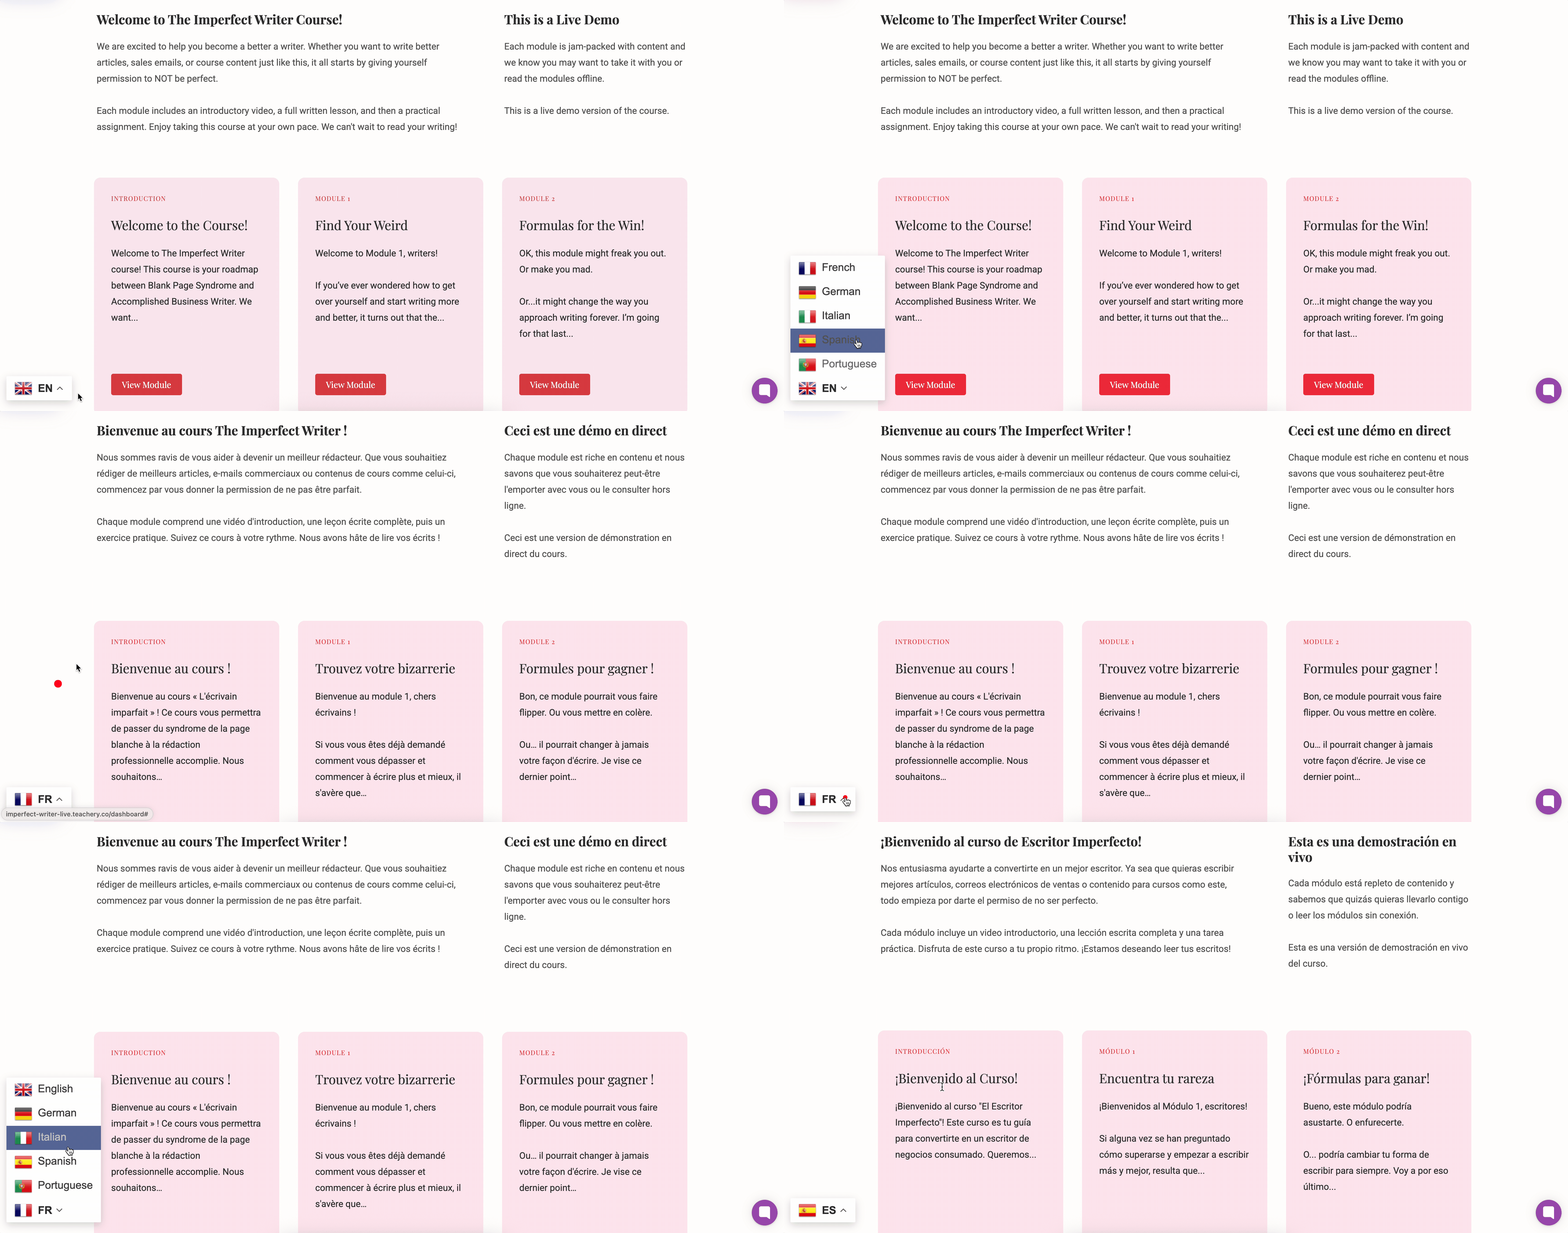
Here, you can see the widget in action switching between multiple languages:
Step #1: Go to the G-Translate Widget site and choose the languages you want added to the small pop-up. We recommend the following widget settings:
Widget Look = Float
Position = Bottom Left
Open Direction = Top
As you update settings in G-Translate, make sure to hit the "Update Preview" button to show your changes on their on-page example widget.
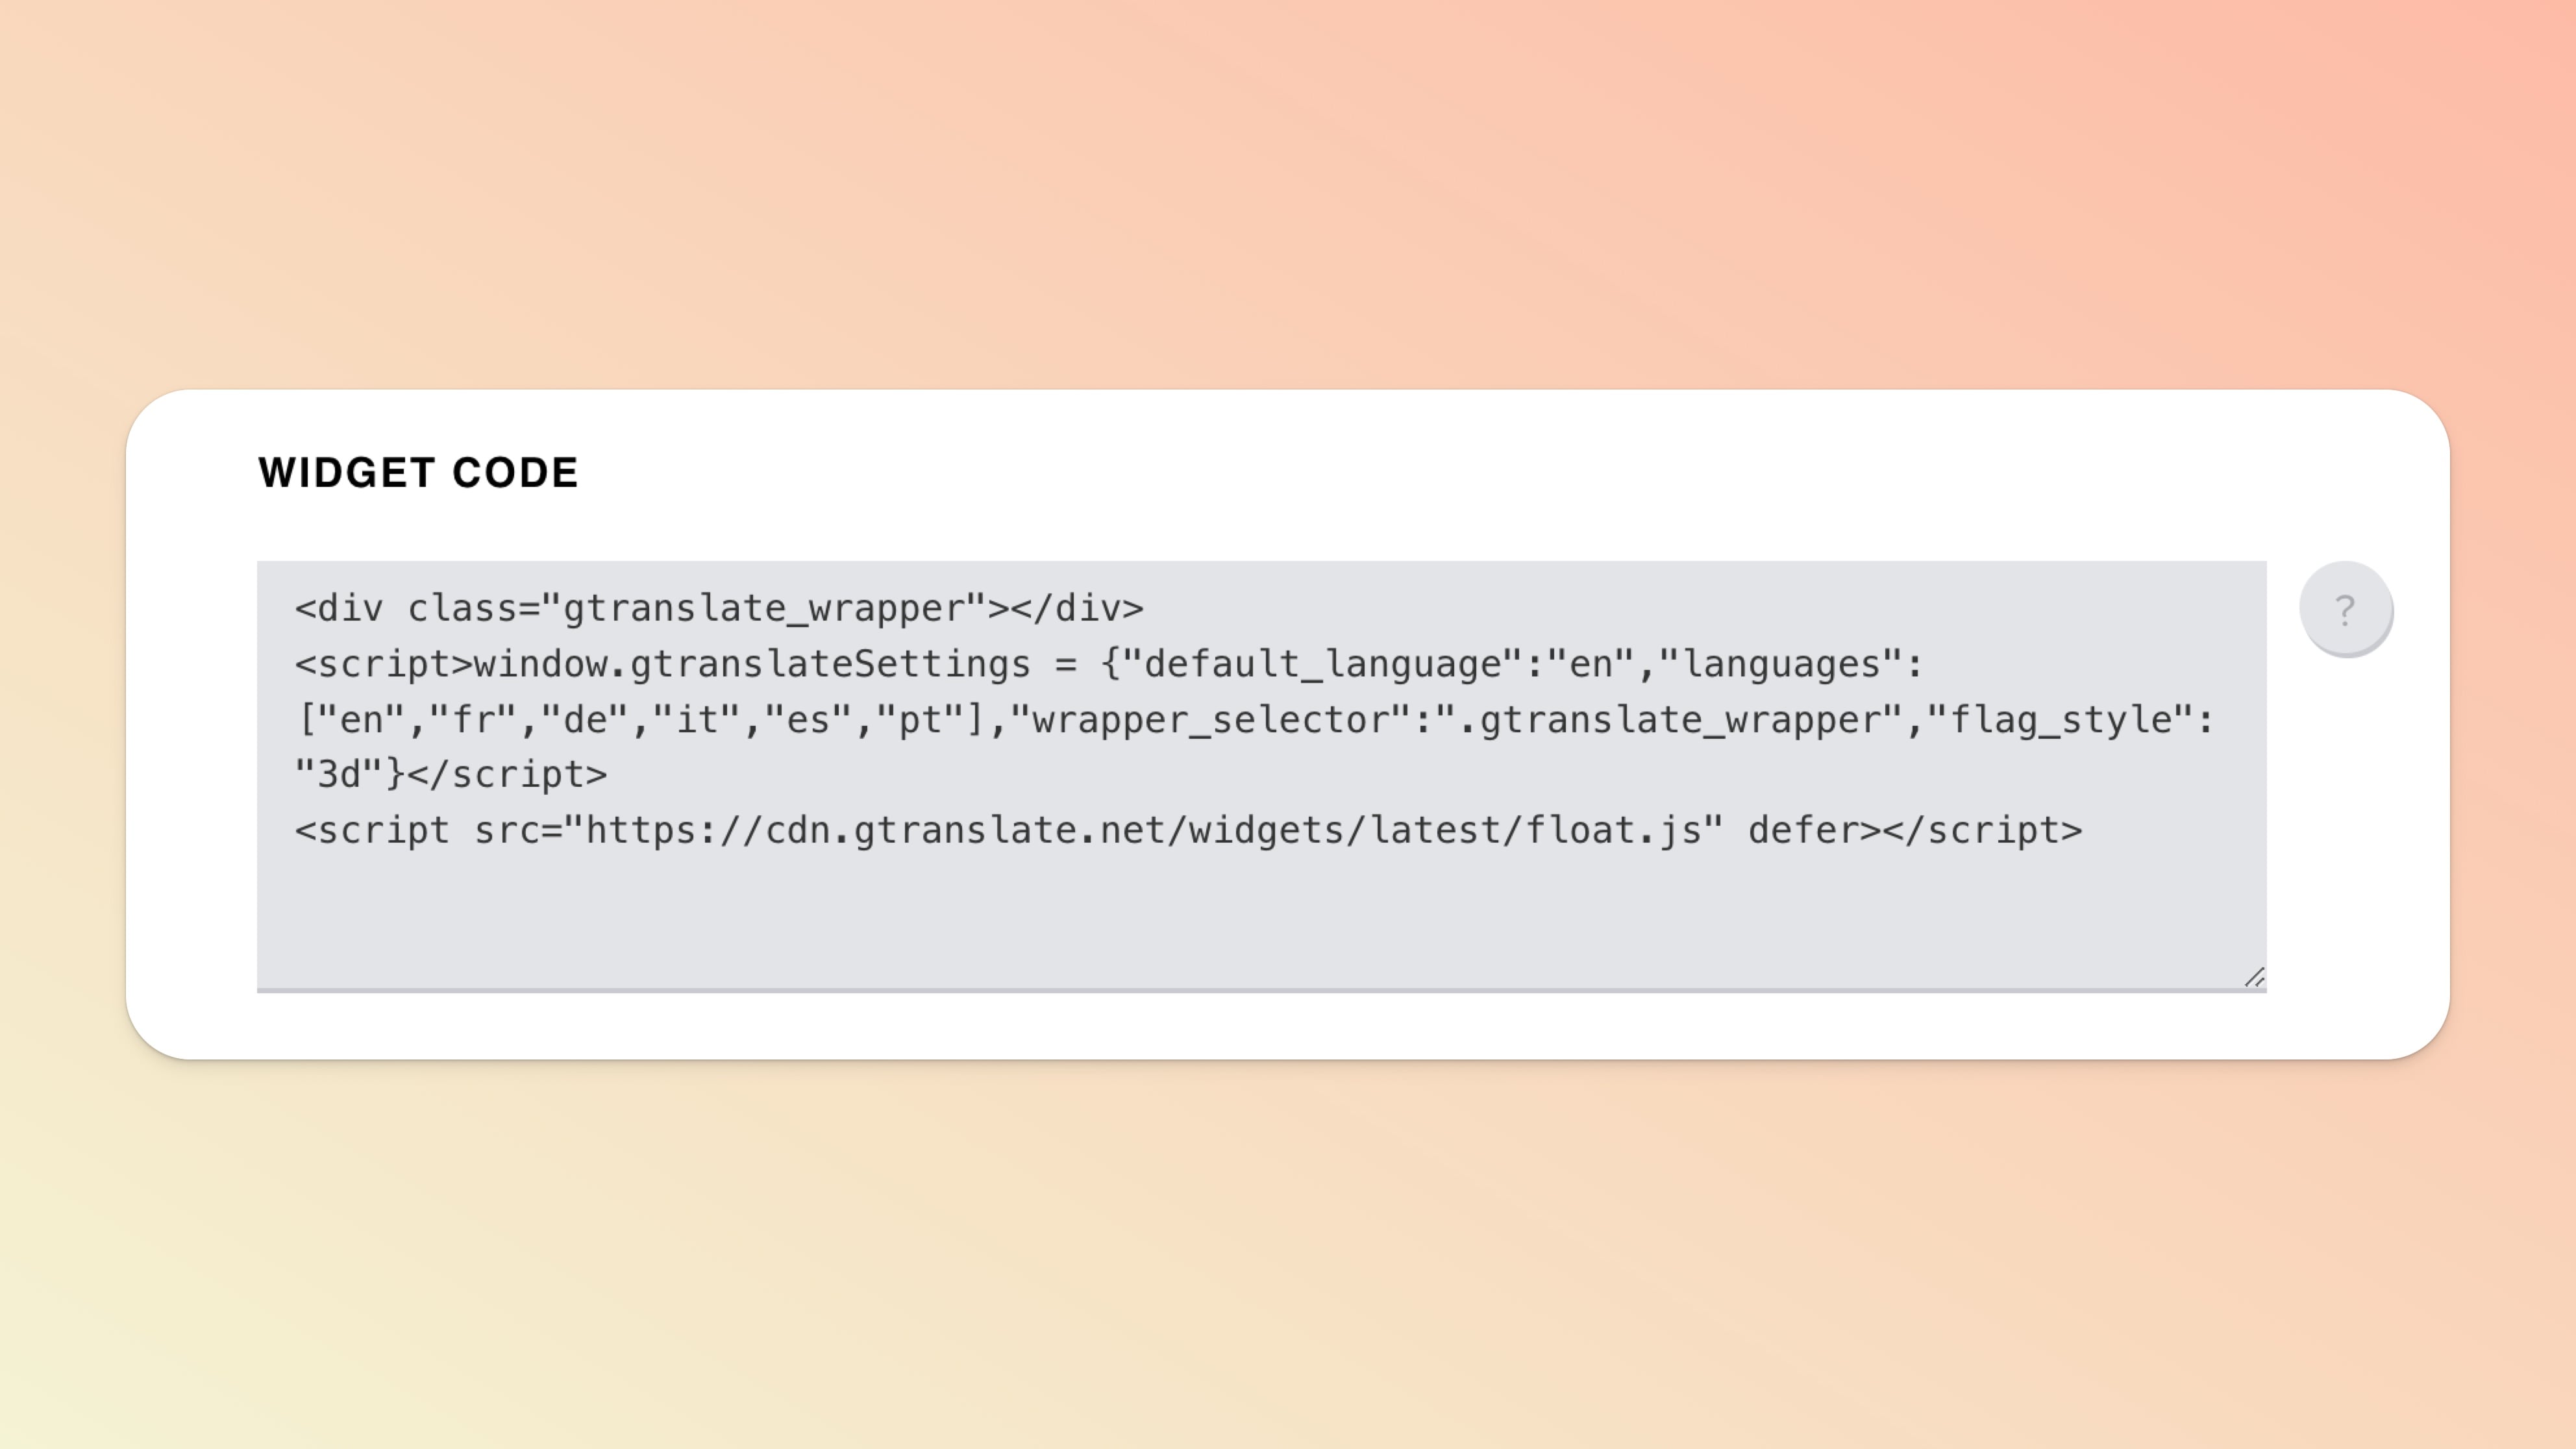
Step #2: After you've finished adding your language options and updated your widget settings, copy the widget code which will look like this:
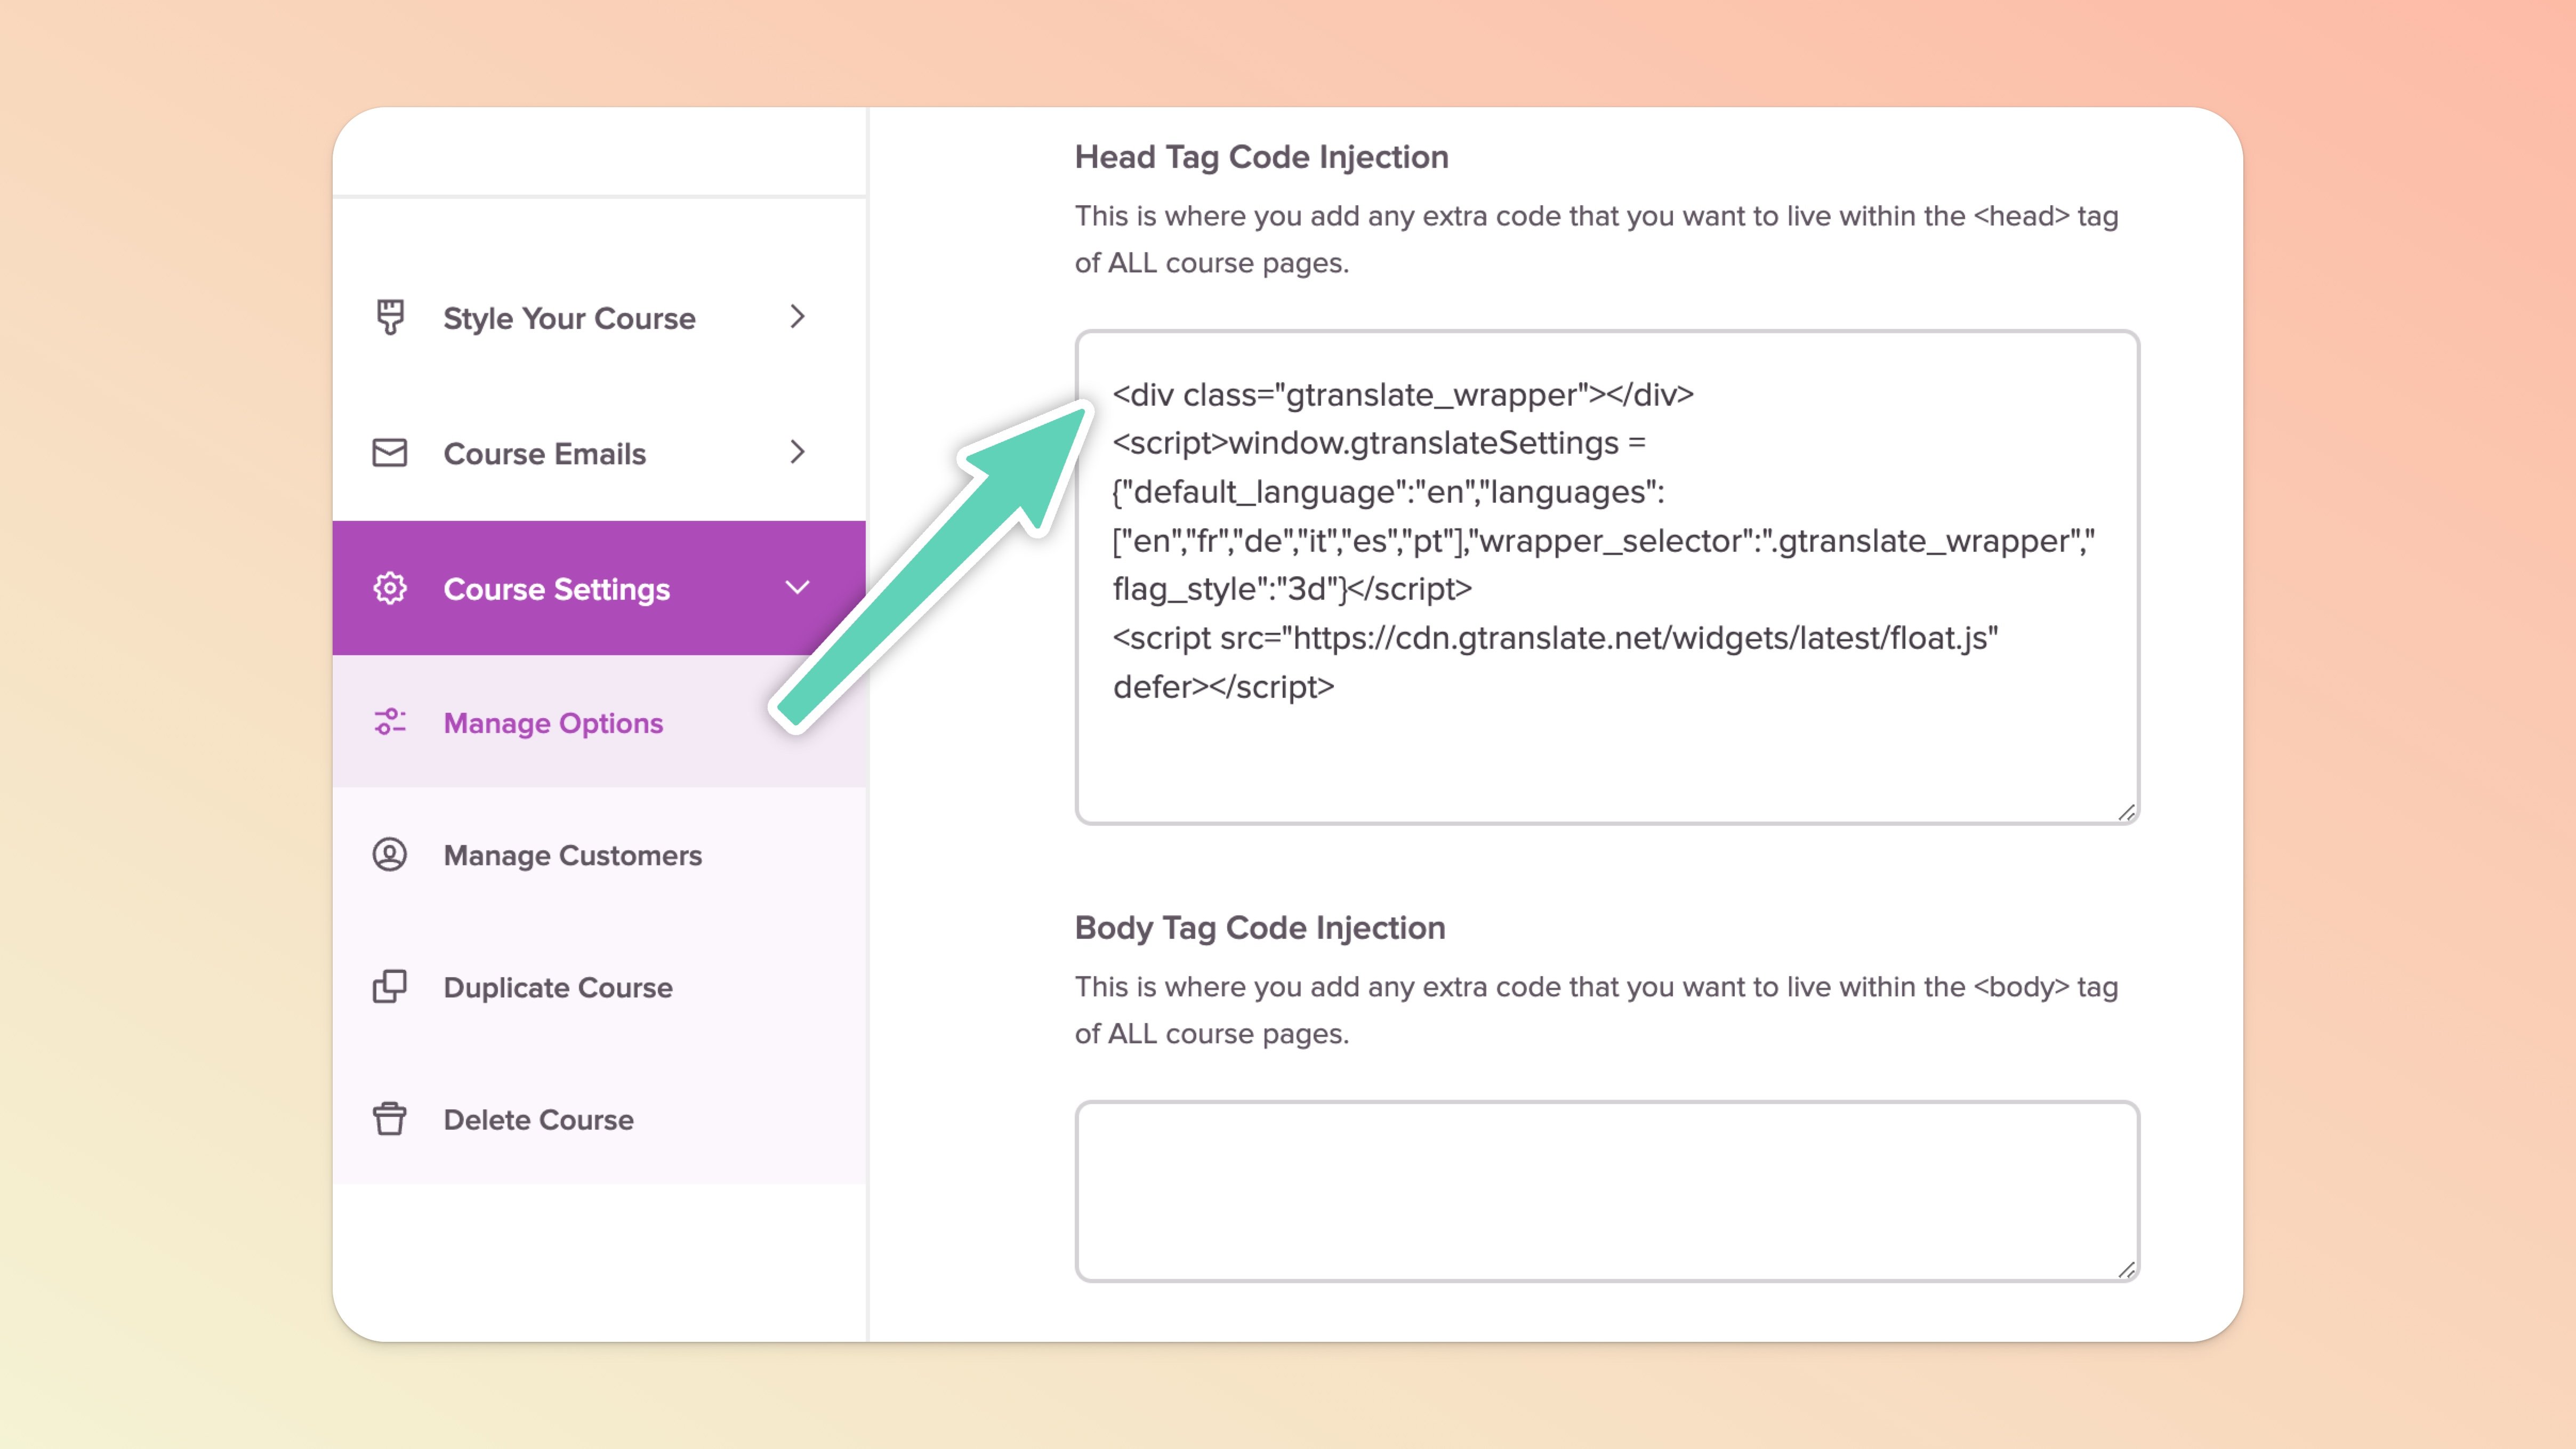
Step #3: Navigate to the Teachery course editor, then go to:
Course Settings in the left sidebar »
Manage Options »
Scroll down to the Head Tag Code Injection area »
Paste in the G-Translate widget code »
Scroll down and click Save Options.
Step #4: Preview your course! 😍 You'll now see G-Translate's widget on ALL pages of your course (you cannot exclude it from pages). You're all set and your course content can be translated into as many languages as you add to G-Translate 👍.